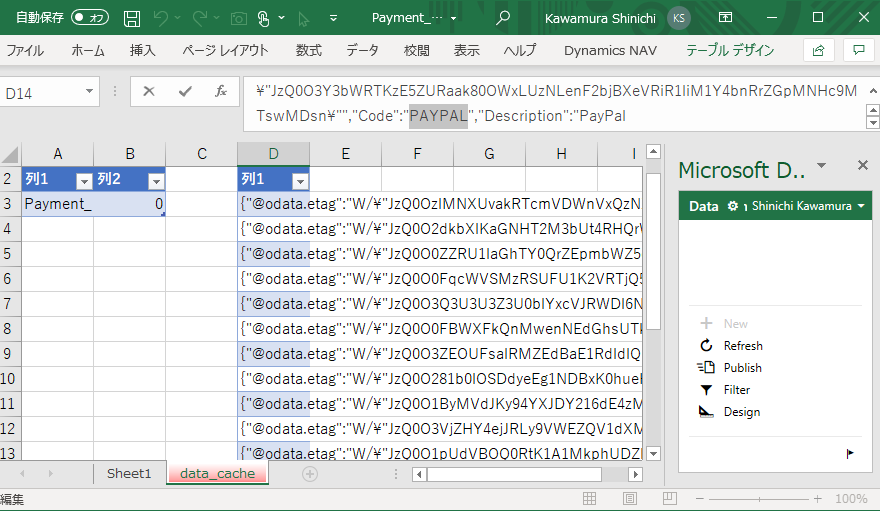
In this article, I will show you the backend process of Edit in Excel in D365BC. In the previous article, I showed you how to update multiple tables using Edit in Excel feature. And in this article, I will explain what happens behind the scenes when you click Edit in Excel button .
There are two points
1.Edit in Excel book has a hidden sheet that controls data updates.
2.Edit in Excel adds a Web Service item when downloading Excel.
Let’s look at them.
1. Edit in Excel book has a hidden sheet that controls data updates.
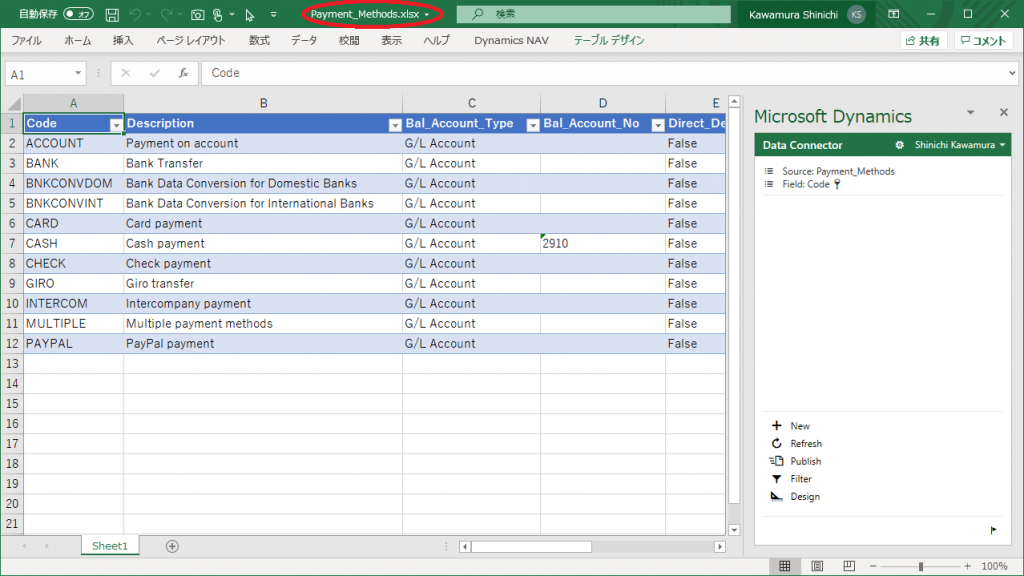
First, open the Payment Method book that was downloaded previous article. This is the book before being enabled multi-table updates. Press ALT+F11 with this book open.
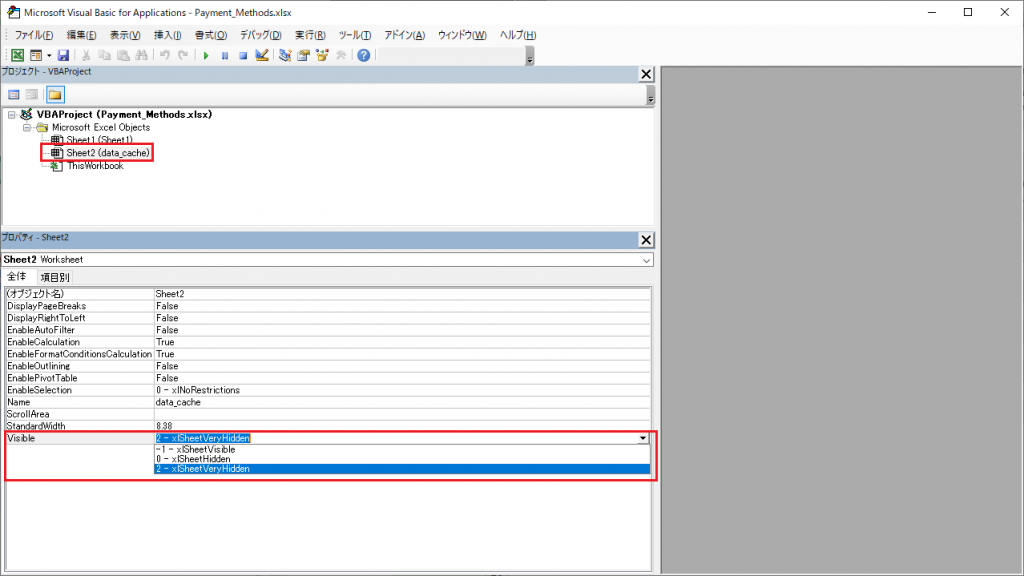
Then the VB editor will open. Click on Sheet2(data_cashe) and look at the Visible attribute in the lower left pane, it is “2-xSheetVeryHidden”. This value means that the sheet is not visible, so change it to “-1 -xSheetVisible”.
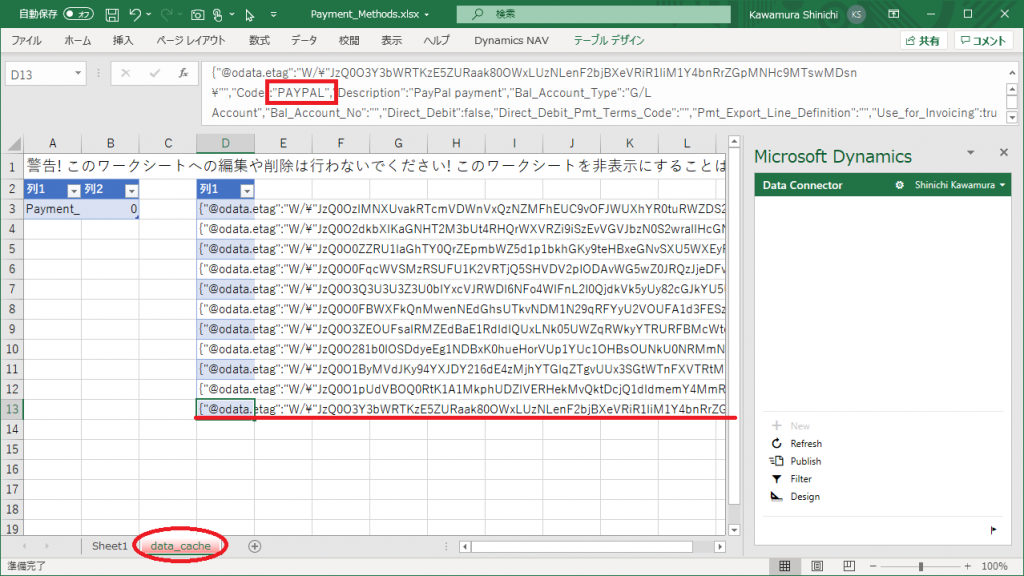
Go back to Excel book, ‘data_cashe’ sheet is visible, and the values in column D shows that it contains the code for Payment Method. When I click the publish button, the connector function writes the data from Sheet1 to the ‘data_cashe’ sheet, and then the connector function posts the data to BC one by one. So, there is a warning in cell A1 not to break this sheet. (Sorry in Japanese. This sentence in A1 should be translated “Warning, don’t remove nor edit this sheet”)
How about the book that is able to update multiple tables I created in previous article?
In the same way, let the ‘data_cashe’ sheet visible. The first six records in column D are Customer records.
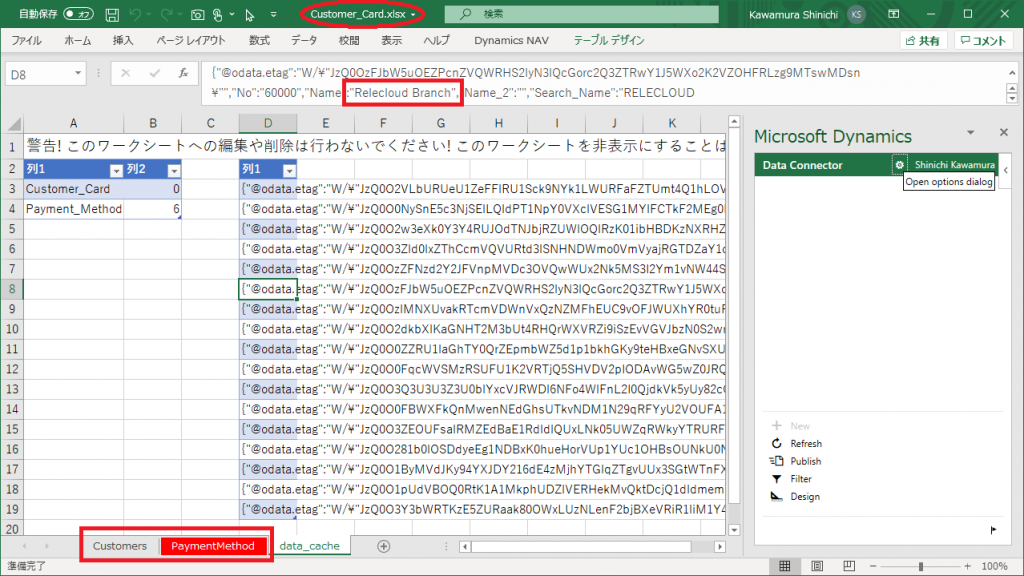
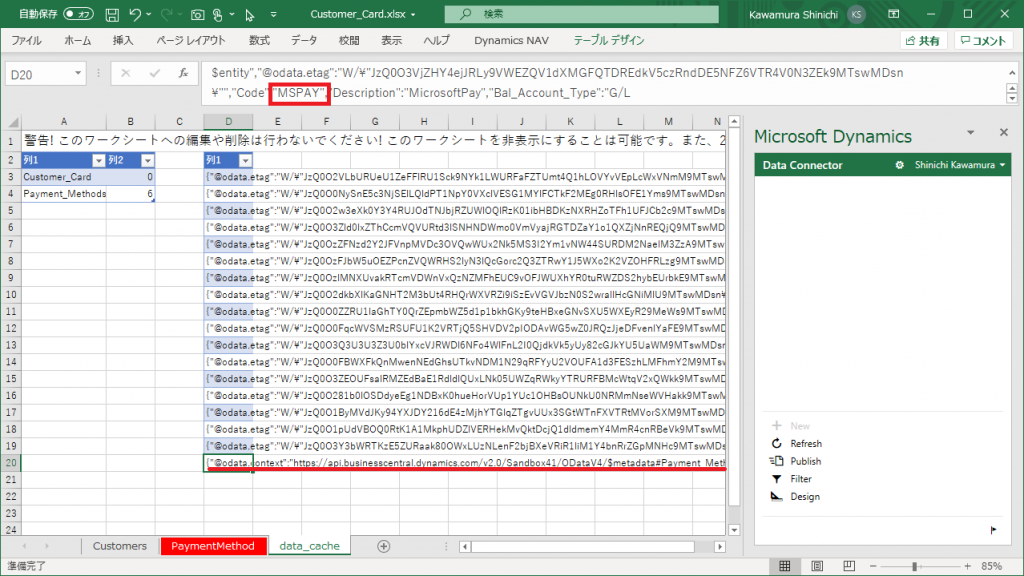
And we can see that the 7th and below item are Payment Method. Column A shows the table name, and column B shows the index of first item of each table. It’s a little confusing because it starts from zero, Customer starts from 0 rows below D3 cell (i.e., D3 cell), and Payment Method starts from 6 rows below D3 cell (i.e., D9 cell).
2. Edit in Excel adds a Web Service item when downloading Excel.
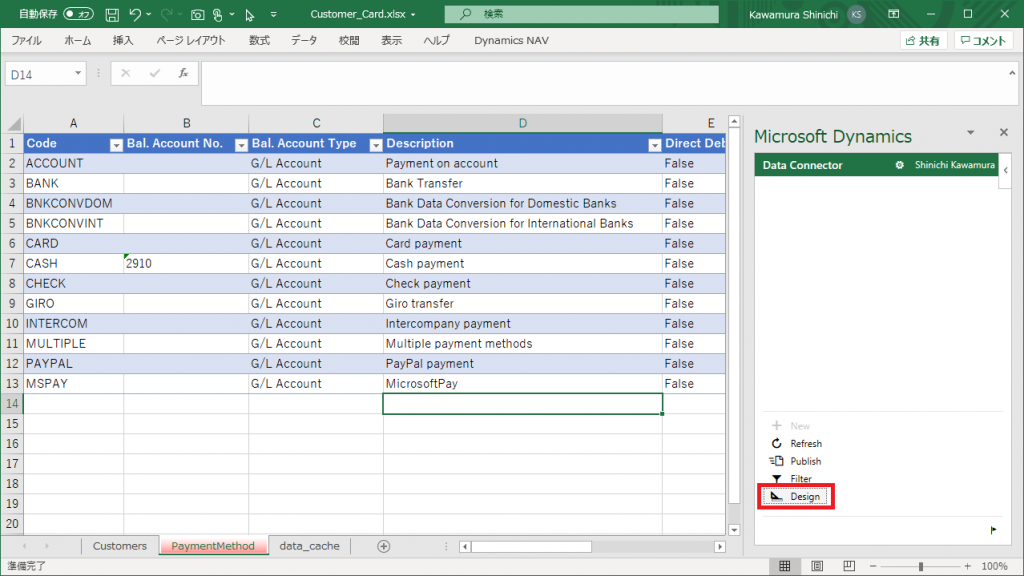
Next, press the Design button. Using design feature, tables can added, and I will show how the table options are added.
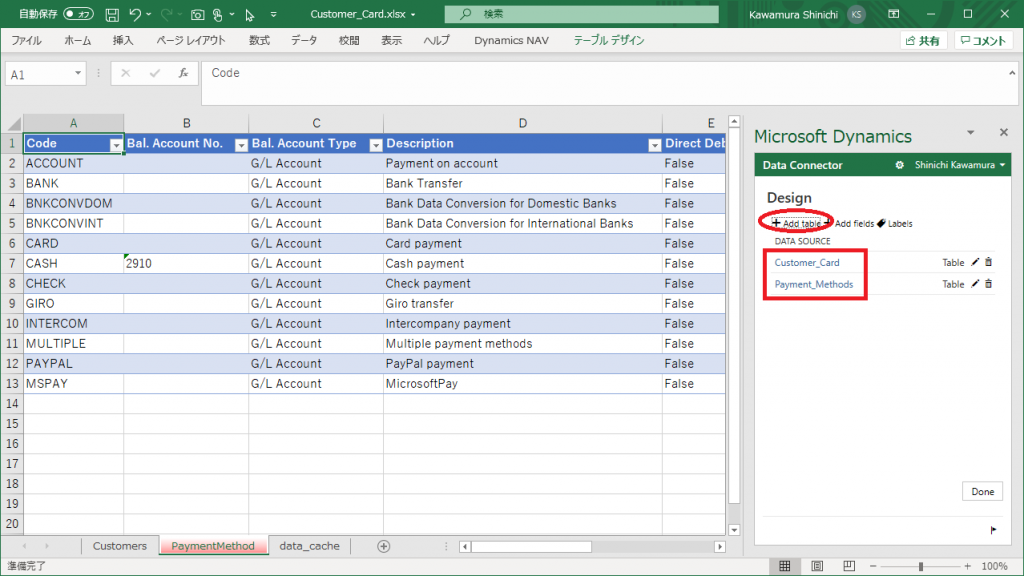
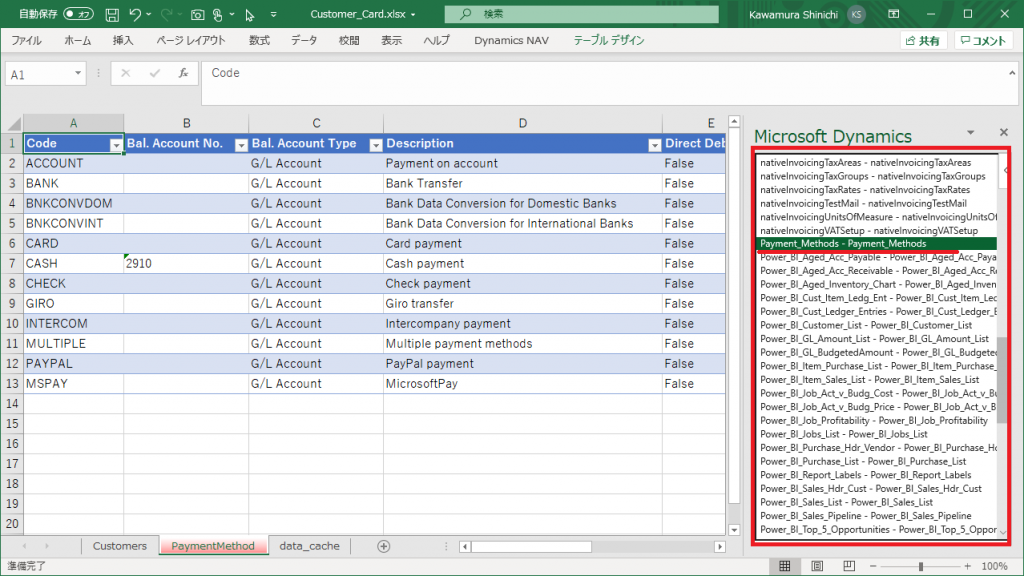
This book has already added the Payment Method and Customer tables, so two tables have been added to the data source. Now click on “+Add table”.
The list of tables that can be added is now displayed. The Payment Method we added last time is shown here. Of course, Customer is also listed here. I have a question, where is this list defined? By the way, remember that the table Payment Terms is NOT here as an option. (I’ll explain later.)
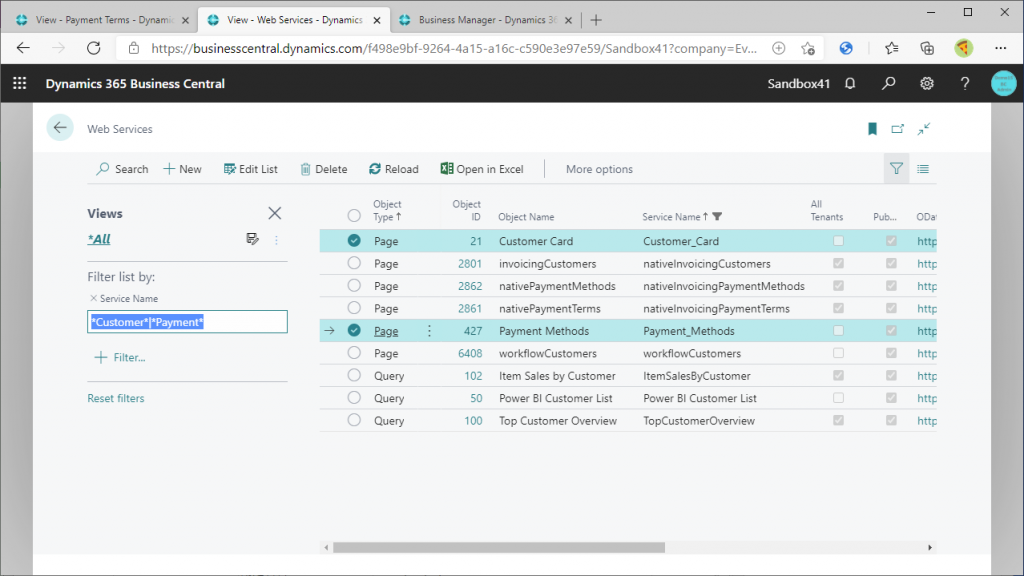
If you go back to BC and look at the WebServcie, Customer and Payment Method are exist. The answer of question is WebService.
Would you believe the answer? There are only about 100 of items in the WebService list, while Edit in Excel feature can be done on most of the list pages much more than 100. The rest of the list pages might not exist in the WebService list, so we might be able to execute Edit in Excel without WebService item. That’s the question that comes to mind.
(By the way, please keep in mind that there are no Payment Terms in web service list either.
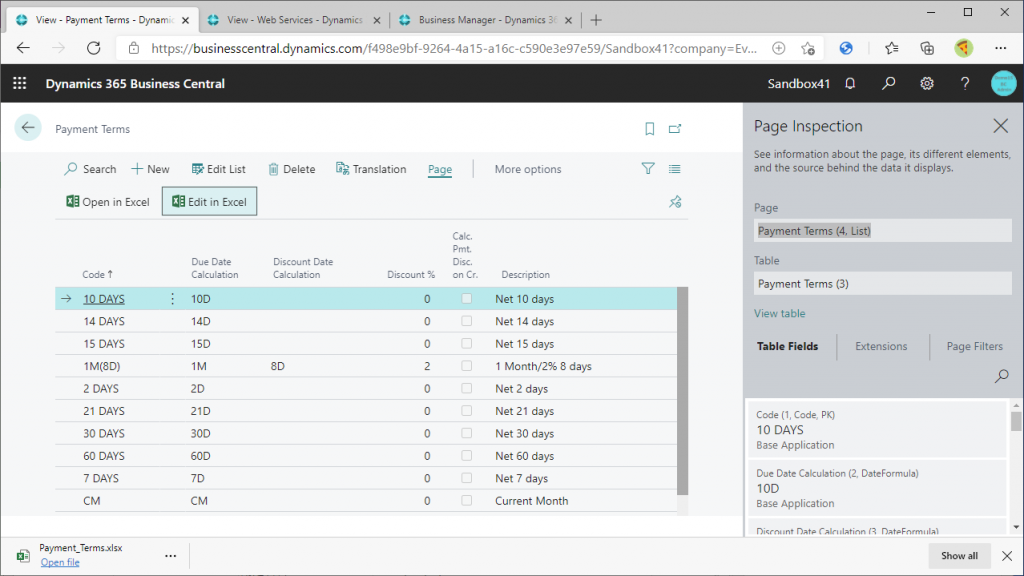
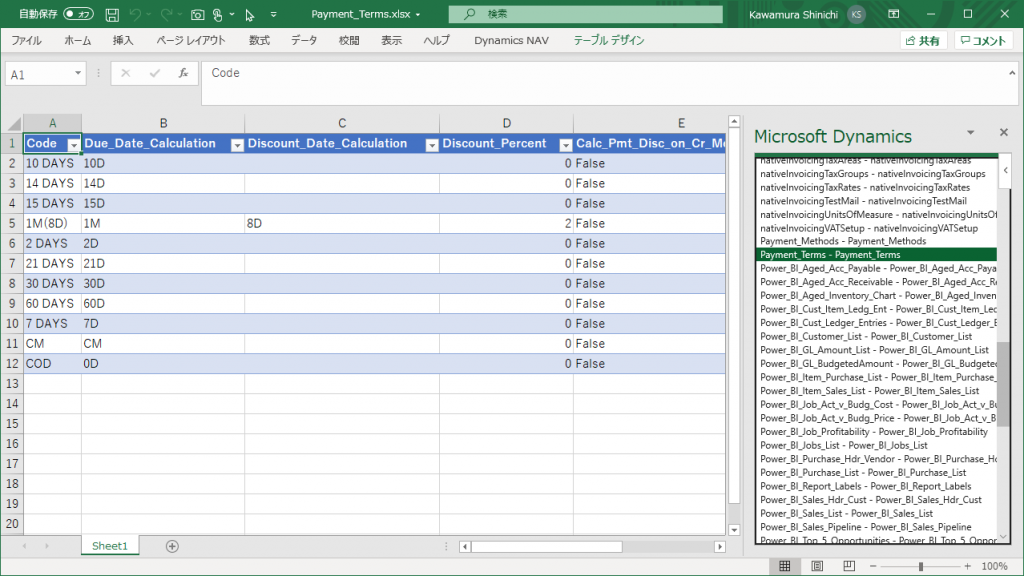
The answer to this question is, as written in the heading, “The WebServcie item of the target table will be added when Edit in Excel is executed. Let’s see how this works with the Payment Terms table. First, I will display the Payment Terms list page. Use the Page Inspection function (Ctrl+Alt+F1) to check the code number of this list page, and you will see that it is Page code number 4. Then click on the Edit in Excel button.
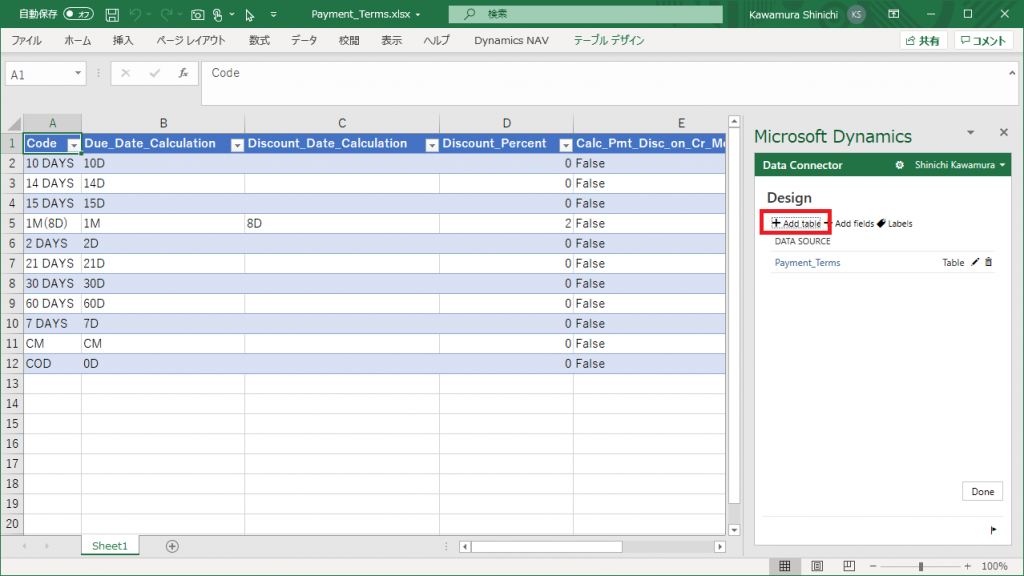
Open the downloaded Payment Terms Excel book. Click the ‘+Add Table’ button in Design mode.
Then Payment Terms will appear as an option. At a glance, it seems obvious, but it didn’t appear here before we execute Edit in Excel for Payment Terms. (See the image four above.) In other words, the option ‘Payment Terms’ was added here by executing Edit in Excel.
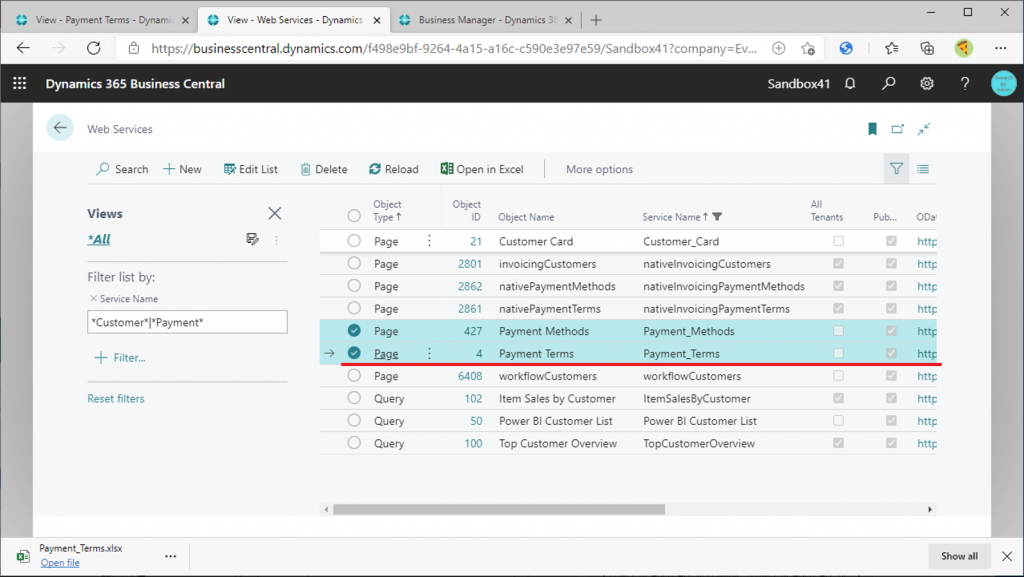
Now look at the BC WebService and you will see that Payment Terms has been added. In other words, the payment terms have been added to the WebService by executing Edit in Excel.
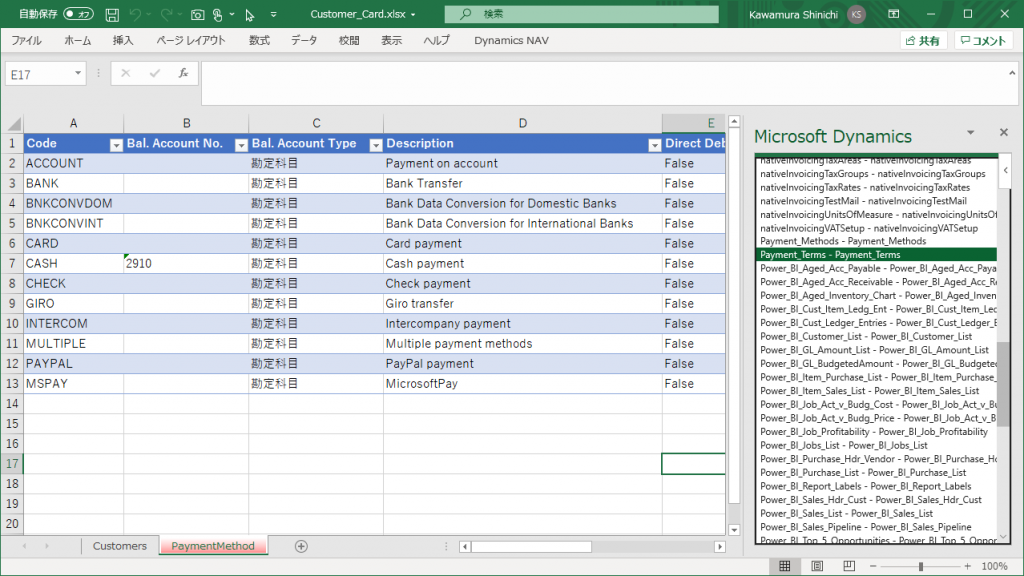
Let’s look at this from different angle. Go back to the Customer and Payment Method Excel created in previous article. Since it is still open , close it without saving and reopen it . Then, use the Design button to add a table, and you will see that it has been added to the list. In other words, the list of tables is not saved in Excel, but is retrieved by the connector from BC’s WebService each time a book is opened.
If you delete the Payment Terms item in the WebService list and then open the book again, it will not appear in this list. Please try it.
If you want to edit multiple tables from one Excel, it’s better to add Web Service items for the target tables first before you use design mode for adding table.

