
DataverseとD365BCを連携された状態で、Dataverseのテーブルレコードの変更を素早く検知してBCに反映させる仕組みが追加されたので試してみます。
元ネタは以下です。2022 Release Wave 2のリリースノートです。
・英語版: Use a Power Automate flow to notify Business Central of Dataverse entity changes
・日本語版: Power Automate フローを使用して Dataverse エンティティの変更を Business Central に通知する
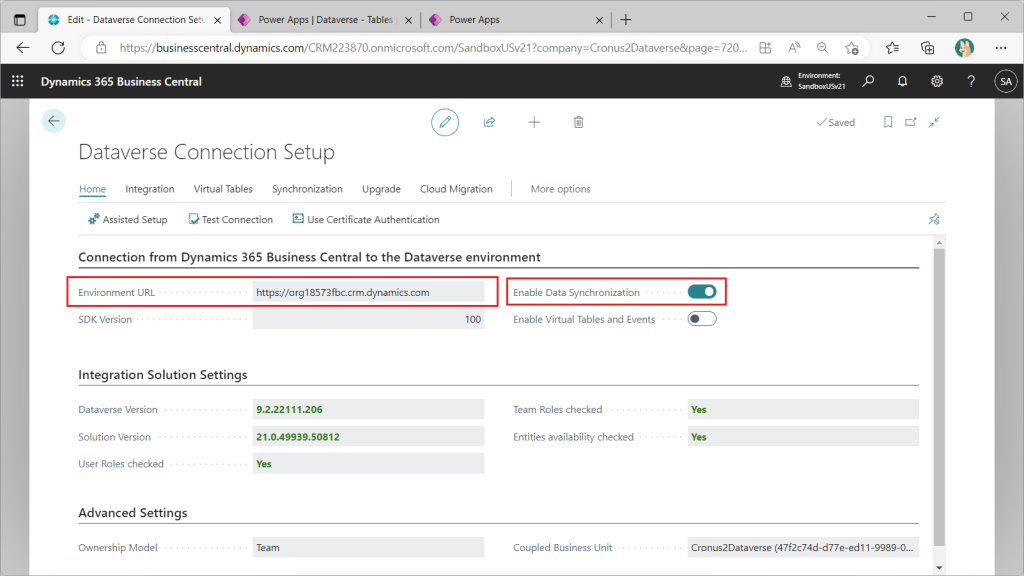
前提として、B365BCでDataverseの連携を設定しておく必要があります。設定自体は以下の画面の左上の”Assisted Setup”の画面から実行できますが今回は省略します。DataverseとBCの接続は”Data Synchronization”方式と”Virtual Table”の2方式をこの画面で指定できますが、必要なのは”Data Synchronization”方式です。
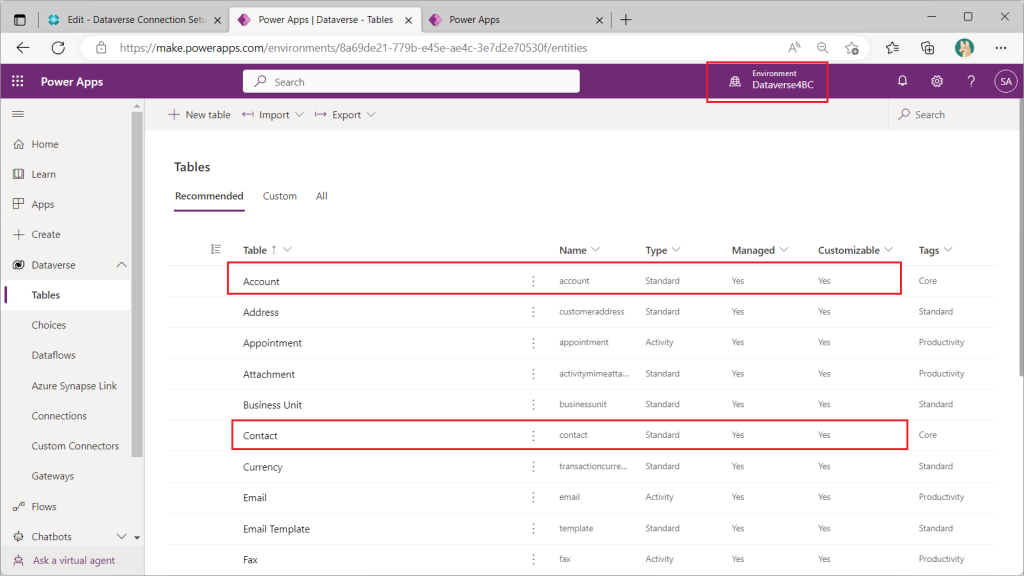
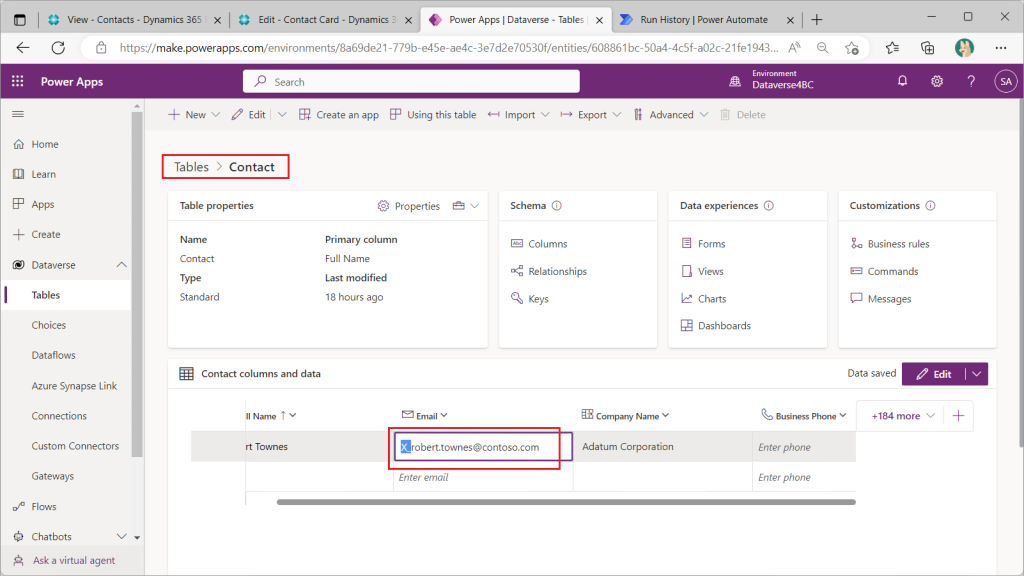
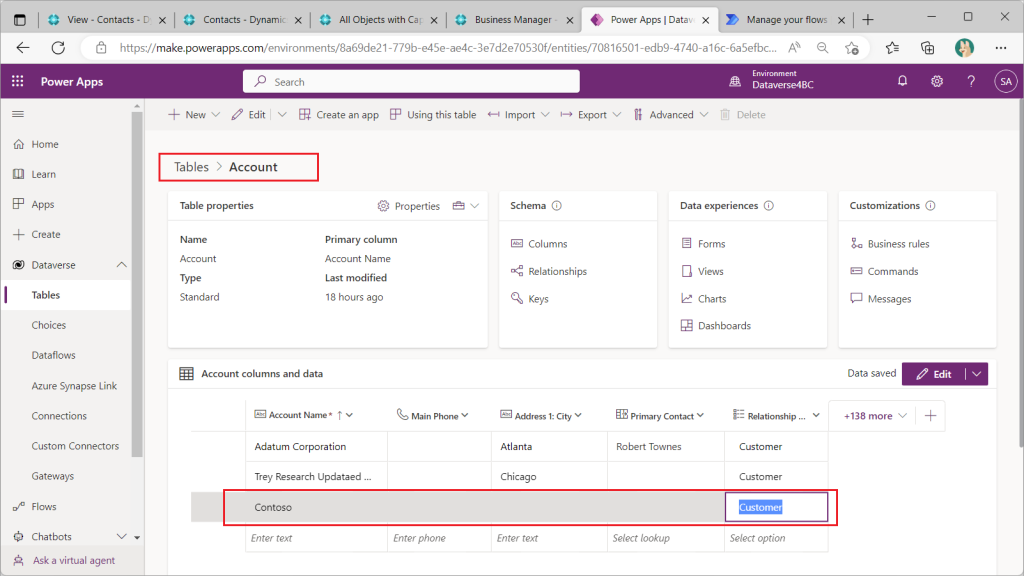
Dataverse側の環境は上述のDataverse Connection Setupの設定前に用意しておきます。今回、実験で使用するのはAccountテーブルとContactテーブルです。
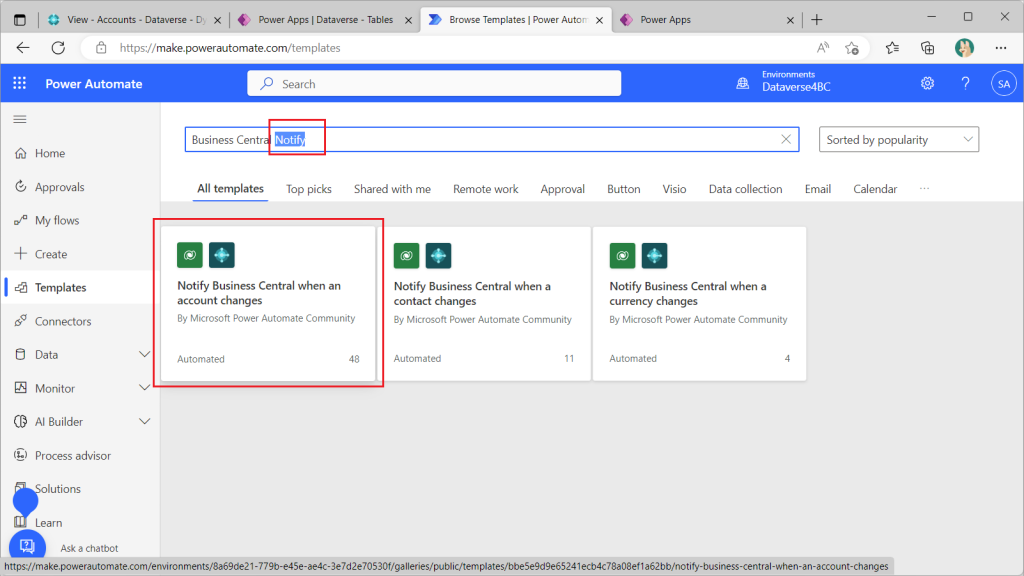
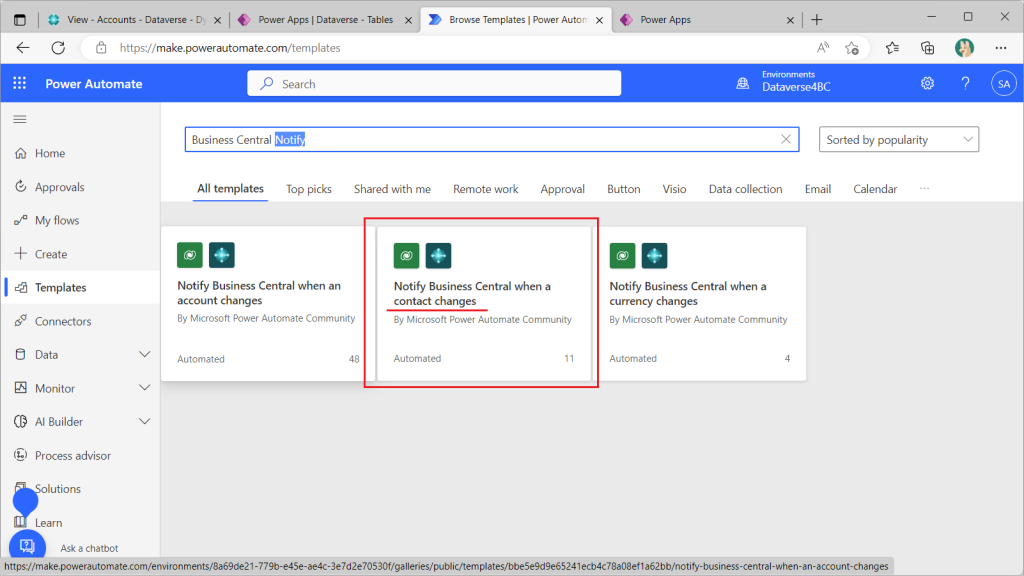
Dataverseのレコード変更をBCに通知するにはPower Automateを使用します。上述のDataverse環境でPower Automateのテンプレートから”Business Central”というキーワードで検索するといろいろと出てきます。
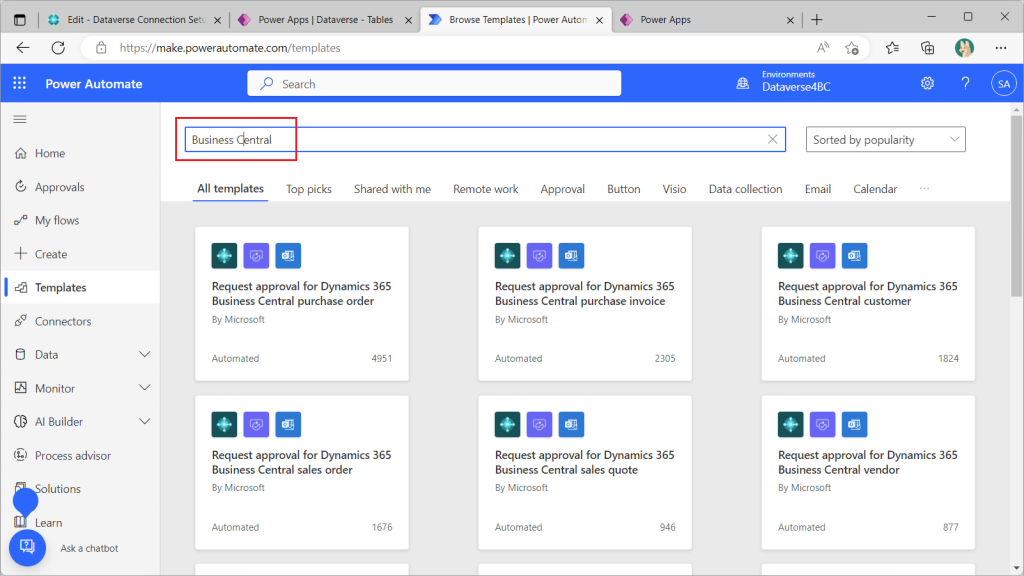
キーワードに “Notify”を追加するとテンプレートが3つ出てきます。変更を検知するDataverseのテーブルとして”Account”と”Contact”と”Currency”の3つがテンプレート化されています。(AccountとContactはわかるけど、何でCurrencyなん?ってのは思いますがw) 実験はまず一番左にある”Account”のテンプレートを使いましょう。
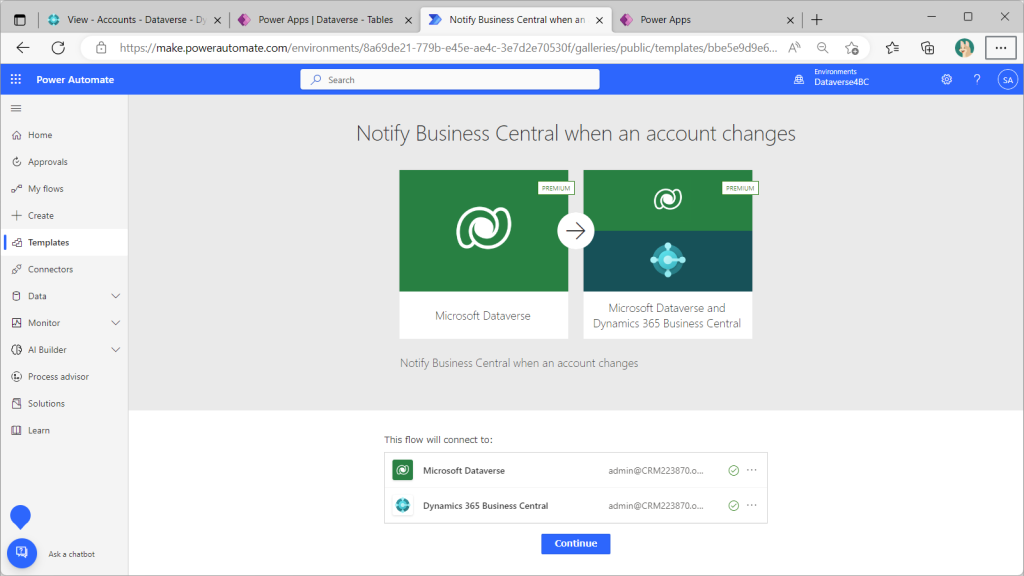
接続はサインインしたうえで”Continue”をクリック。
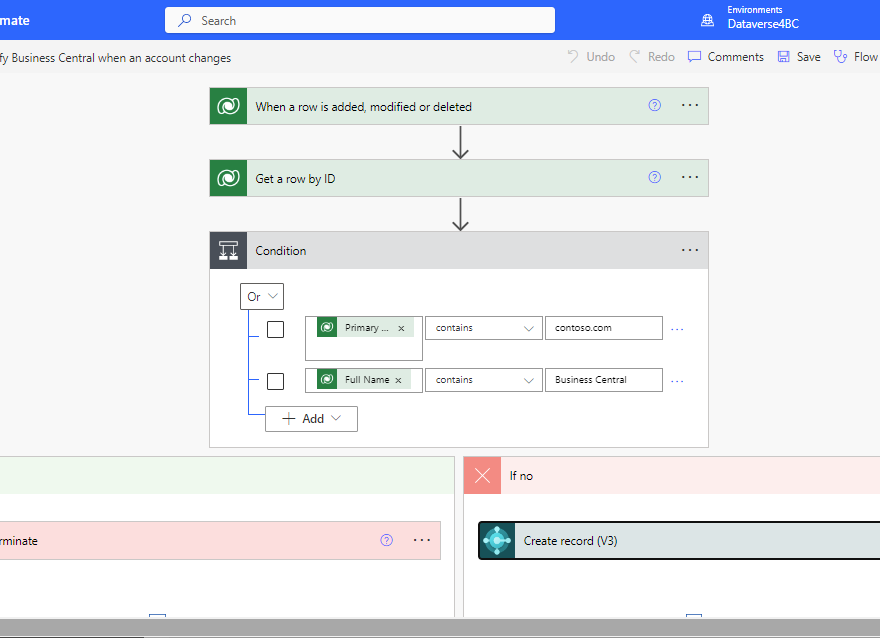
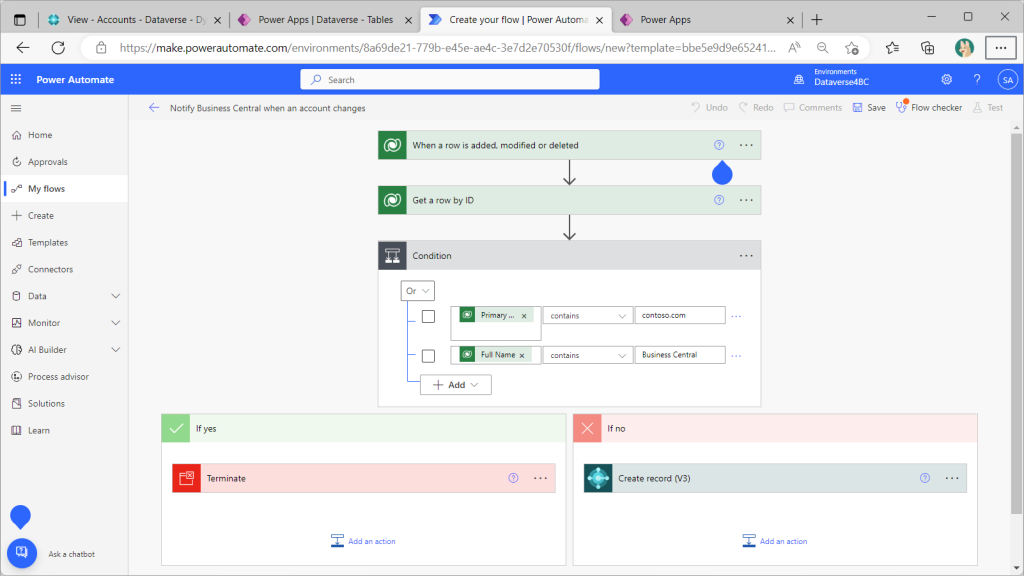
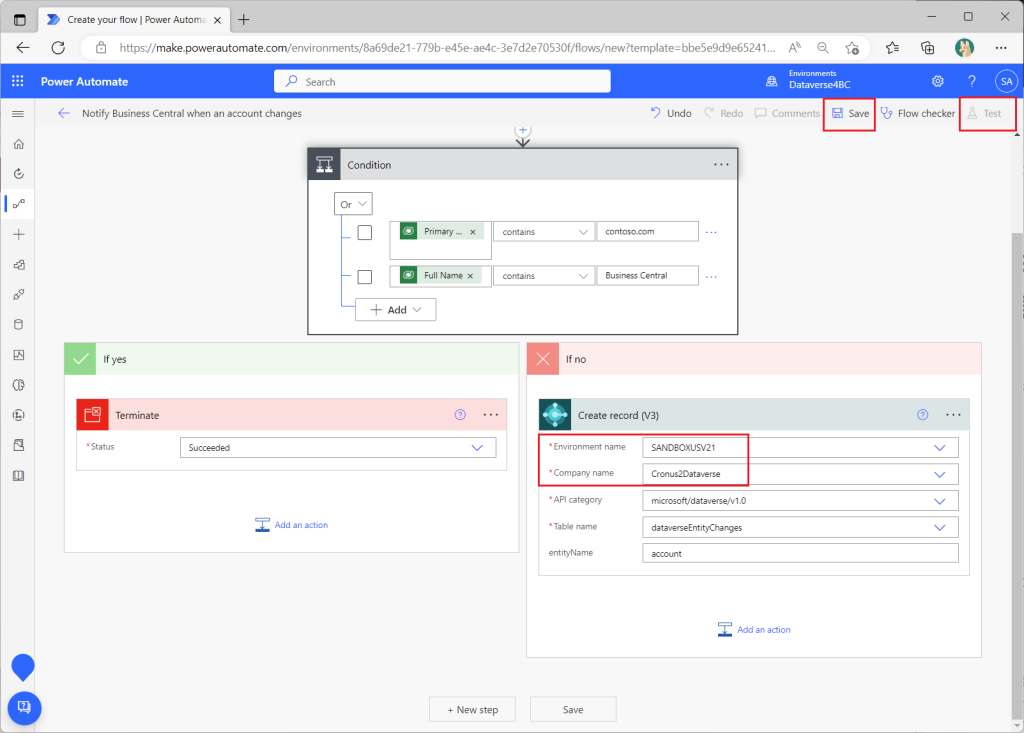
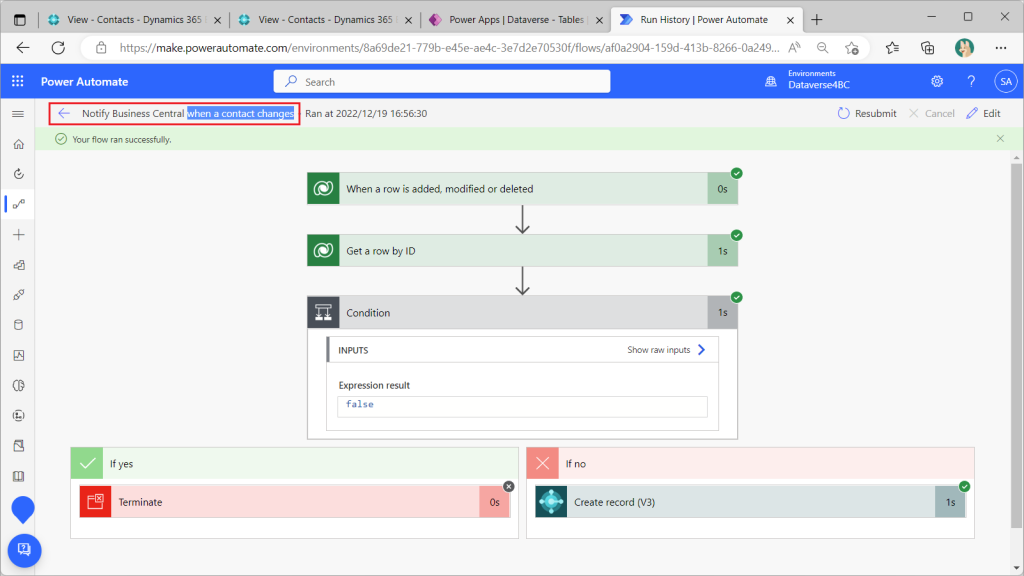
テンプレートが展開されます。詳しい解説は後でやりますがザックリいうと「Accountテーブルの変更を検知したら、変更したユーザーIDをチェックしてBC関連ならBCのレコードに反映する」というフローです。
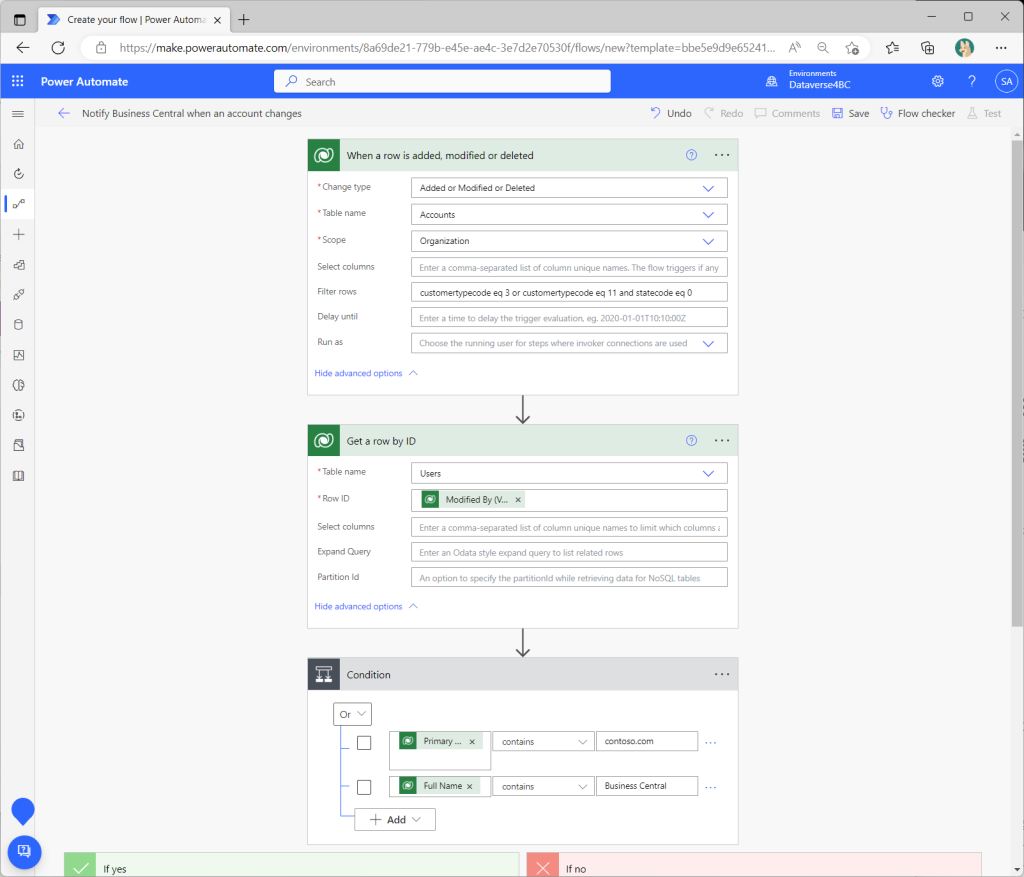
Dataverseのコネクタを開きます。特に設定追加すべき項目はありません。
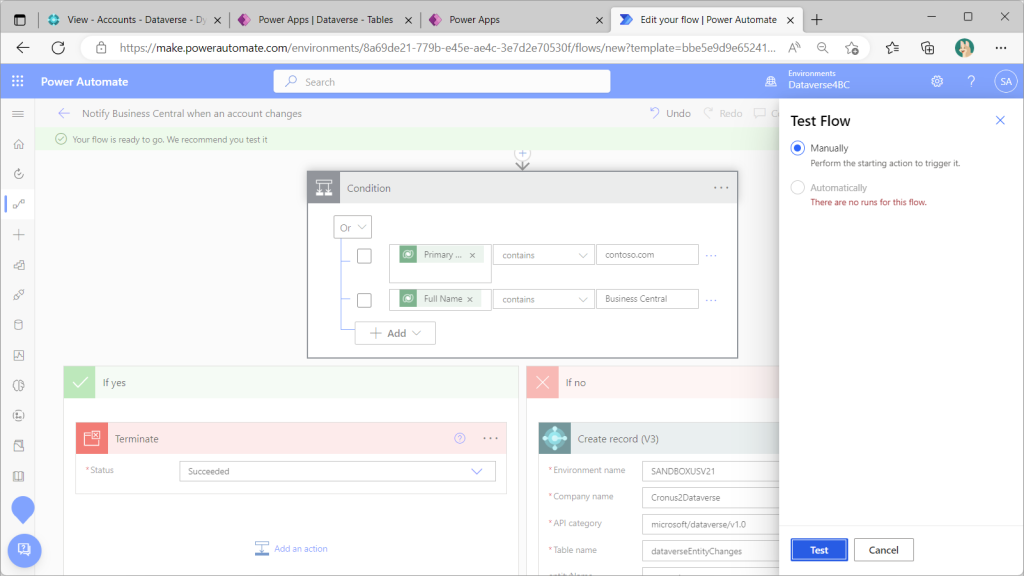
BCのコネクタを開きます。対象のEnvironmentとCompanyは指定が必要です。指定したら保存してテスト実行。
マニュアル実行。
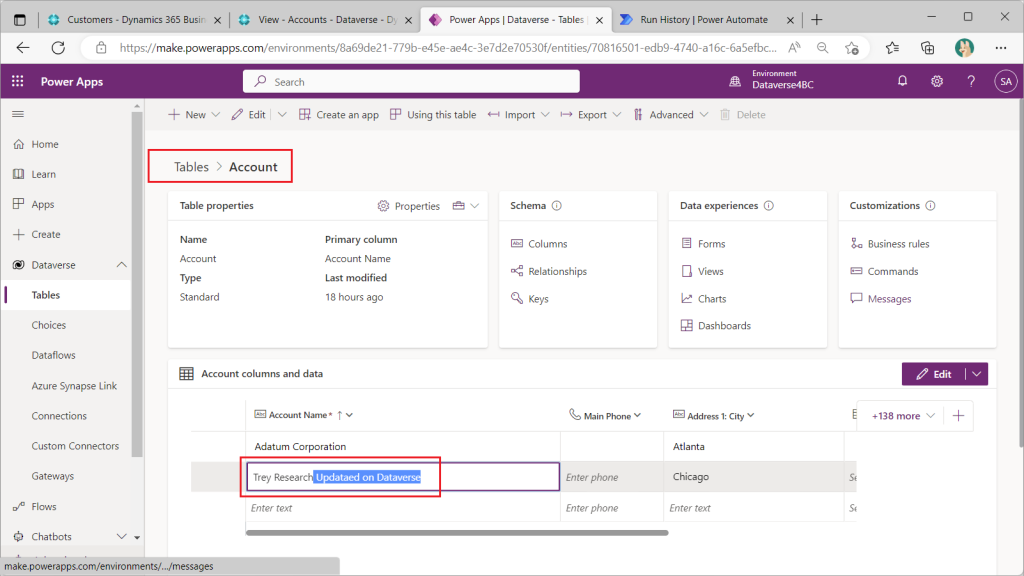
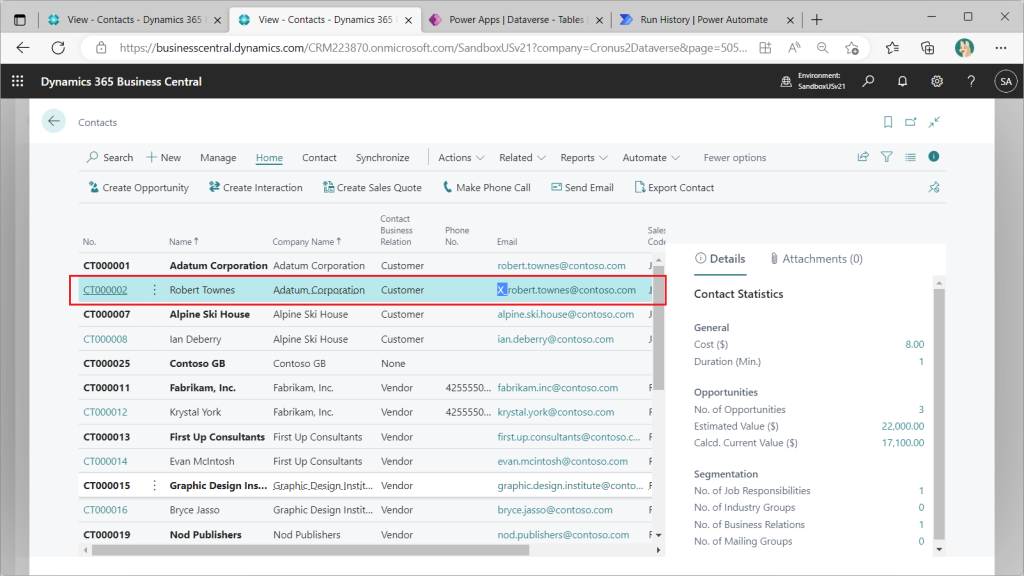
実験開始です。DataverseのAccountのレコードを変更します。例えばAccount Nameを変更してみます。(この時、レコードの”RelationshipTypeが”Customer”のレコードを選んで変更します。)
クラウドフローが実行され、、
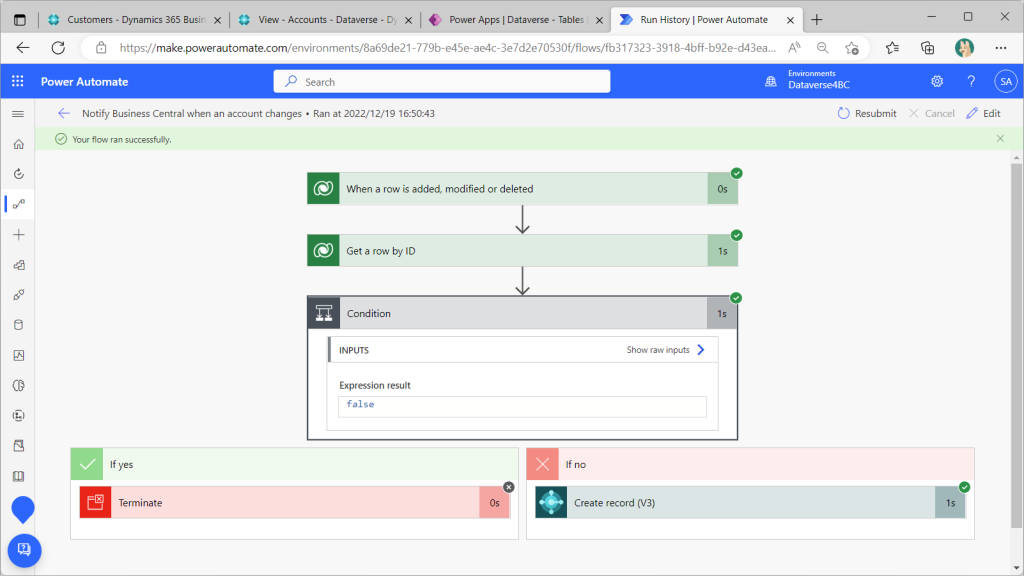
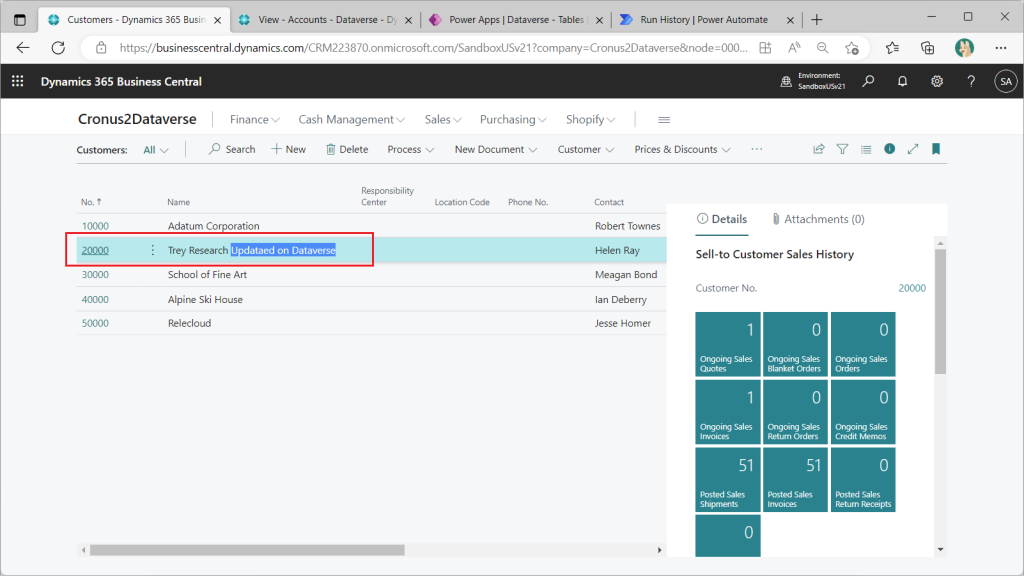
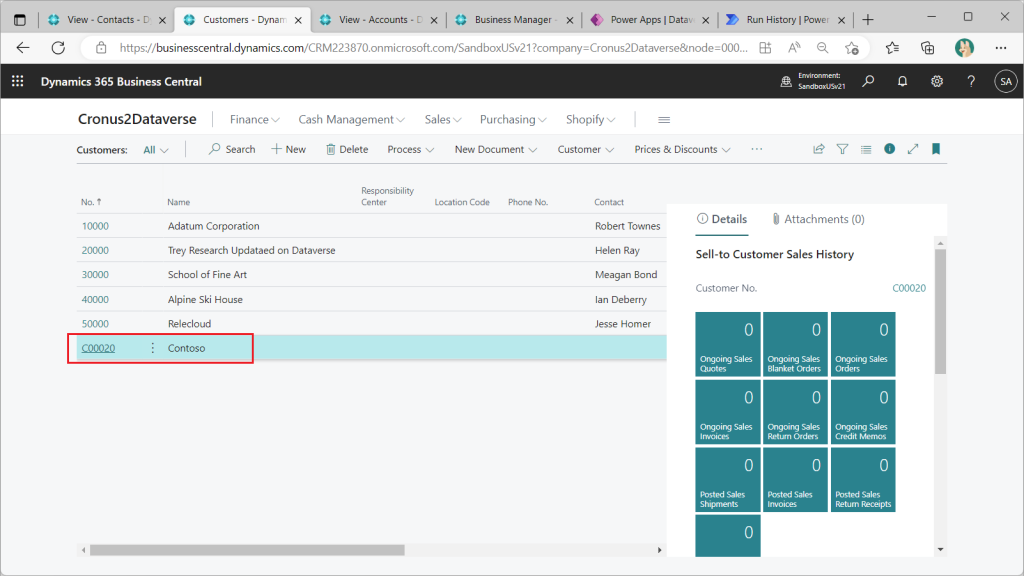
BCのCustomerの対応するレコードが変更されました。成功です。(なお、このレコードは事前にDataverseの該当レコードとカプリングしておく必要があります。)
2つ目のテンプレート、Contactでも試してみましょう。
テンプレートから作成したクラウドフローにBCのEnvironment名、Company名を設定してテスト実行したのち、Dataverseの”Contact”テーブルのレコードを変更します。
するとクラウドフローが実行され、、
BCのContactの対応レコードが変更されました。成功です。(これも事前にDataverseのContactのレコードとカプリングしておく必要あり。)
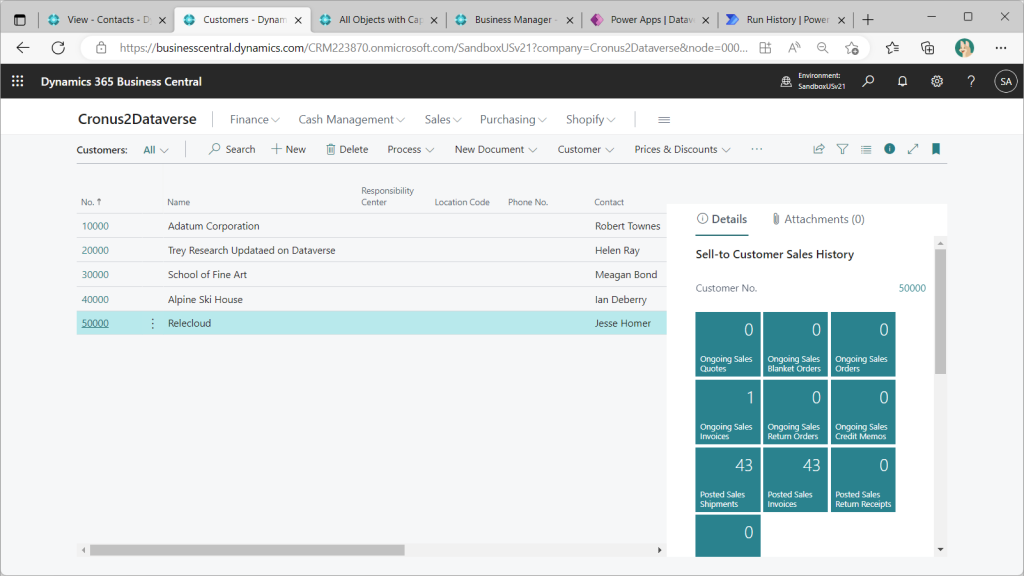
別の実験です。Accountテーブルに戻り、新規でレコードを登録します。
BC側でレコードは追加されません。。
新規登録するには”Account – Dataverse”テーブルの一覧画面から該当レコードを選択して”Create in Business Central”をクリックします。
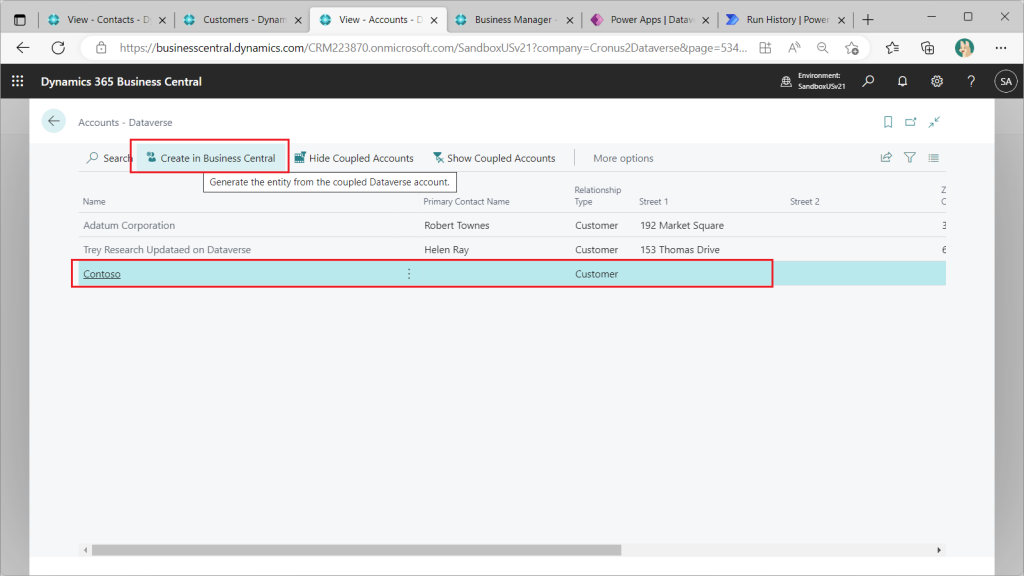
すると、レコードが作成されます。
ここまでは冒頭に紹介したDocs見てそのまま実施すれば良いだけです。次回はこの仕組みを解析したいと思います。
1件のコメント