
I will explain correcting dimension feature of D365BC. This is a feature added in the 2021 Release Wave1 of D365BC.
Summary
1. We can now correct Dimension values of POSTED G/L Entries.
2. It is possible to prohibit changes to certain dimension code.
3. Dimension value correction can be reflect immediately in G/L entries G/L entries and Analytics view
4. Dimension value correction can be also reflect in G/L entries G/L entries and Analytics view later using job queue.
5. It is possible to set the conditions for filtering G/L Entries and correct their dimension value all at once.
Source: Dimension corrections (for G/L Entries) – Dynamics 365 Release Plan | Microsoft Docs
In the previous blog post containing 1. 2. 3. and 4, I corrected the value of Dimension Code with one G/L entry. In this article, I will explain how to select multiple G/L entries to be corrected that is fist part explanation of 5.
Review from last time
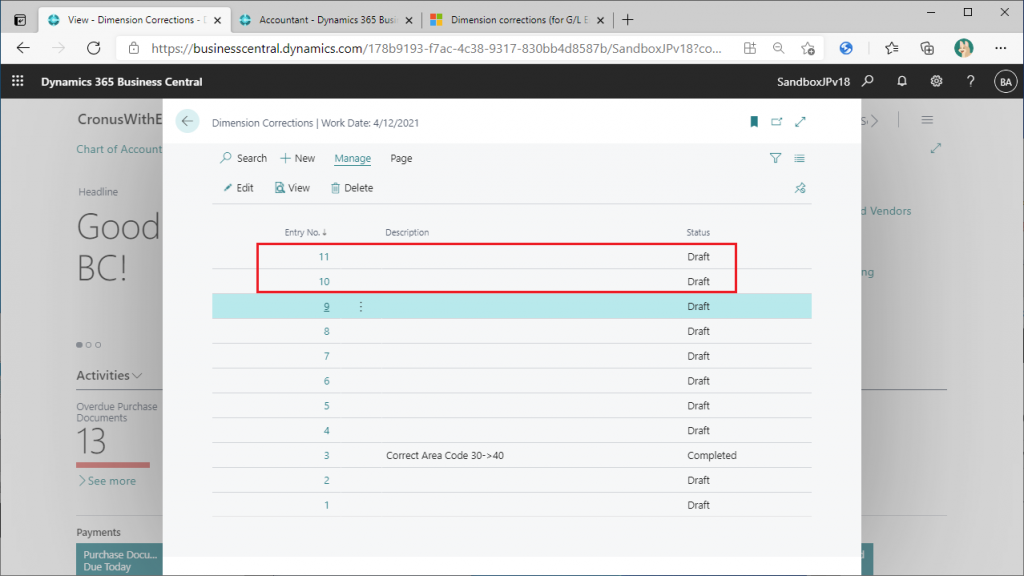
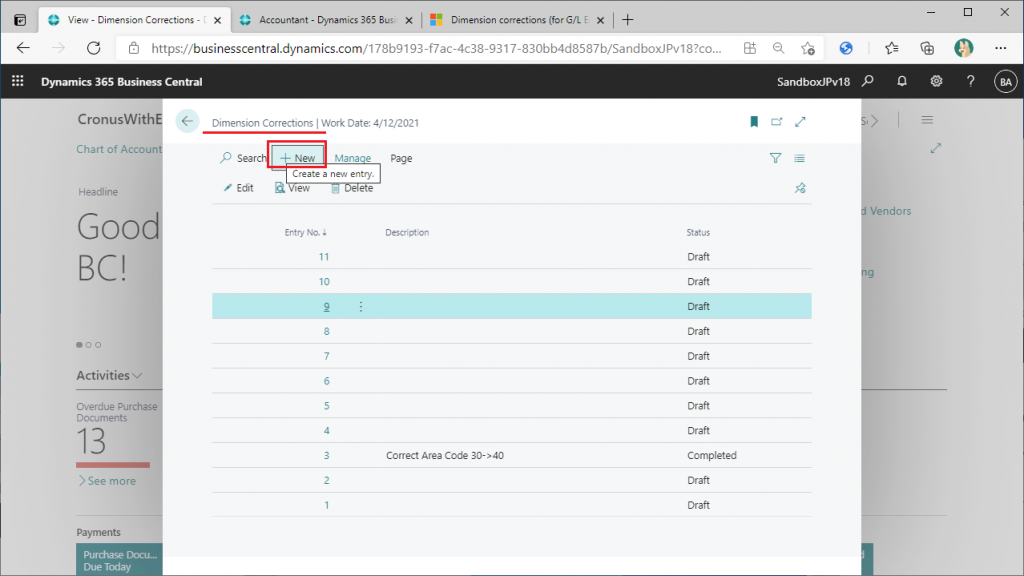
I found unnecessary records when I opened the “Dimension Correction” page after correcting the dimension values last time, as shown below. Entry No. 3 is the record that actually I modified dimension value, but there are many other “Draft” records created. When were these created?
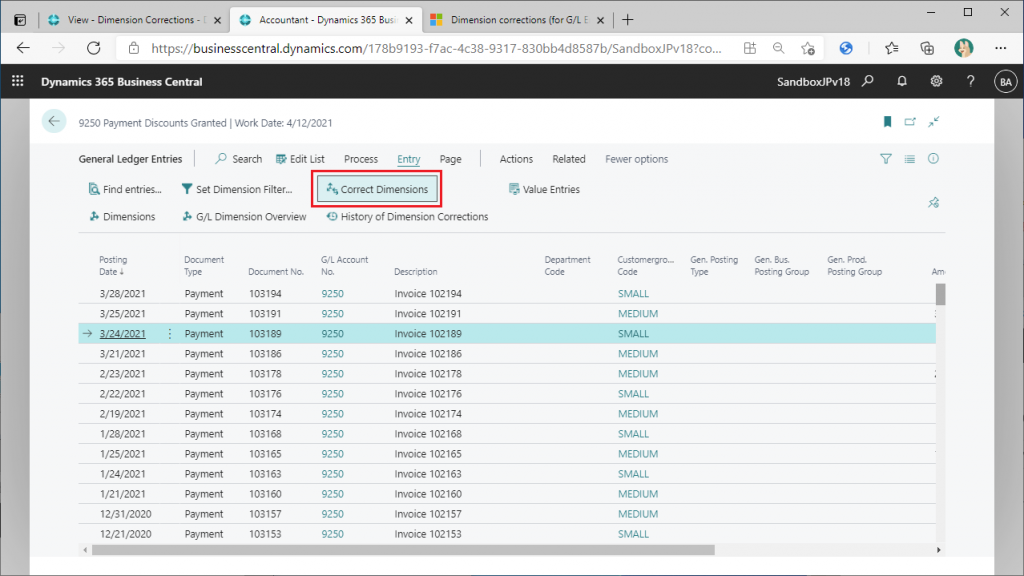
Follow the same procedure as before, from the General Ledger Entries page, click the “Correct Dimensions” button.
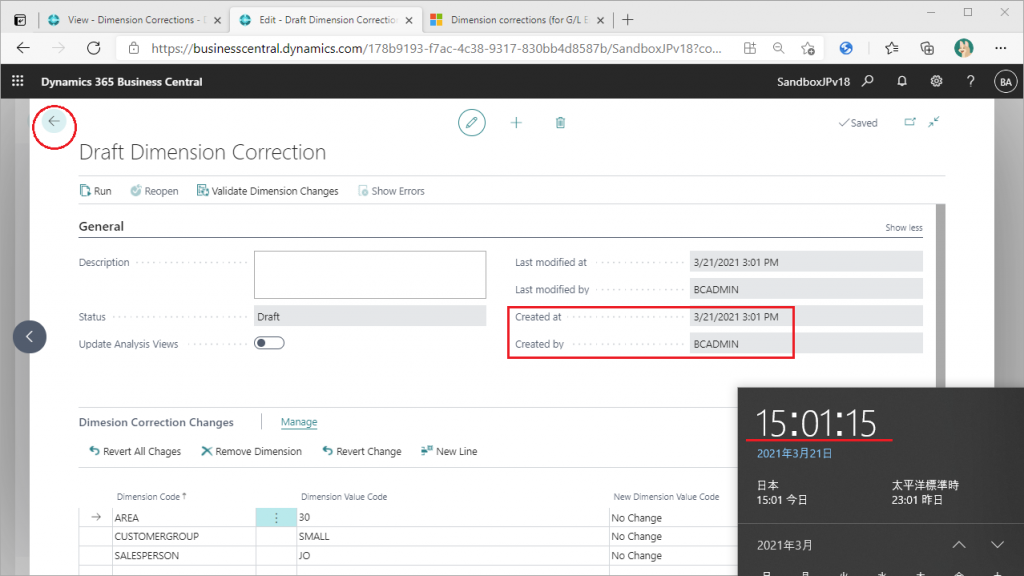
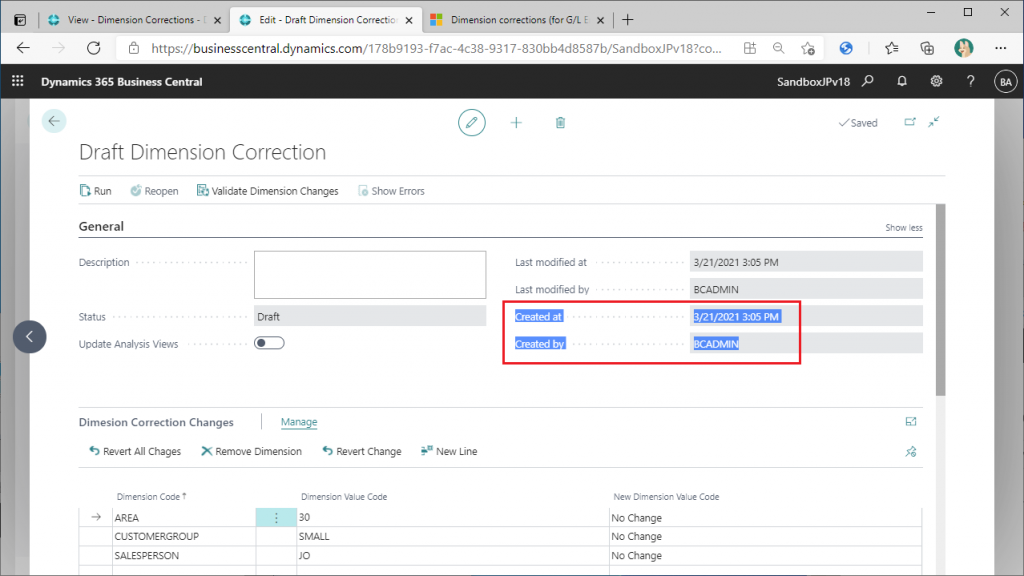
Then the card page for “Draft Dimension Correction” will open. The “Created at” date and time is today at this time. This means that this record was created at this very moment. Go back to the previous page with the arrow on the upper left.
In the General Ledger Entries page, click “Correct Dimensions” again.
Then the card page of “Draft Dimension Correction” will open again. You can see that a new record has been created.
Going back to the “Dimension Correction” list page and refreshing the page, you will see that two new records have been created. This means that if you try to correct a dimension from the General Ledger Entries page, an unnecessary record might be created unintentionally every time you stop working. As I mentioned at the end of my last article, I think it is not the best way to use “Dimension Correction” to correct the dimension value of G/L entry from the General Ledger Entries page.
My guess is that the best way to correct dimension values is below:
1. Create a new “Draft Dimension Correction” record
2. And then assign a group of General Ledger Entries records that satisfy specific conditions.
3. And then execute batch job with Job Queue to validate and run the correction.
It makes sense why we have to do batch processing in Job Queue to change the value of dimension codes. If you only need to modify one G/L entry as in the previous example, you don’t need to use Job Queue for batch processing, and you don’t need to use the “Draft Dimension Correct” card page. It is more natural to think that the card and Job Queue are prepared to correct a large amount of data.
Let’s imagine the following business scenario.
”The salesperson, JO (Jim Olive), was no longer in charge of customers classified as Small in the CustomerGroup from 1st March 2021, but noticed that JO’s sales had been recorded as of the posting date in March 2021. The sales should have been posted by LT (Lina Townsend), who took over from JO, but due to a mistake, they were posted by JO. This will be corrected.”
In the following, I will explain how to extract the General Ledger Entries to be corrected, assign them to “Draft Dimension Correction”, and change the dimension values.
a. Preparation
In the default settings of Cronus Company, “Area” and “Salesperson” are not displayed in the General Ledger Entries list page. This is because the General Ledger Setup lacks settings for the shortcut dimension code. As you can see in the image below, Shortcut Dimension 3 to 8 are not set.
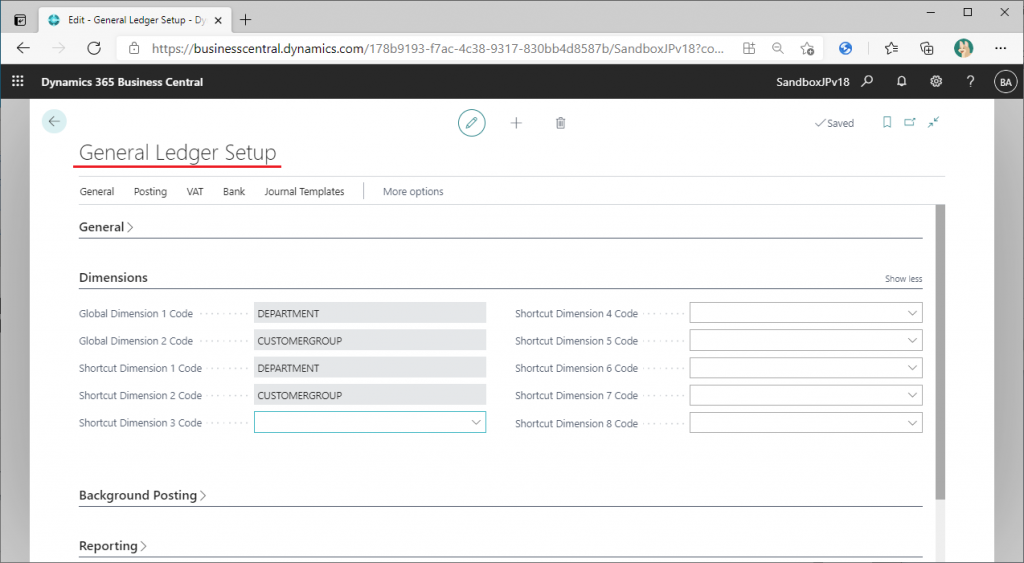
Set “Area” for ShortcutDimension3 and “Salesperson” for ShortcutDimension4.
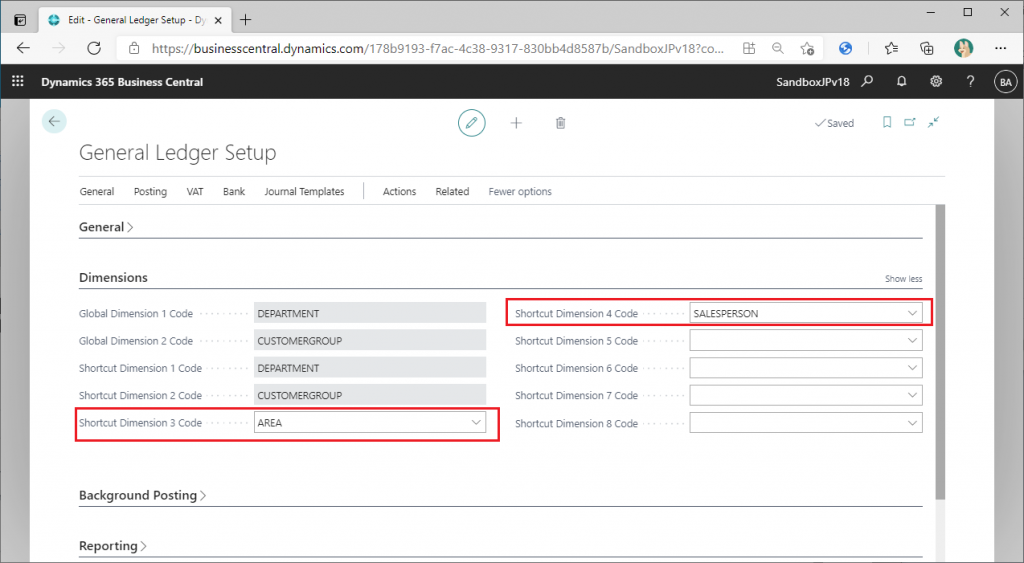
Then, ShortcutDimension3 and 4 are displayed in the General Ledger Entries list page. By the way, right after the setting, “ShortcutDimensionX” will be displayed, but after some time, the name fo dimension code will be displayed like “Area”, “Salesperson” and so on.
b. Extraction of G/L Entries with incorrect dimension values
From here, I will follow the business scenario.
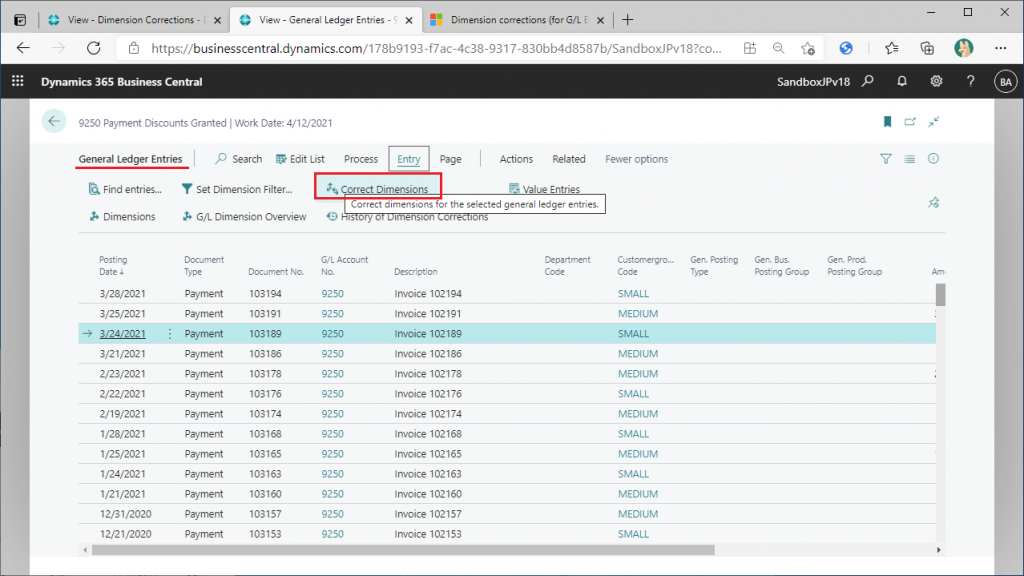
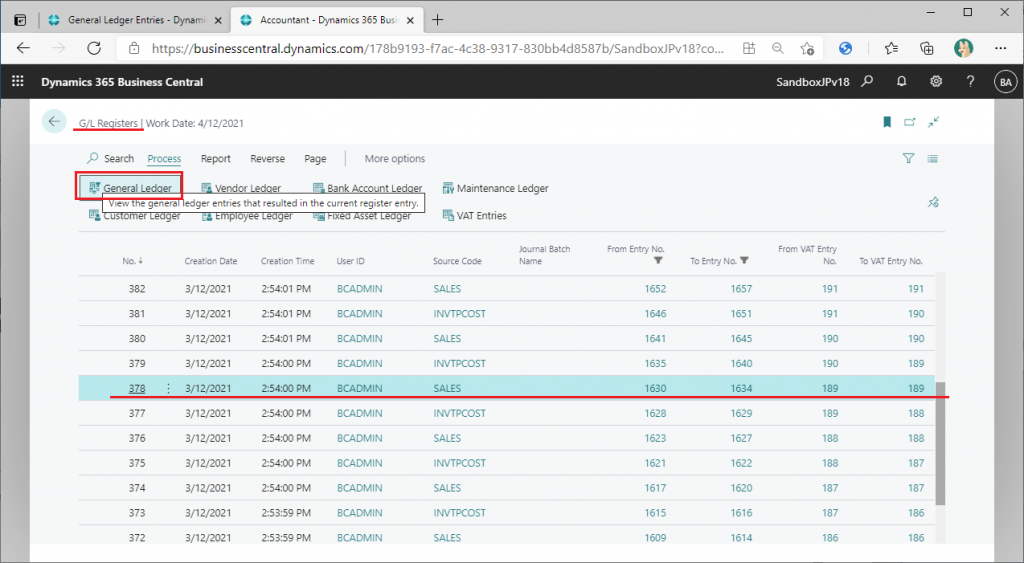
The accountant was checking the General Ledger Entry. From the G/L Register page, select one ledger entry number (378 in this case) and click on “General Ledger” in the “Process” tab.
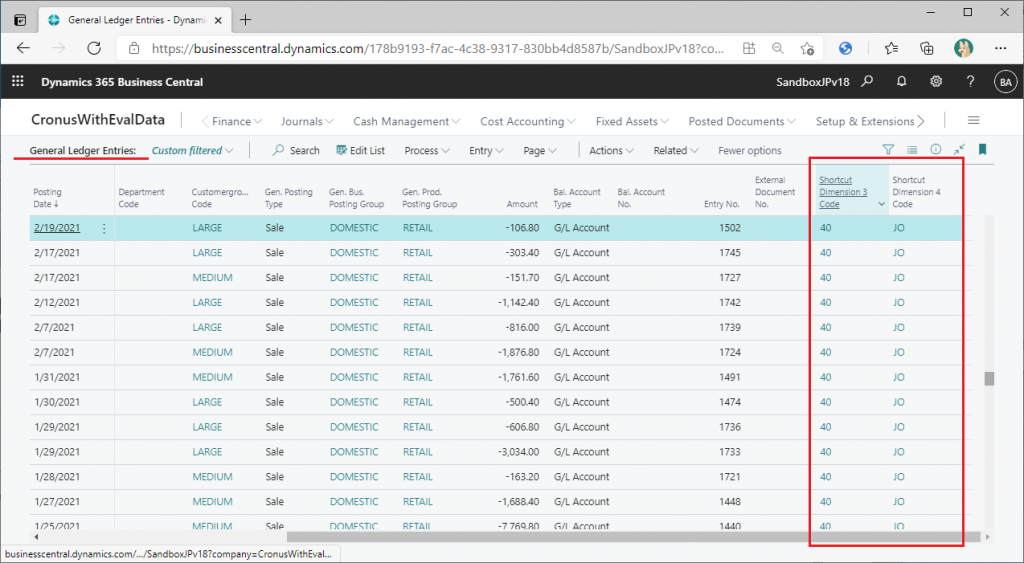
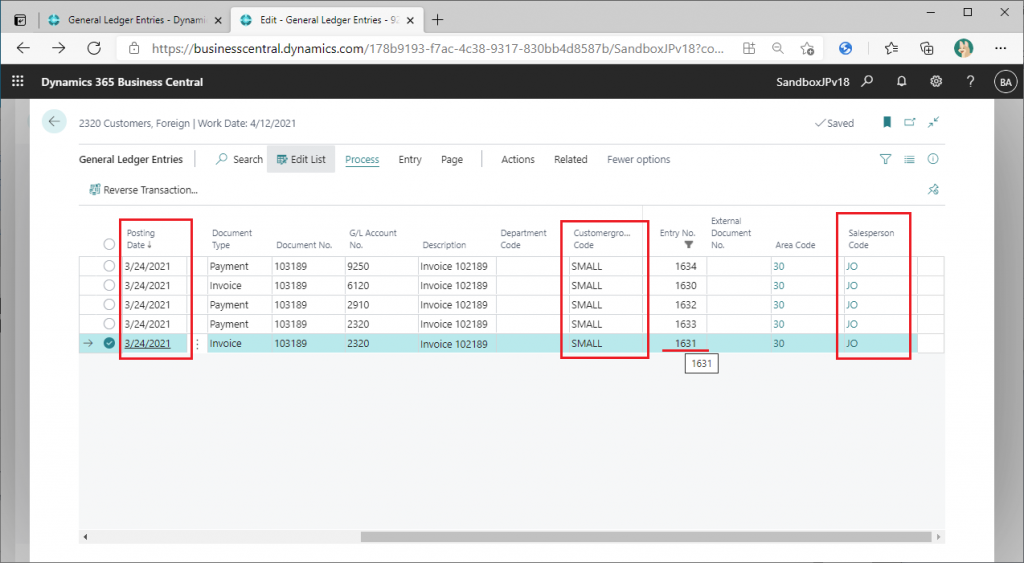
The G/L Entries associated with this G/L Register number are now displayed. Even though the posting date is March 2021 or later, there are sales revenue entries where Customergroup is Small and Salesperson is JO.
JO was no longer responsible for the sale in March. The accountant confirmed with the sales department that the data was entered incorrectly and that LT (Lina Townsend) was the right salesperson.
c. Create Dimension Correction record
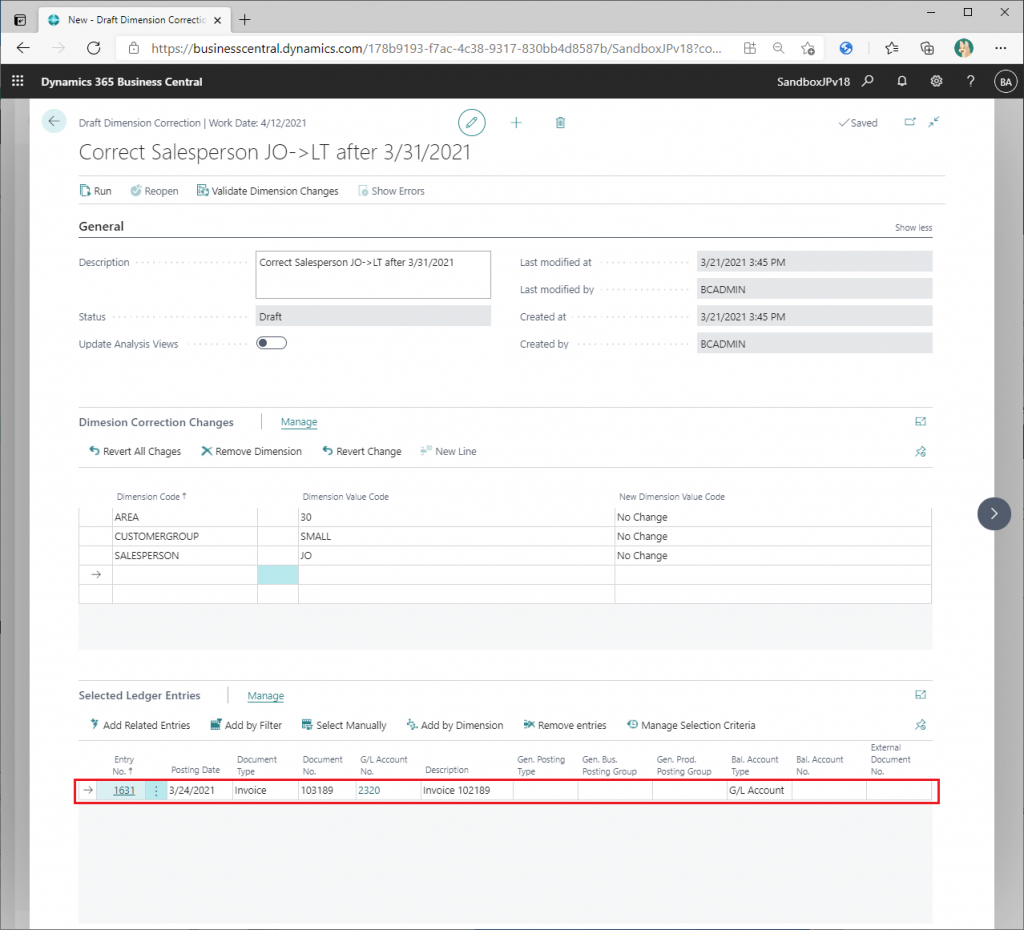
Correct the dimension values. From the “Dimension Correction” list page, click the “+New” button.
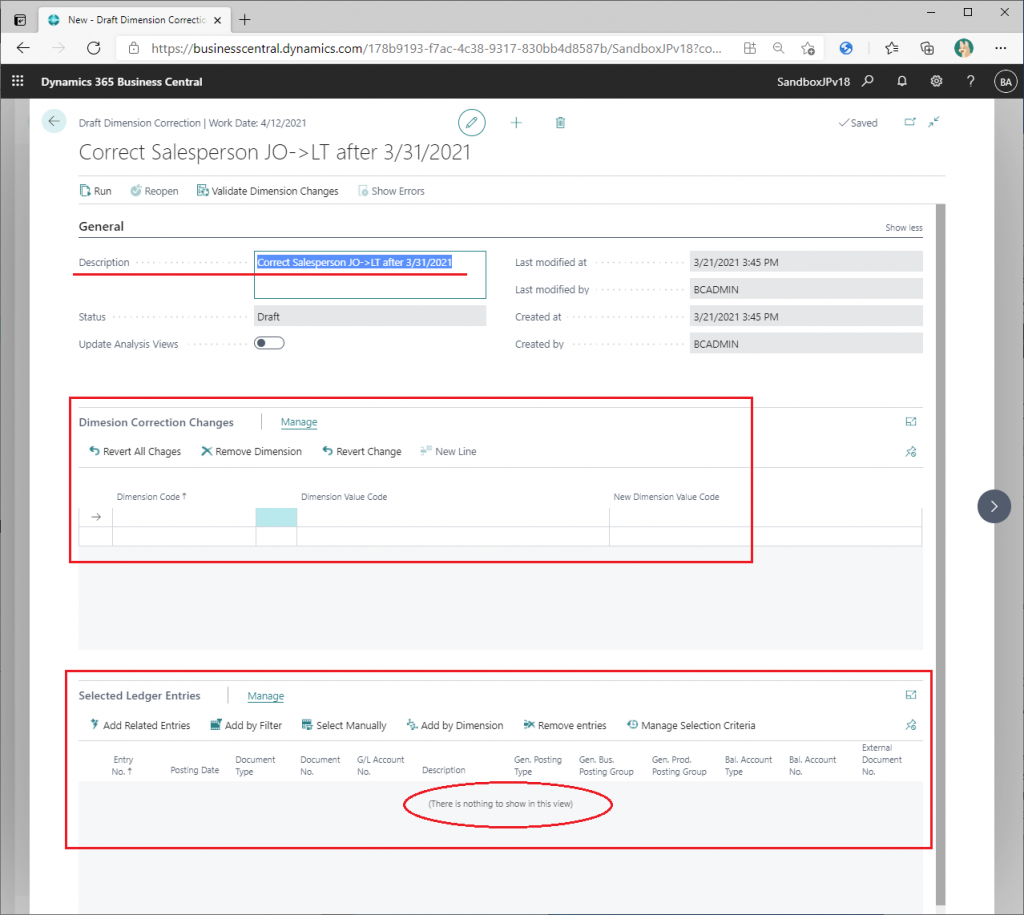
A new “Draft Dimension Correction” card page has been opened. Describe the correction in the “Description” field. At the moment, nothing is shown in the middle “Dimension Correction Changes” nor in the bottom “Selected Ledger Entries”. We will now extract and specify the target G/L entries, and specify the dimension values to be changed.
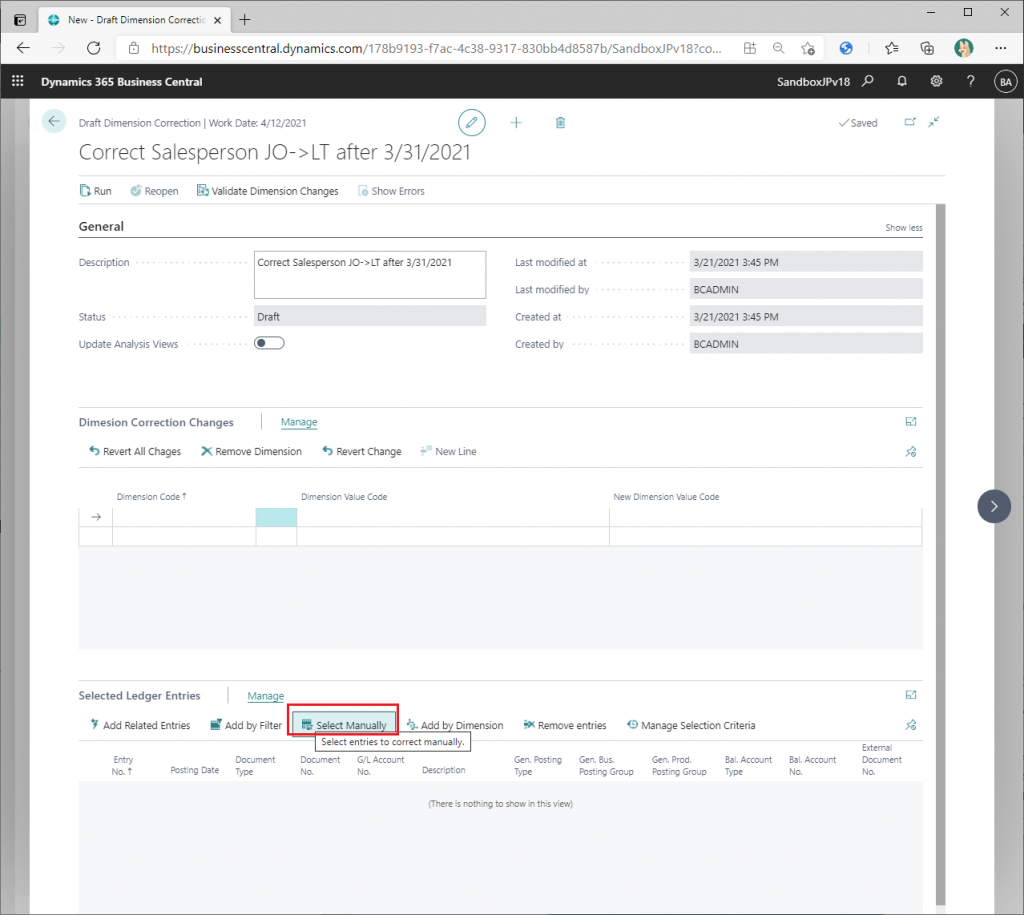
There are six buttons in the “Selected Ledger Entries” section at the bottom. These buttons can be used to identify the G/L Entries of the target. I will explain how to use these buttons one by one.
d. Select Manually
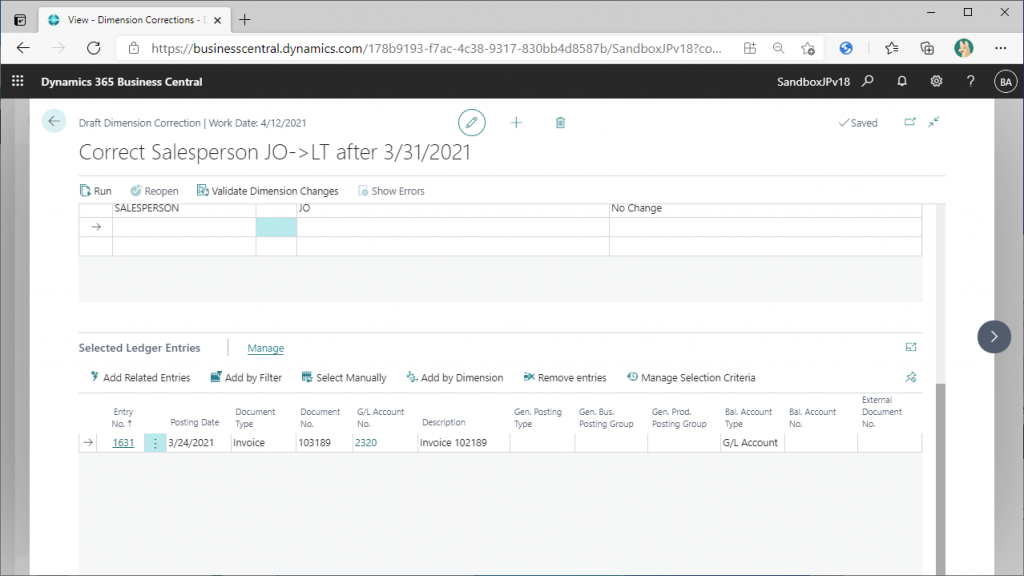
The “Selected Manually” button allows you to select any item from the list of G/L Entries. Let’s click on the button.
The list of General Ledger Entries page is now displayed. Here, select the target entry and click the “OK” button to set the target entry into card page. Since all the G/L Entries are displayed, it is not easy to find them, but you can use the Filter function in this page. In this case, we know the Entry number of the G/L Entries, so we will filter the Entry No.
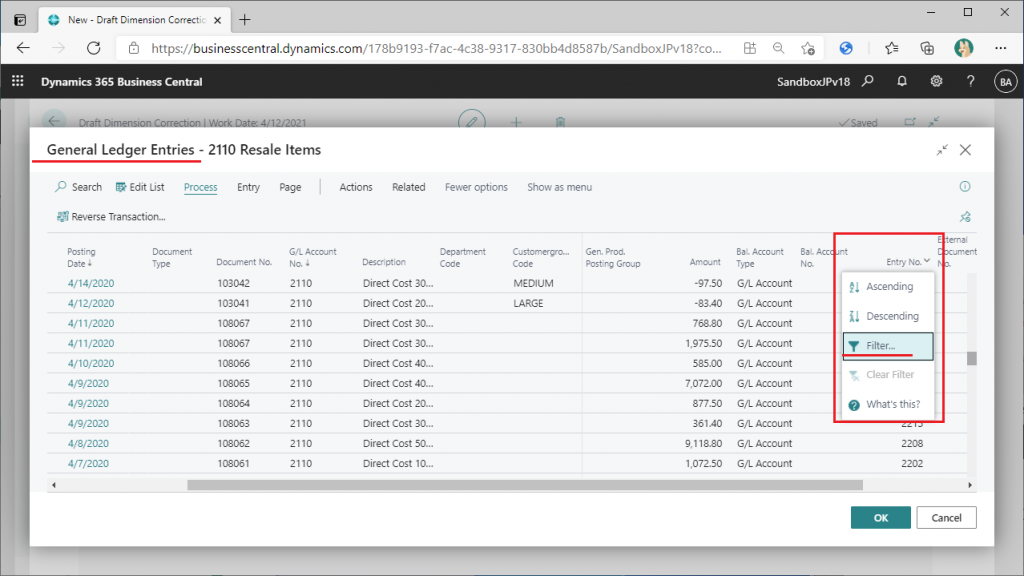
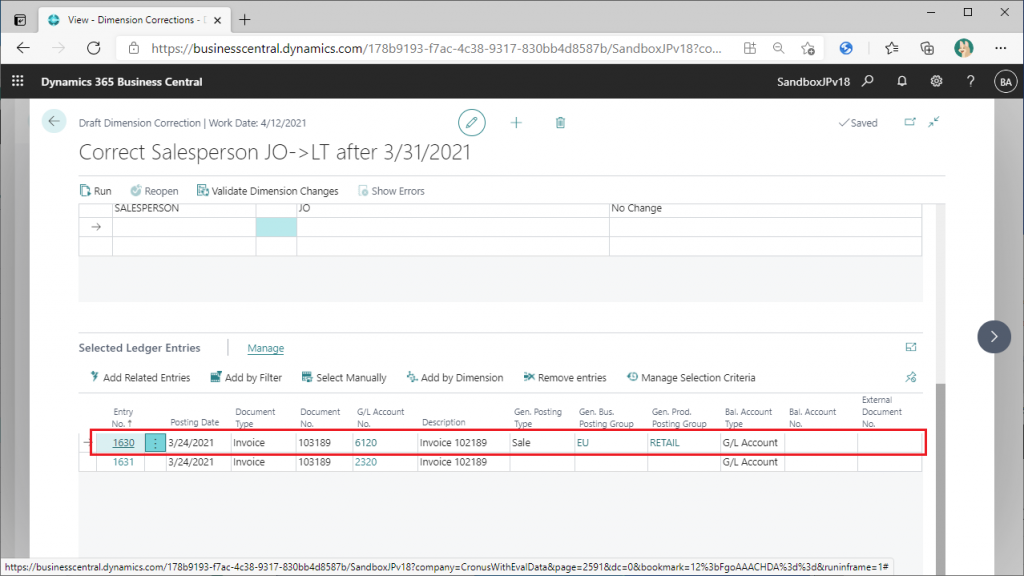
Specify Entry No.=1631.
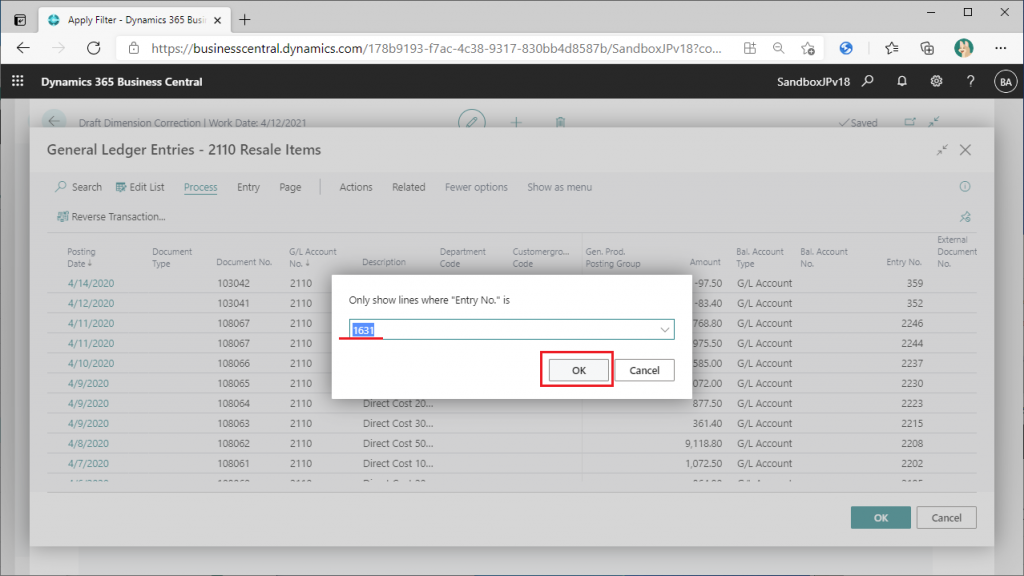
The target G/L Entry has been filtered. Now click “OK”.
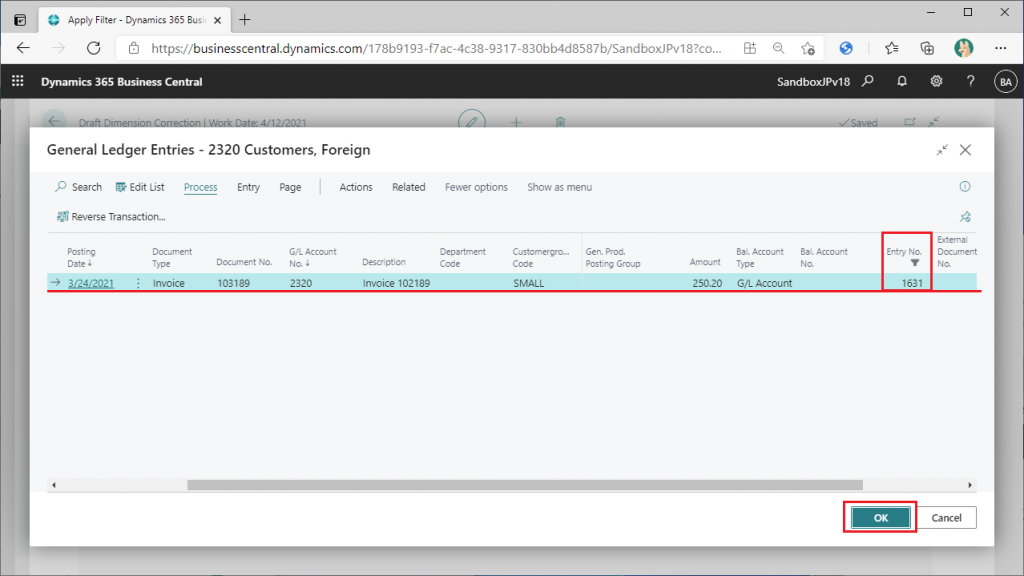
”Draft Dimension Correction” card page is returned. The G/L Entry No. that I specified is displayed in the “Selected Ledger Entries” box at the bottom.
“Select Manually” button is the most simple way to specify and set the target G/L entry.
e. Add Related Entries
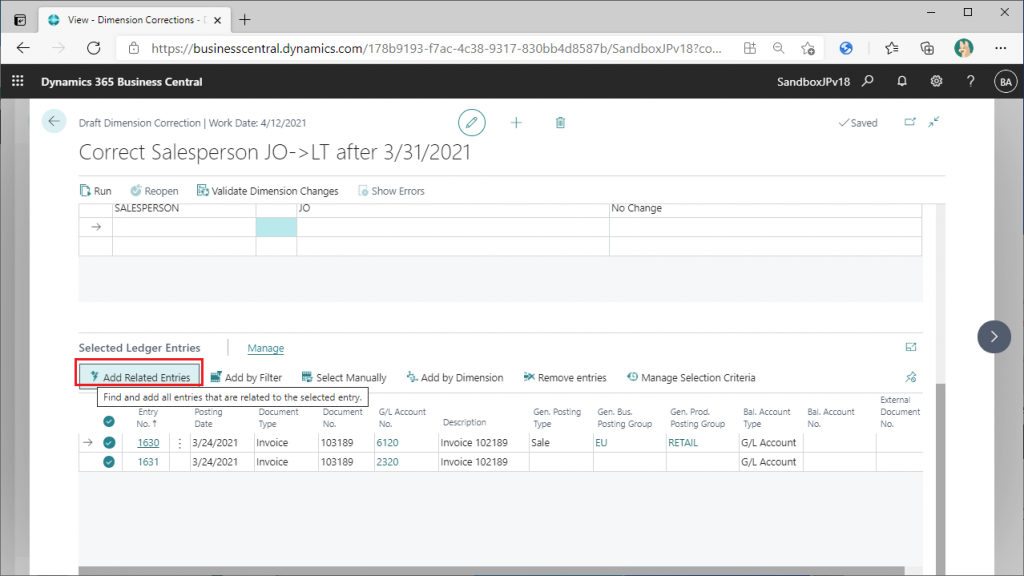
Next is the “Add Related Entries” button. It is not clear from the Tooltip what kind of “Related Entries” will be specified, so let’s actually click on it.
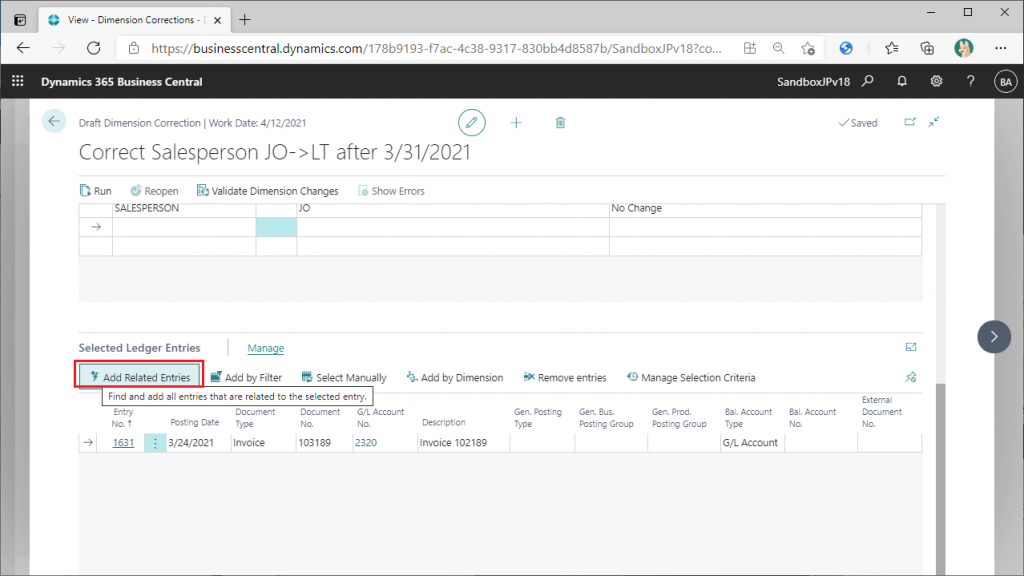
One more G/L Entry has been added. What is this entry?
This is a sales revenue entry that is associated with the same General Ledger Registration number.

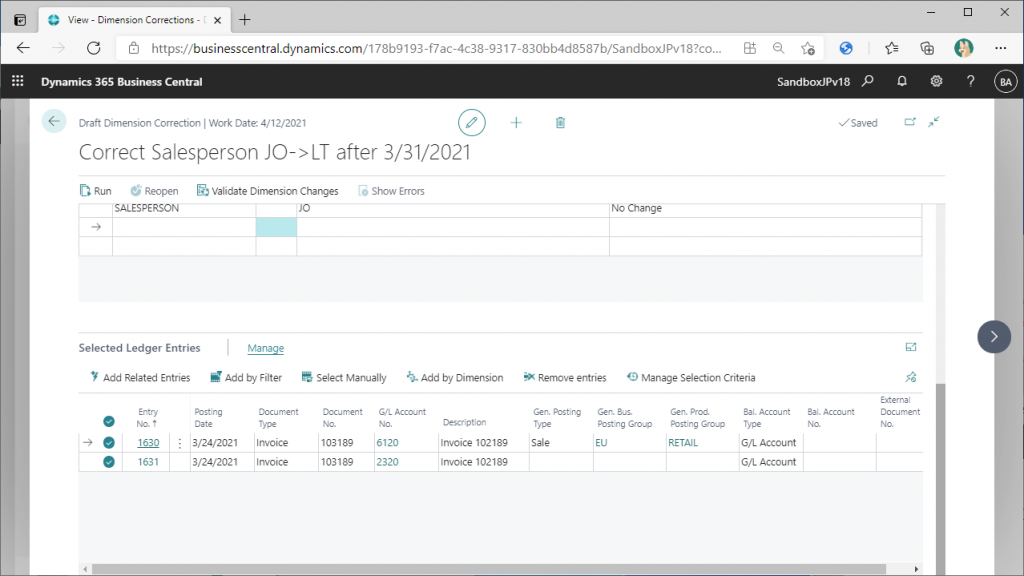
Check if there are any related entries to the added entries. Select all the entries and click the “Add Related Entries” button again.
There were no more entries. I guess that means there are no more related details. The definition of “related entries” is unclear at this time, as it is not specified in the Docs. We will wait for Microsoft to provide more information in the future.
f. Remove Entries
If you want to remove the entries in “Selected Ledger Entries”, for example, if you exclude the proposed related entries from the target entries, select the entries to be removed and click “Remove Entries”.

Then the entry is deleted.
Now click “Add Related Entries” again, and what happens?
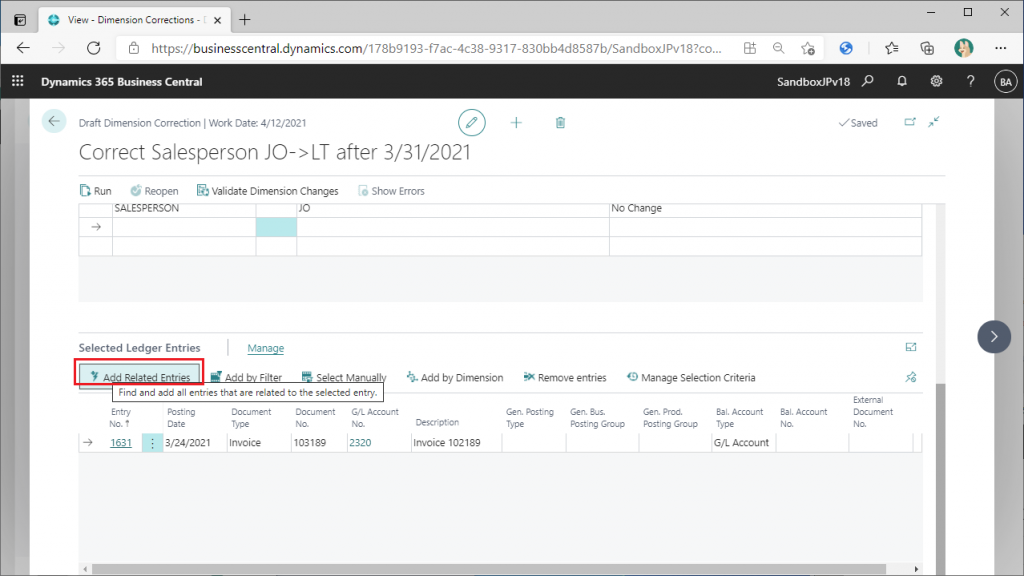
I thought it would add the related entry that I just saw, but nothing is added. When I click the button again, nothing happens…
When I first saw this, I thought it might be a bug. But it is not a bug, you need to understand the “Manage Selection Criteria”.
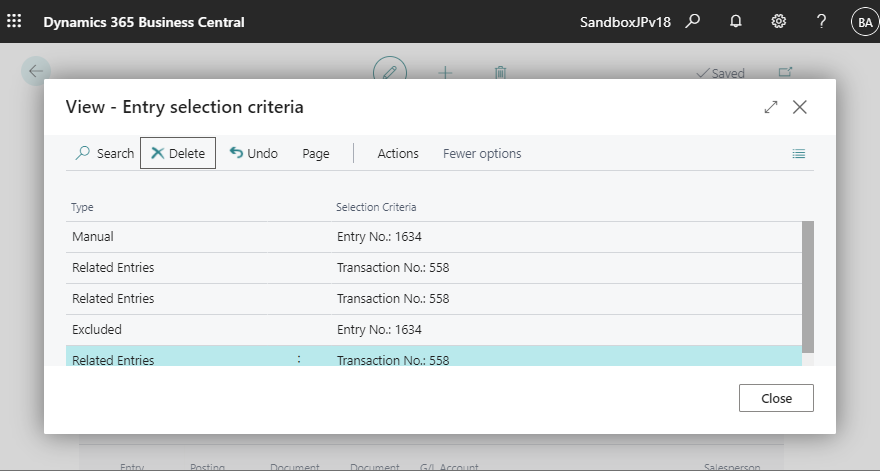
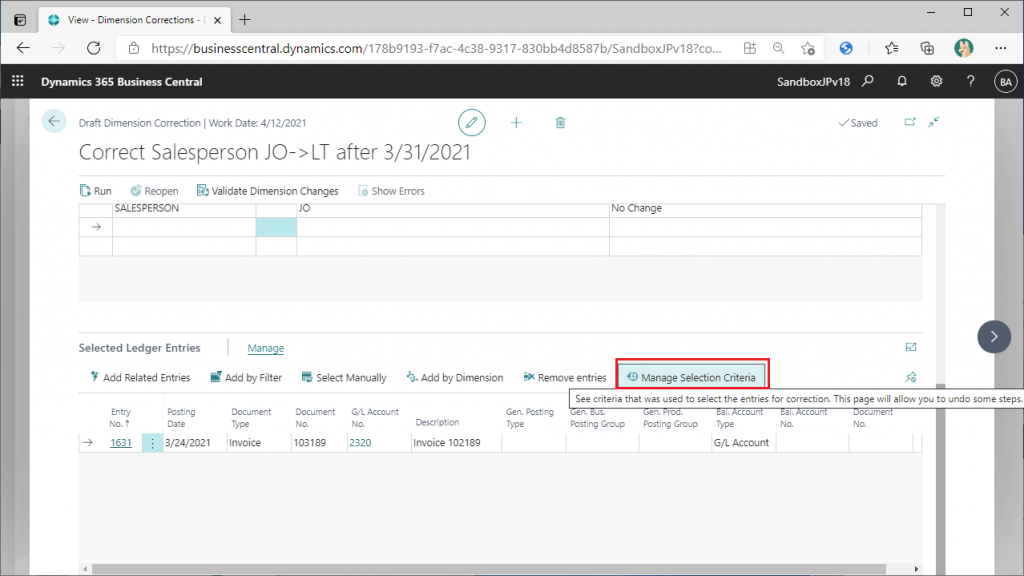
g. Manage Selection Criteria
Let’s click on “Manage Selection Criteria”.
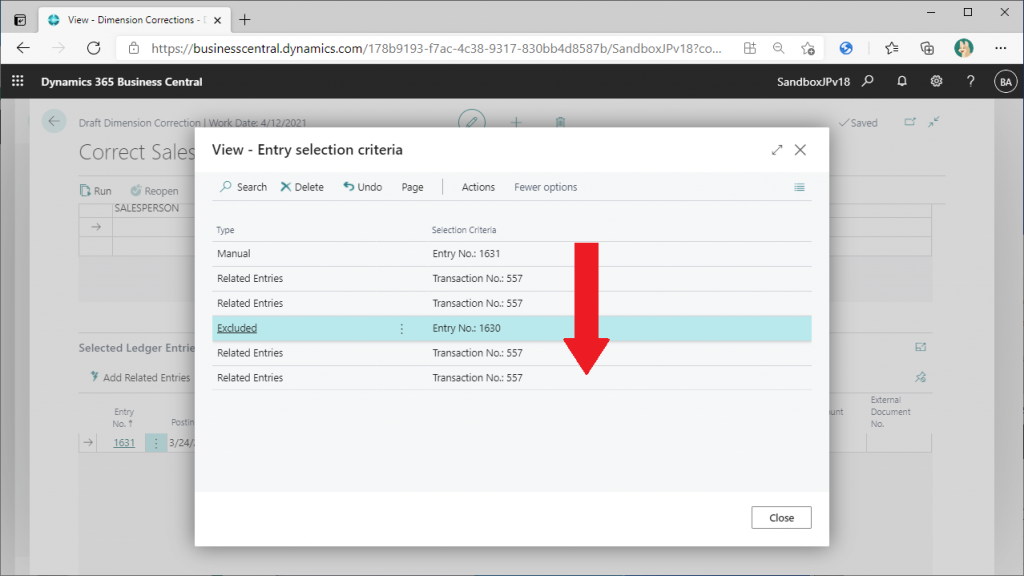
The following page will be displayed. On this page, you can see the steps I have taken in selecting G/L Entries, from top to bottom. First, specify the G/L Entry number manually, then add for related entries, add for related entries again, delete related entries, add for related entries, add for related entries again. In the current situation, no matter how many times I click “Add Related Entries”, it only adds the “Related Entries” item to the bottom line. As long as the “Excluded” step remains, the related entries will not be displayed in card page. This architecture is very important and you need to keep it in mind.
Select the rows after the fourth line and click the “Delete” button.
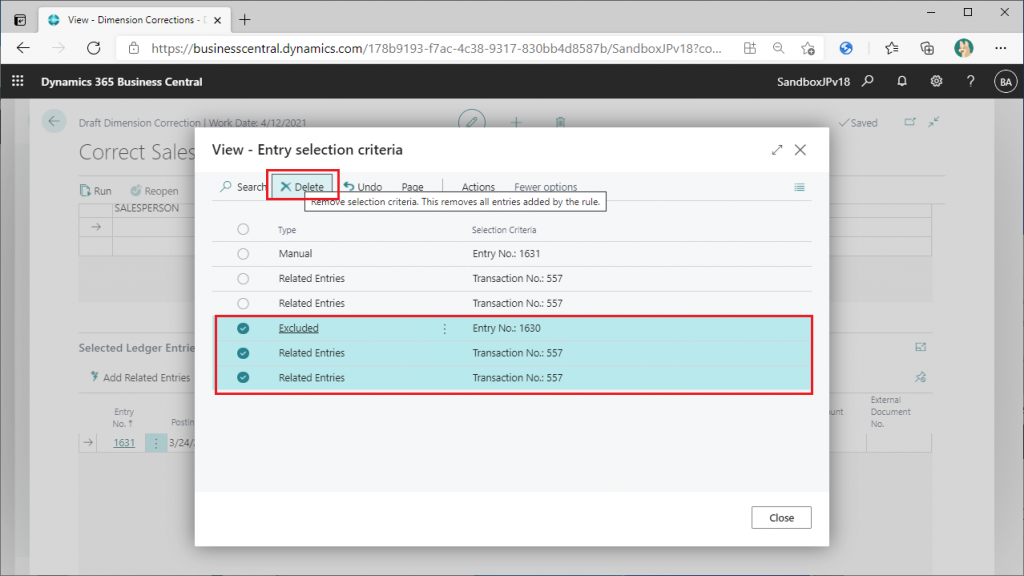
Only one row was deleted. I think this is a bug…
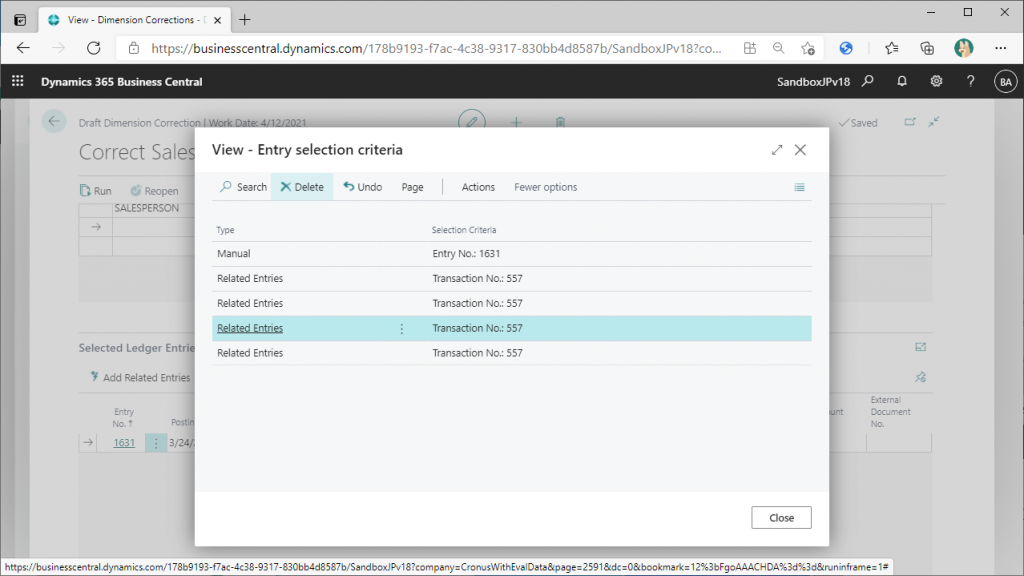
Anyway, I deleted them one by one, and deleted all the details after “Excluded”.” Click the “Close” button to return to the previous screen.
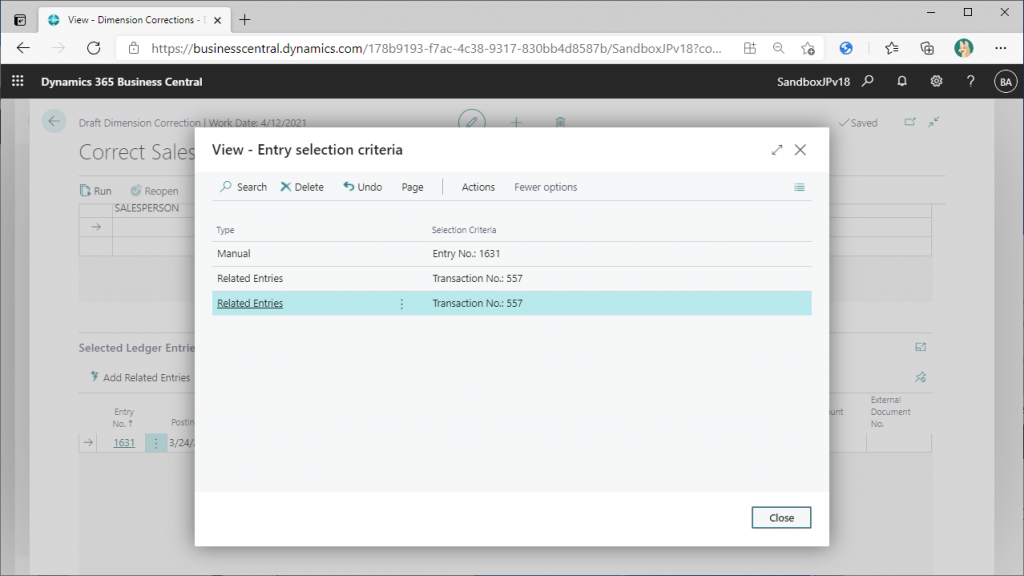
The relevant details are now displayed.

The explanation is getting long, so I will continue in the next article. The buttons used in this article are useful for modifying small amounts of G/L entries, but in actual business, you will need to extract a larger amount of data with more conditions. In the next article, I will explain how to select the data with the posting date and dimension code “Salesperson”.
1件のコメント