
Bank Deposit feature has been added in Business Central. Previously, we had to use “Journal” to increase balance of bank account. “Bank Deposit” is a new feature in 2022 Release Wave 1 that allow us to increase balance of bank account with “Slip” card page like Sales Quote or Purchase Order.
Docs : Create bank deposits – Dynamics 365 Release Plan | Microsoft Docs
Table of Contents
1. What is Bank Deposit?
2. Basic behavior of Bank Deposit
3. Apply Entries
4. Handling the difference
5. Number of Bank Ledger Entries
6. Account Type other than Customer
7. Relationship with and restrictions on journal batches
8. Summary
1. What is Bank Deposit?
If you search for “Bank Deposit” on the web, you will find a description of Bank Deposit Slip like below.

Let’s see this feature in practice in Cronus.
2. Basic behavior of Bank Deposit
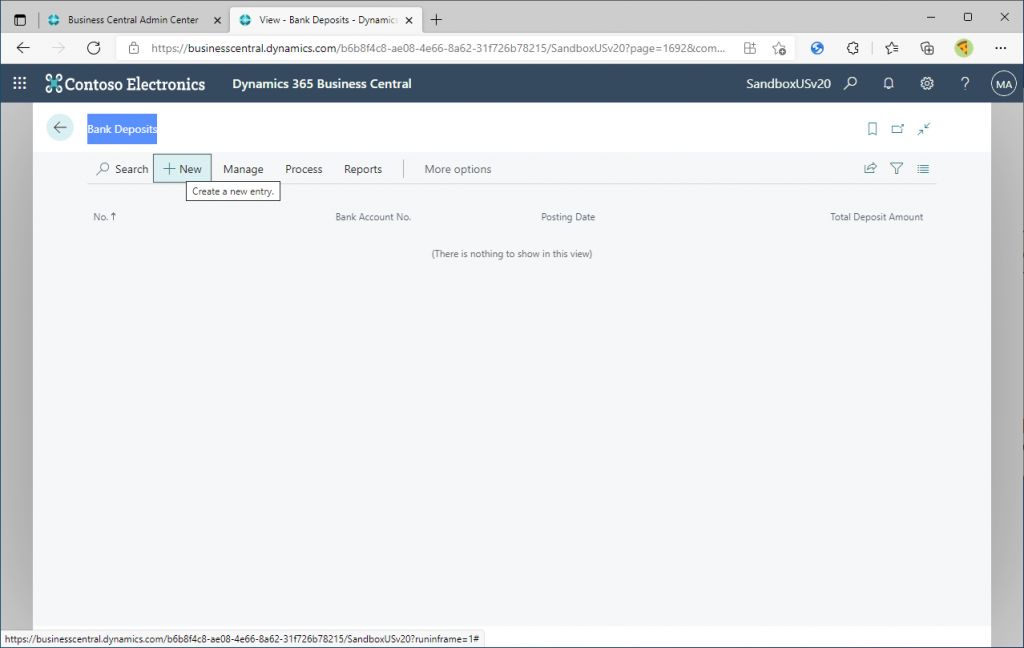
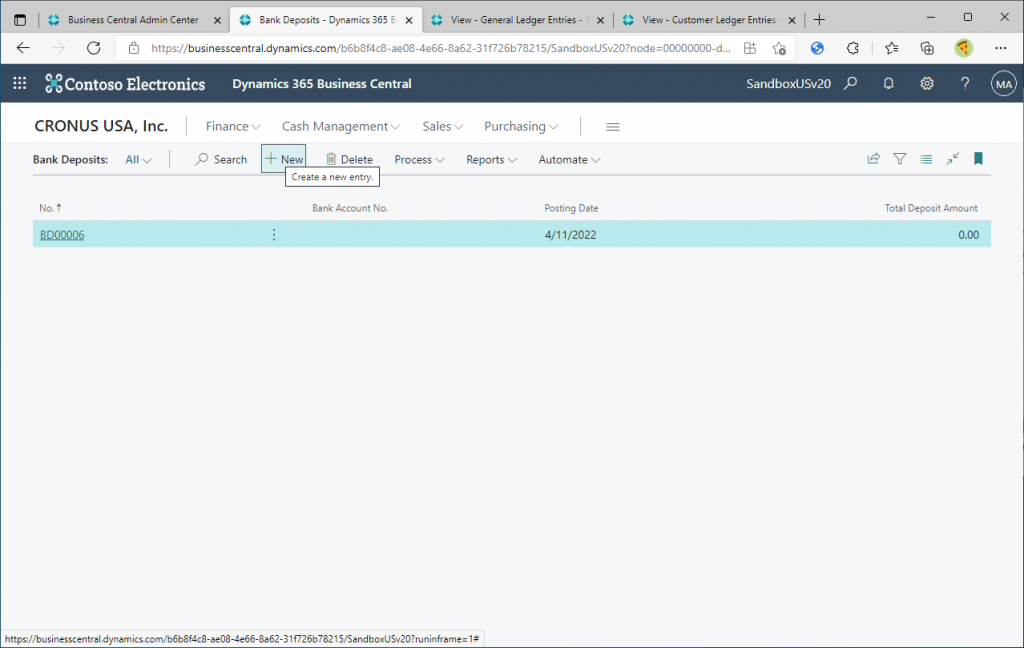
Use the tell me what icon to search for the keyword “Bank Deposit” to open the Bank Deposit list page. Click “+New”.
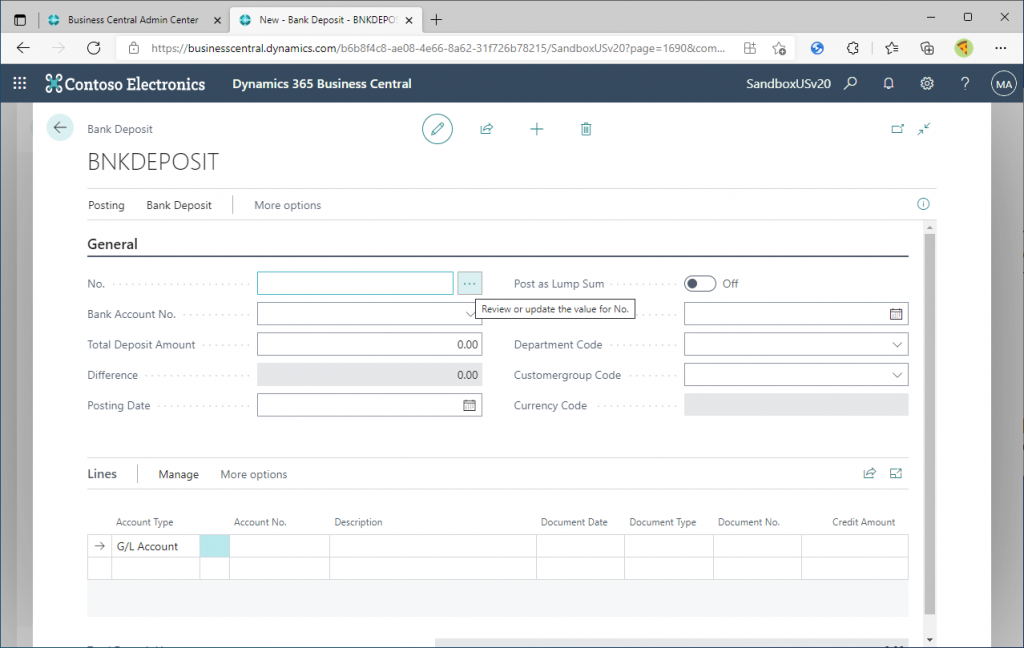
A page like the following will open, with a header and a line subform like Sales Quote or Purchase Order. This is why I used the word “Slip” at the beginning of this article. In the header, there is a field to specify a bank account, and we can specify the bank to which we want to make a deposit. In the header, there is an item named “Customer Group”. Customer Group is an analysis item in Cronus, so I can guess that the analysis items specified in Sales & Receivables Setup will be displayed here.
Before clicking Enter to auto-generate the number, click on the “…” to the right of “No.”.
The No. Series List page is displayed. “Bankdepost” is the default No. Series.
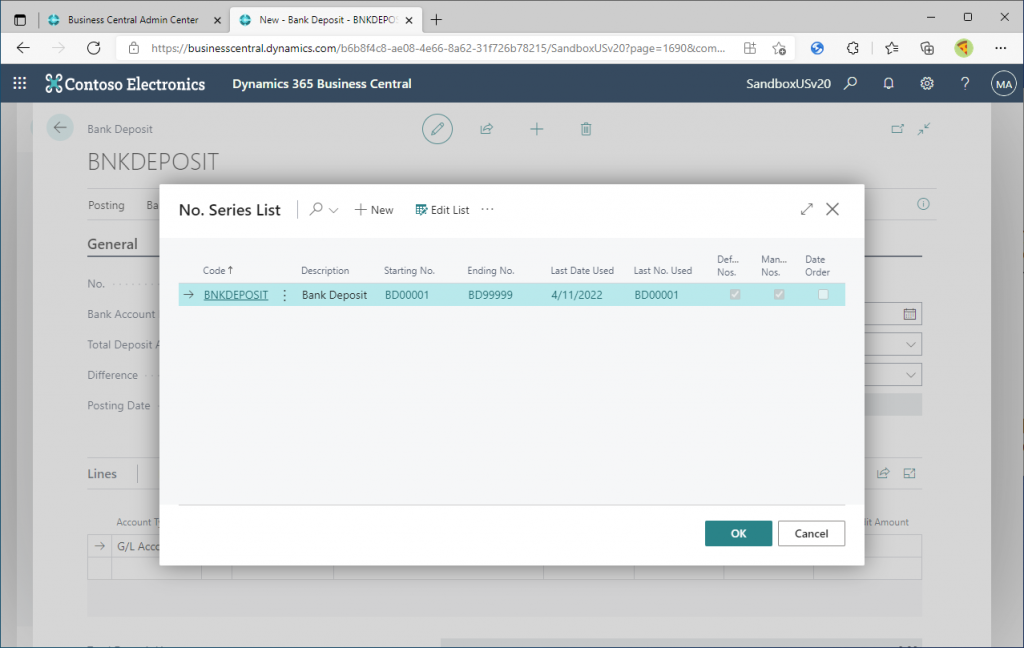
This “Bankdeposit” No. Series is defined in the Sales & Receivable Setup.

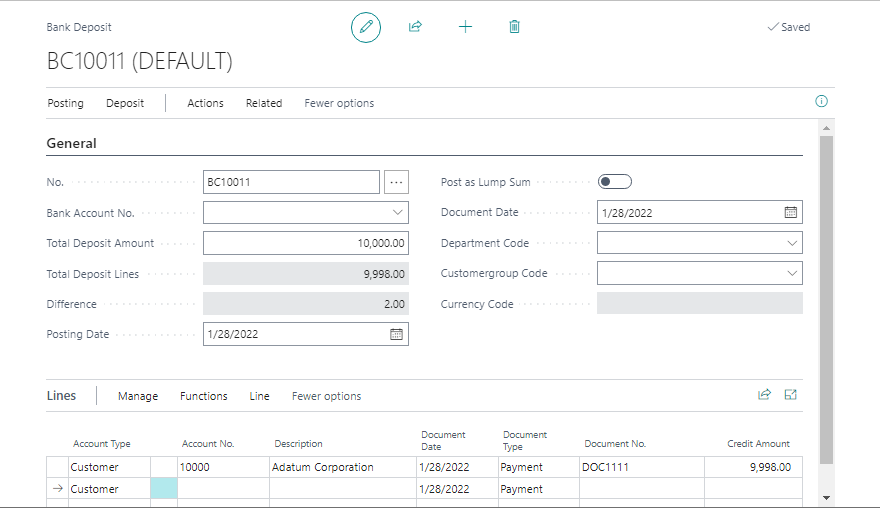
Go back to the Bank Deposit card page, press enter key to generate number. Specify the bank account number, deposit amount, and date.
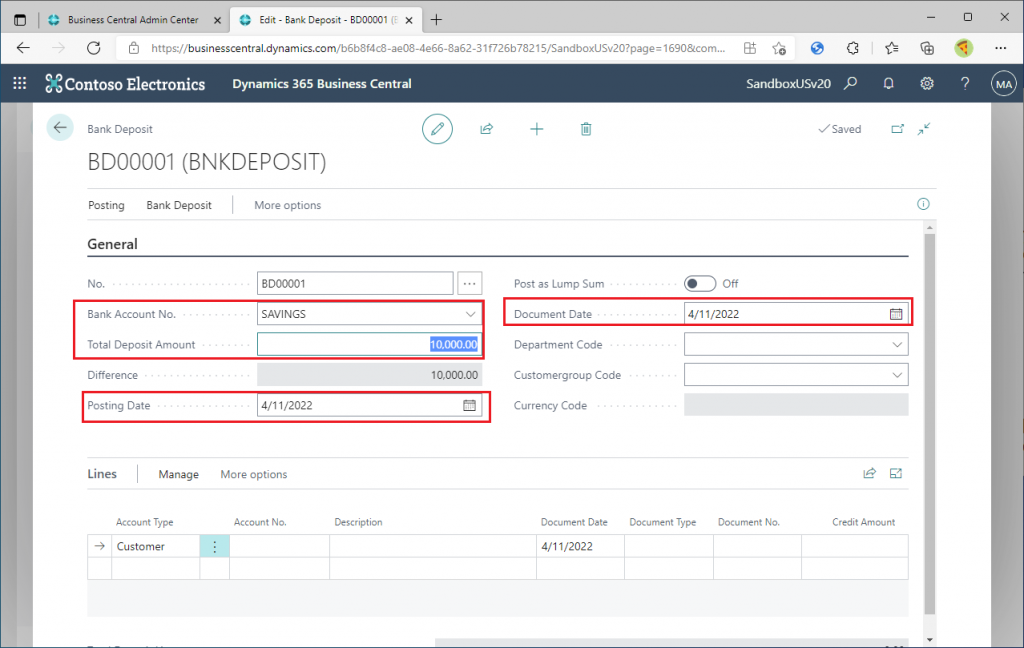
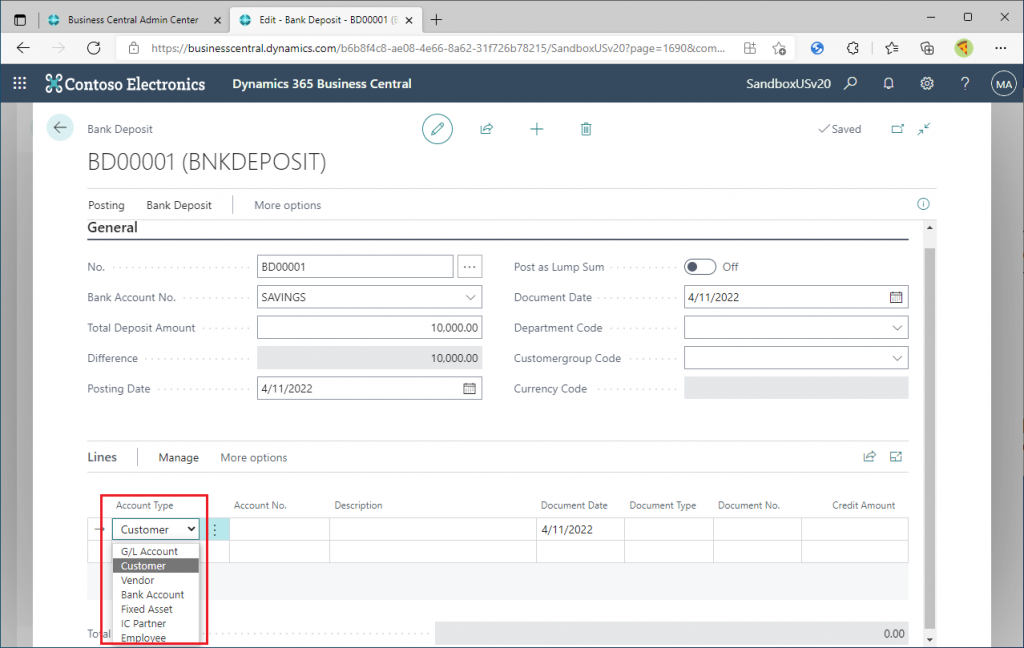
Enter on line items. Account Type pull-down list shows you the same Account Types as in the General Journal page, and it is very interesting that you can select Vendor, Employee, etc. in addition to Customer and G/L Account. In this case, let’s try selecting Customer. (I’ll try one of the other types later.)
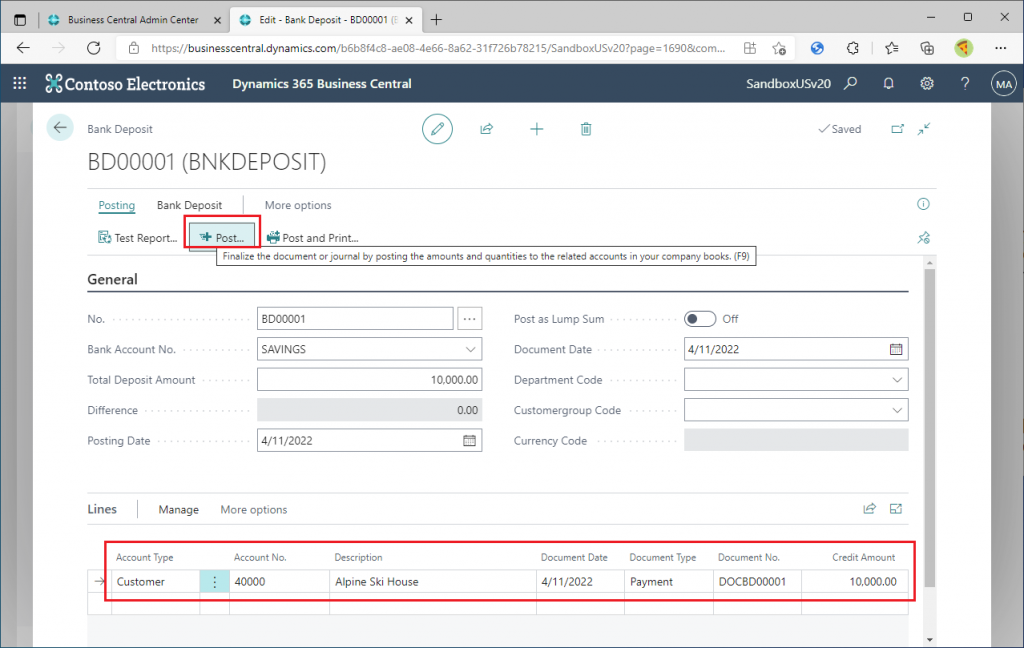
Enter customer number and credit amount of AR that was paid. And then post.
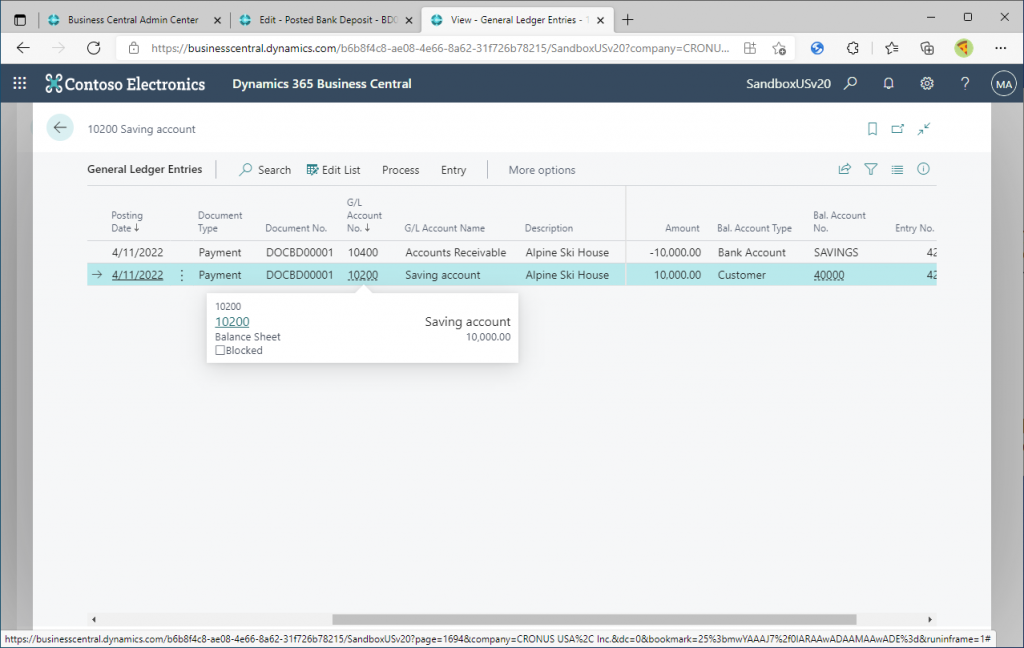
Check the posted general ledger entries. You can see that the entries are similar to those posted by General Journal or Cash Receipt Journal.
3. Apply Entries
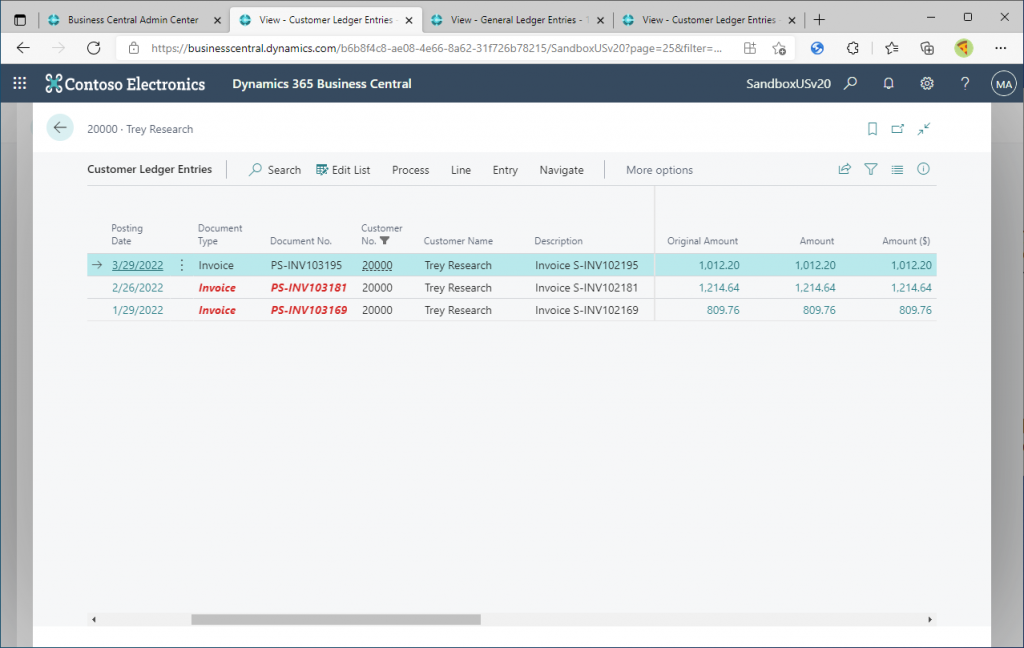
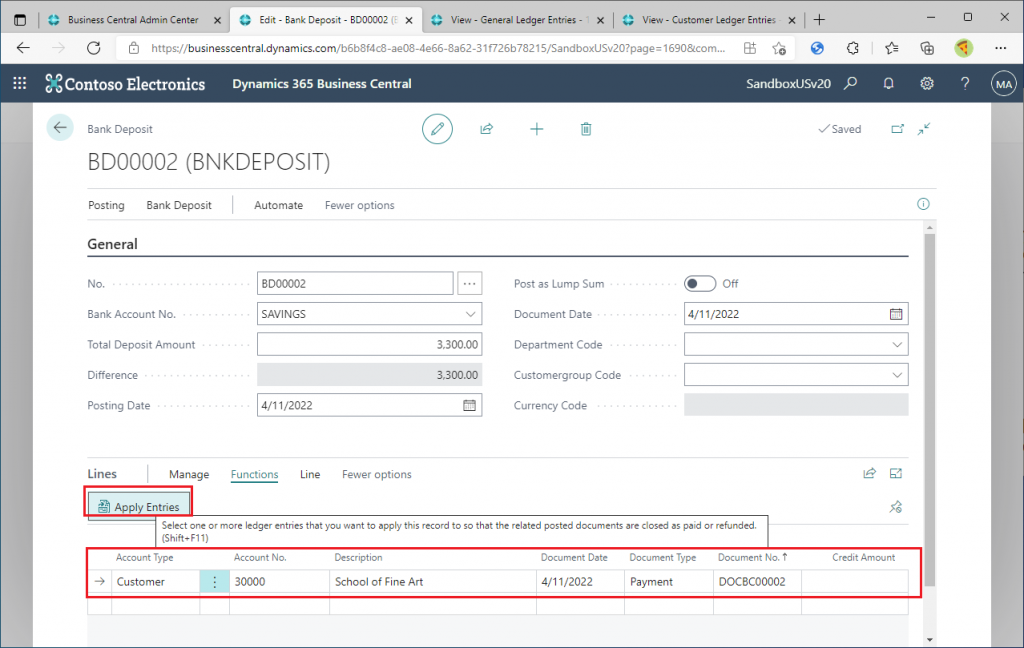
As you can imagine in actual business, you may want to apply the customer ledger entries when you are posting payments from your customers at the same time. And it is possible to do so. As a preparation, post several Sales Invoices and create a Customer Ledger Entries as follows. (Cronus provide this as sample date.)
Back to the Bank Deposit page. Enter the same data as before, and click Functions -> Apply Entries on the line.
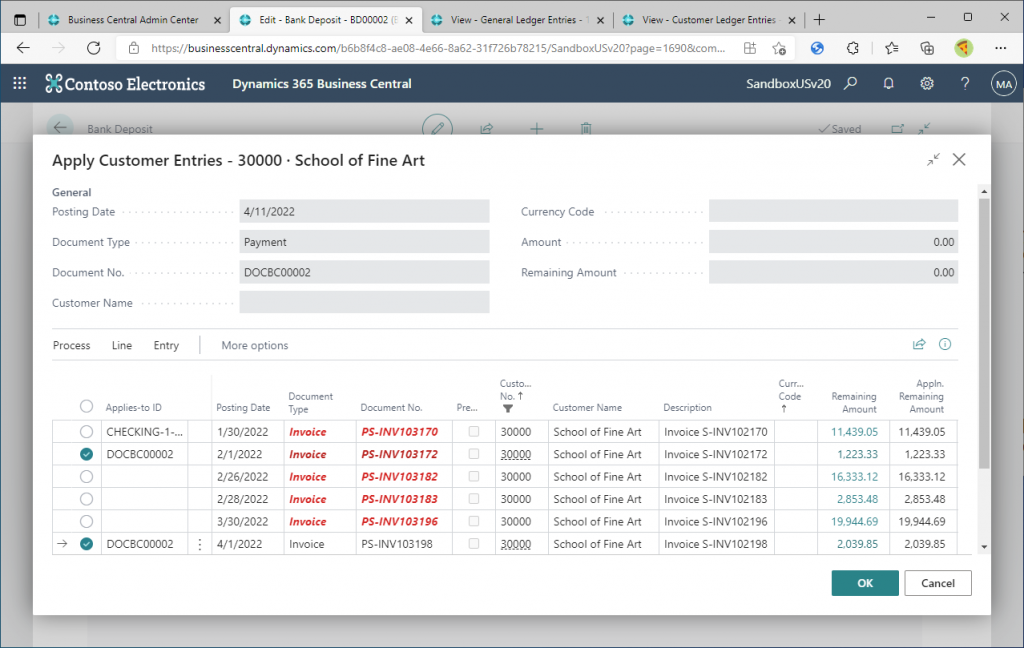
Then the following page will be displayed. This is the familiar page where you apply the customer ledger entries in general journal or cash receipt journal. Apply the entries as usual, and click OK.
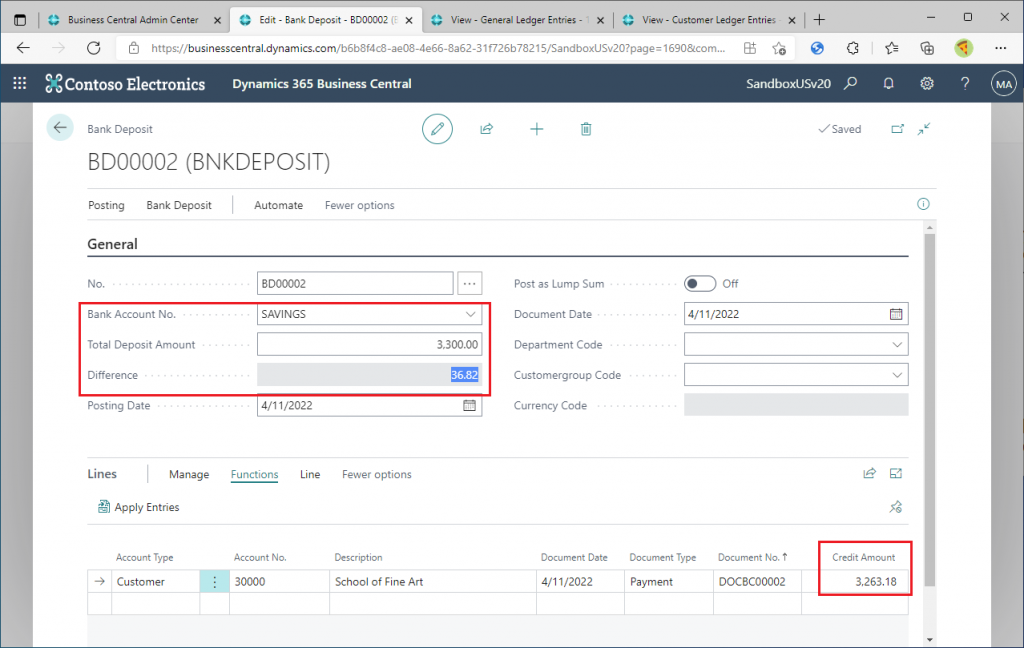
Then the total amount that you just applied in previous page is set to the Credit Amount in the line. If there is a difference between the amount in the header and the total of credit amount in line section, the difference will be displayed in the header.
4. Handling the difference
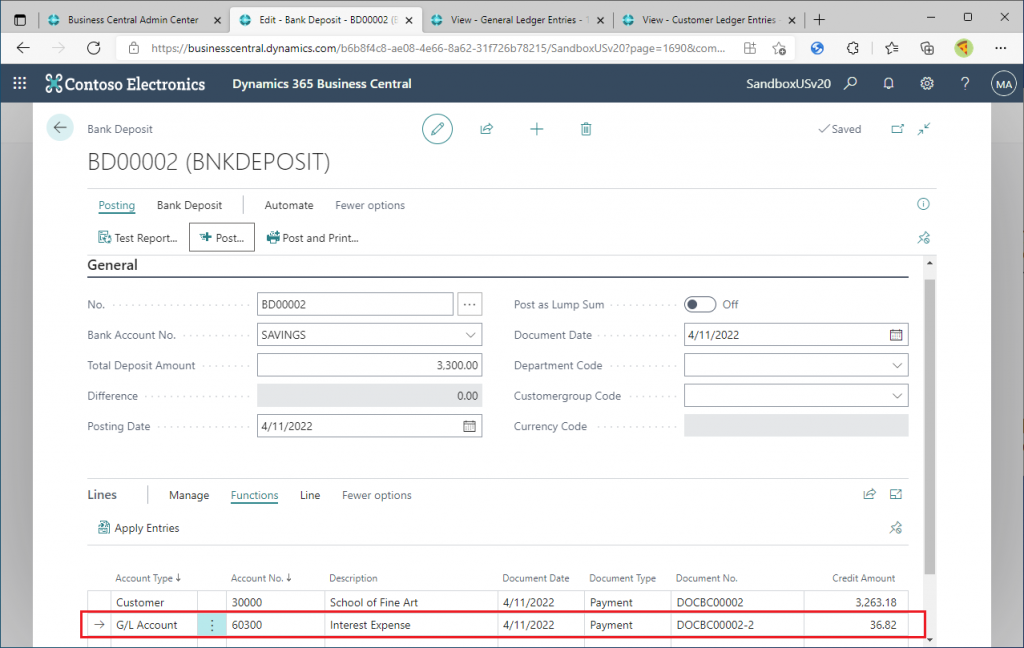
In actual business operations, there are often differences between the amount deposited in the bank account and the amount in the customer ledger entries. There are various reasons for the differences, and each reason should be posted with the appropriate G/L account. As same as with journal, the Bank Deposit card page allows you to specify the account to post the difference in the line section.(The accounts in the image below are not good examples… Please choose appropriate accounts by yourself.)
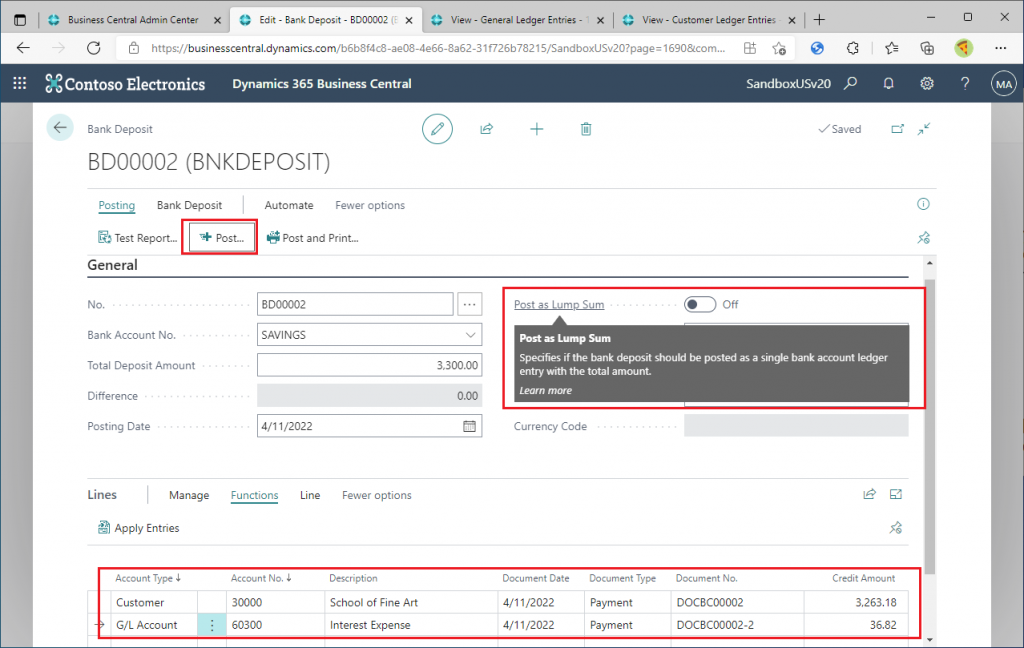
5. Number of Bank Ledger Entries
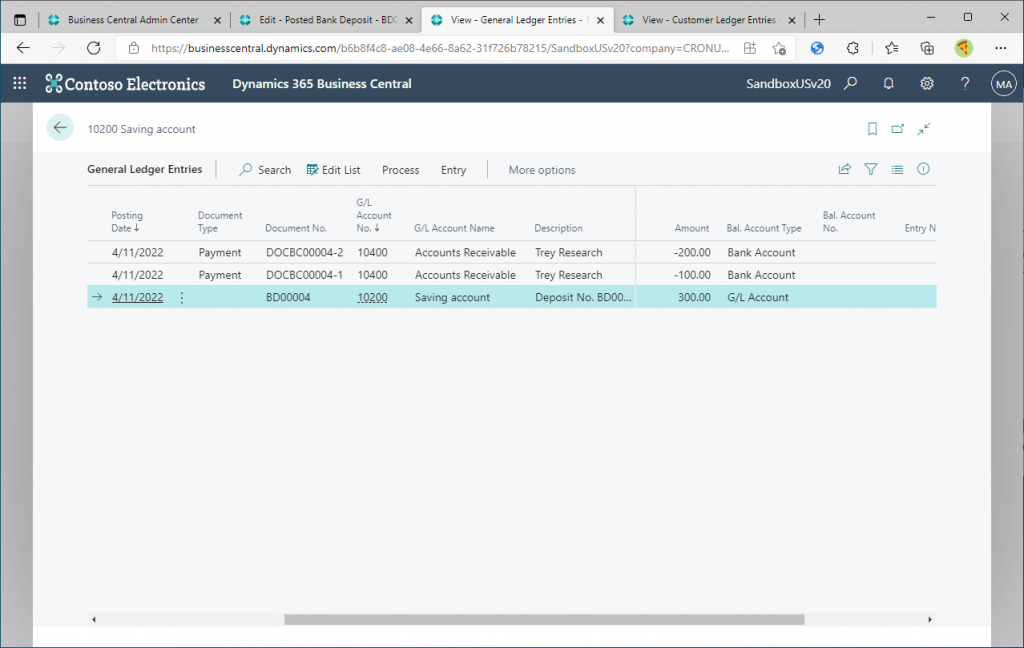
In the header, there is an field named “Post as Lump Sum”. It seems to be a switch that determines whether to post the number of bank account ledger for the lines or only one. Let’s create two lines with the Account Type of “Customer” and post the Bank Deposit.
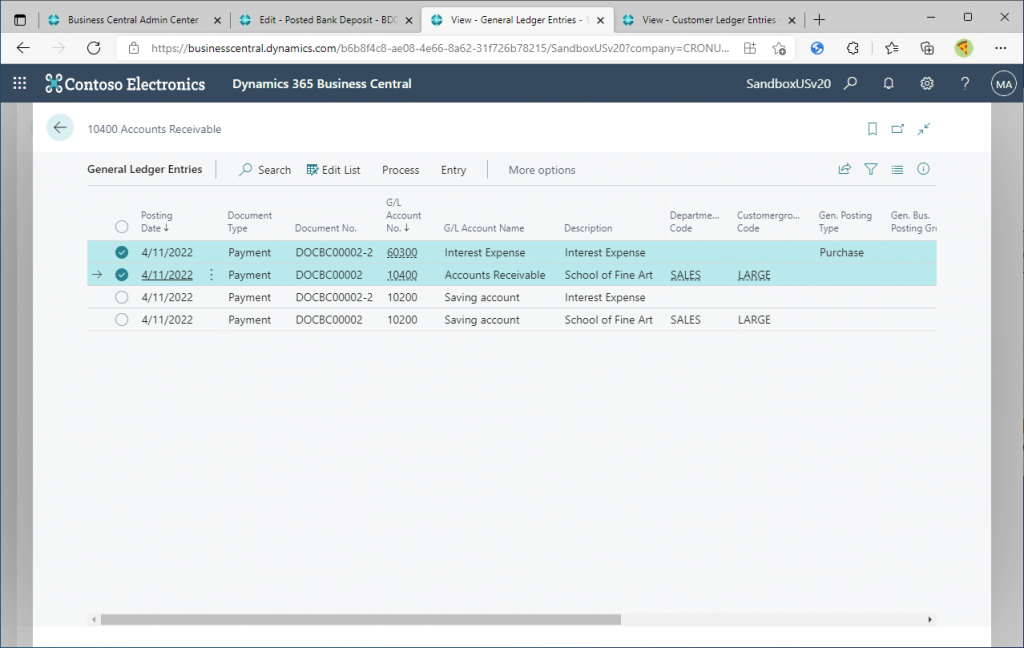
This is the posted general ledger entries. Two entries for bank account exist. You can see that each entries have Balance Account Type and Balance Account No. The result is the same as when we created two lines of account in the General Journal page, set Balance account for each line, and posted them.
Now turn the switch to On and post another Bank Deposit.
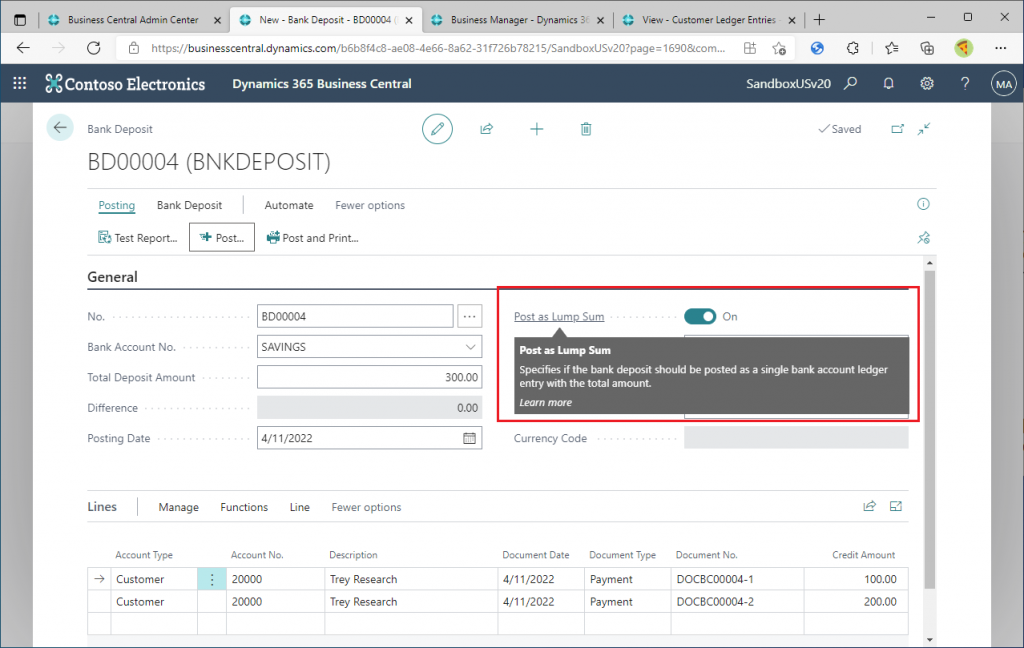
Only one general ledger entry related to the bank account was created. All the entries do not have Balance Account Type and Balance Account No. set. The result is the same as when we create three lines in the General Journal page without specifying the Balance Account, set the Account Type to Bank for one and Customer for the other two, and post them.
6. Account Type other than Customer
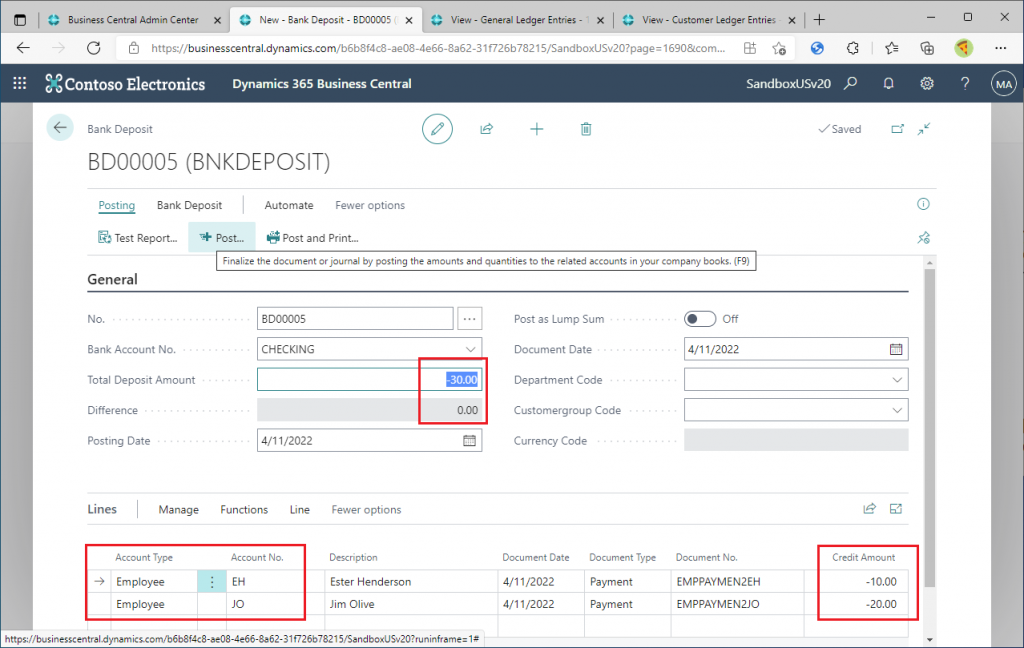
You can also specify an Account Type other than Customer in the line. Let’s try specifying Employee as an example. This assumes that you have paid the reimbursement to the employee. Since the deposit is decreasing, we will specify a negative amount in the header. The credit amount in the line should also be a negative amount.
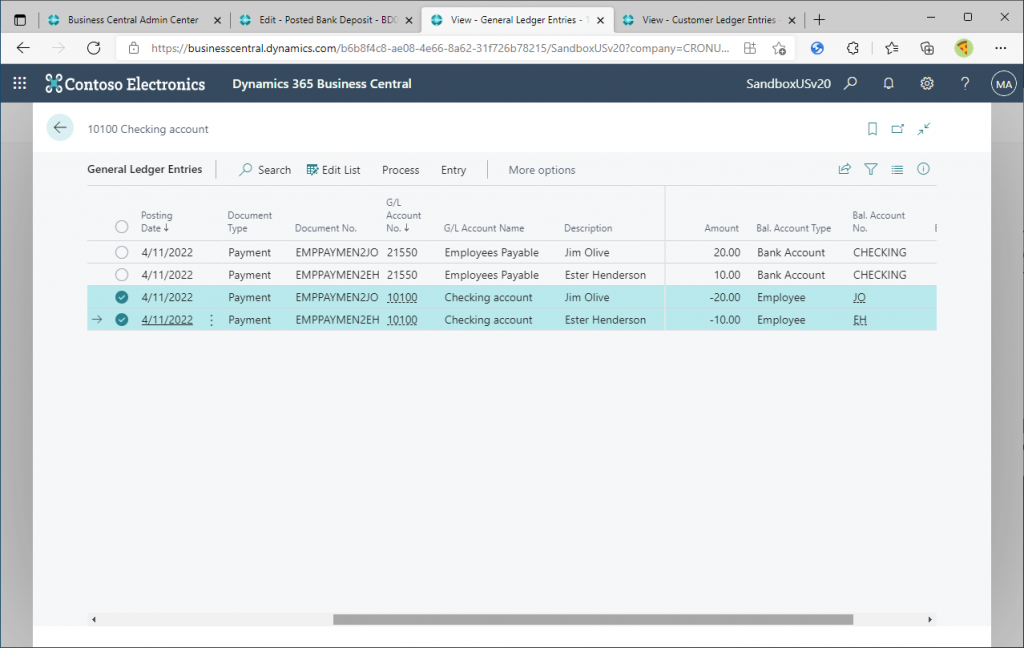
This is general ledger entries created by posted bank deposit above. At first glance, it looks fine, but…
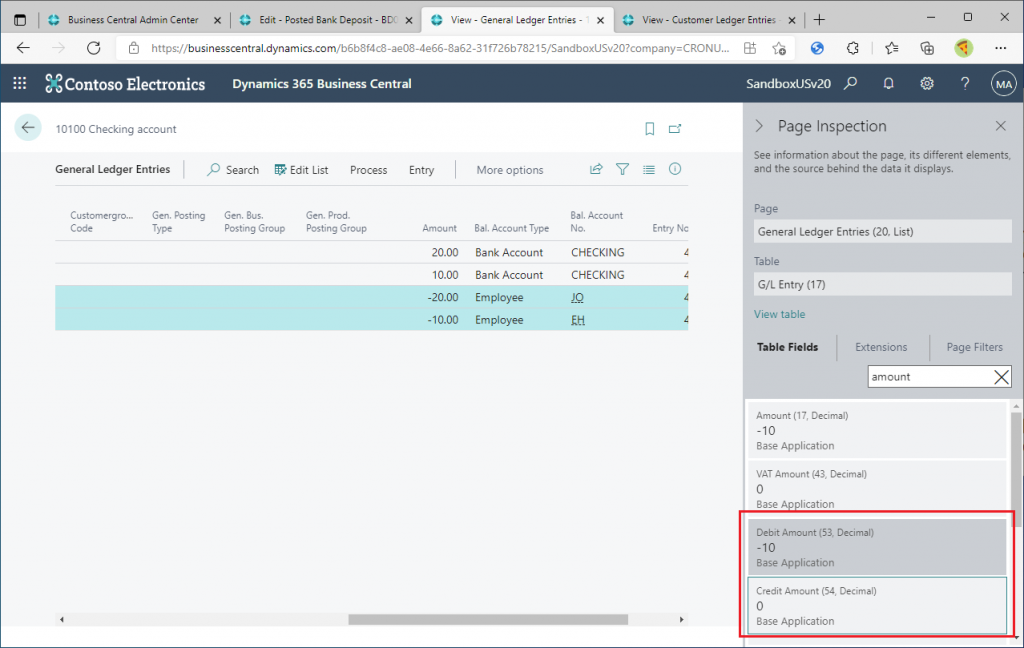
Use Ctrl+Alt+F1 to inspect the page, you will see that the Debit Amount of the deposit details is negative. In normal payments, the Credit Amount is positive. In other words, the information is being posted as if the deposit was cancelled. Whether or not this is acceptable is up to the customer. Personally, I think Bank Deposit is better used for posting deposits such as accounts receivable. (I’m hoping that a page/feature for payments will be available In the future!)
7. Relationship with and restrictions on journal batches
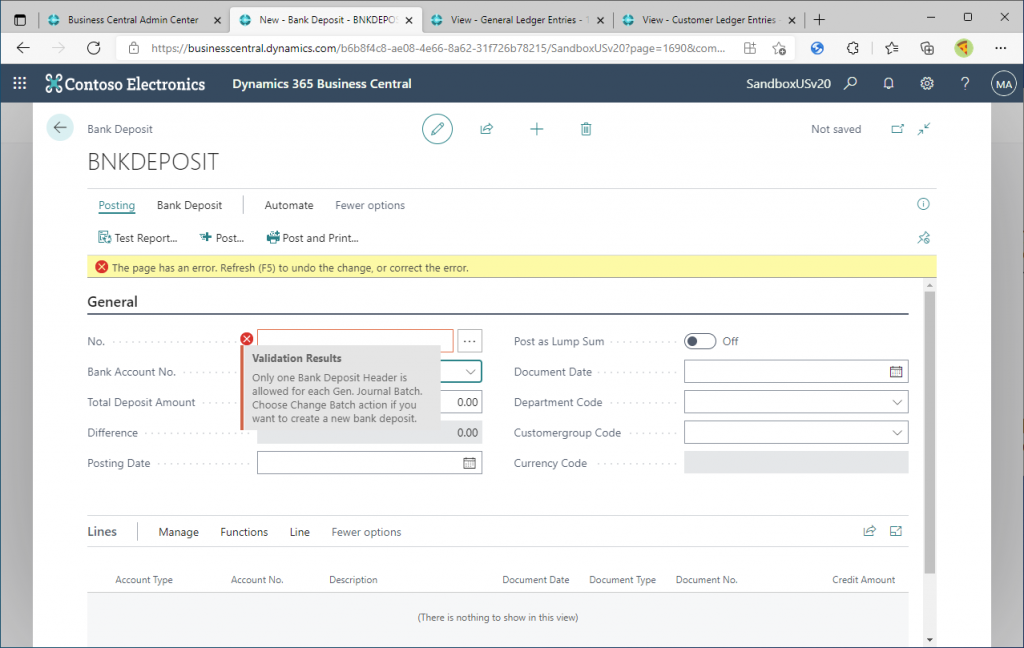
At the end of this blog post, I will explain how it works with journal batches. Create one Bank Deposit without posting, and then create another new Bank Deposit record.
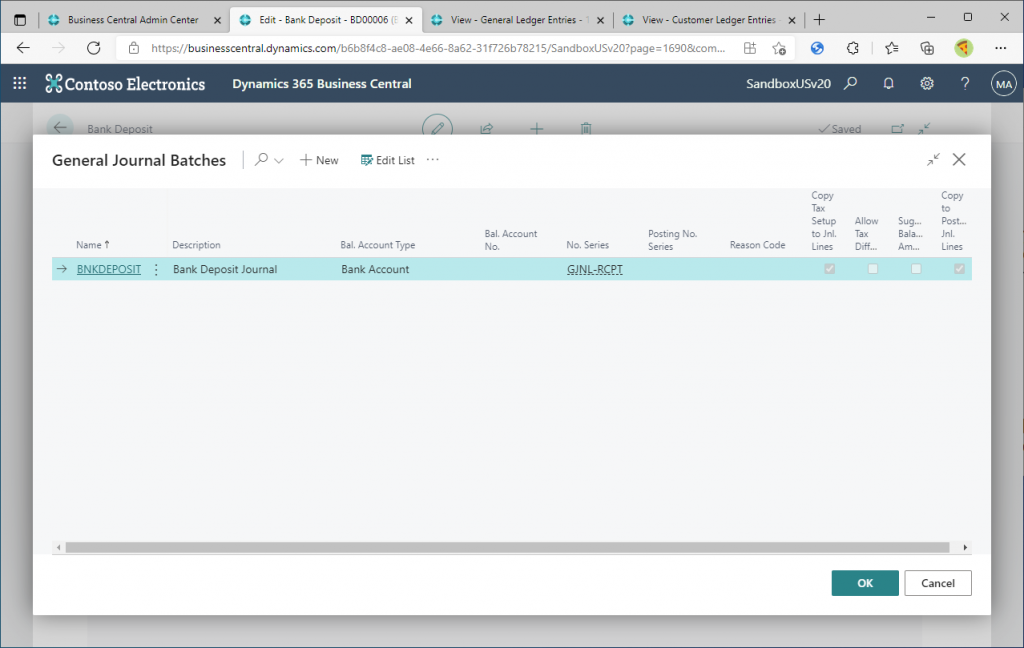
When I pressed Enter on the new card page, the document number is not automatically assigned and General Journal Batch page will be shown. Click OK to choose the default batch name “BANKDEPOSIT”.
Then the error message will displayed. It says that each Bank Deposit data(=header) is associated with one journal batch, and multiple Bank Deposit data are not allowed to have same journal batch. This means that if you want to create multiple bank deposit data (=header) , you need to either create multiple batches. Or you need to finish posting a bank deposit data before creating a new bank deposit data. This specification is a little difficult to use, but specifications are specifications, so you need to use it with this limitation in mind.
The batches can be switched from the following menu.
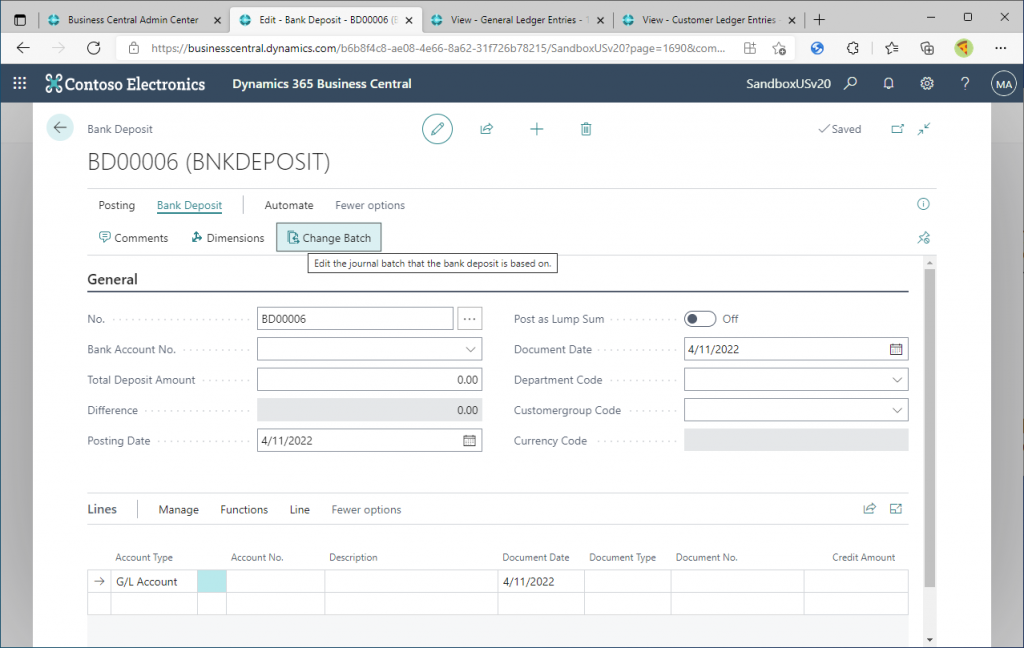
In the default state of Cronus, there is one General Journal Batch, but if you are creating multiple batches for each person in charge (or multiple batches for each purpose), you can select it here.
8. Summary
There are certainly points where the functionality is lacking to that of sales slips and purchase slips. For example, the processing of payment cases as mentioned above, and the lack of an approval workflow feature. However, I think it is very significant to evolve from the world of journal books to the world of slip. I hope to see many more features added in the future, and I would like to use it actively.
I hope this will helps you.
Thanks for your reading.