
In this post, I will explain some useful methods and hidden functions that are not well known about D365BC’s job processing. Job WIP(Work in Process) is quite complex, and to understand it properly, you need to repeat the steady work of posting various actual cost data, executing WIP calculations, and checking the result data of WIP.
If you try to do this, you would create multiple jobs, set different WIP methods for each job, post the same actual cost data to each job, and execute the WIP calculation. If you make a mistake in the posting date during the WIP calculation, you might have the experience of re-creating a new job, throwing away the WIP-calculated job. Then, many experimental jobs will be created as shown in this image.
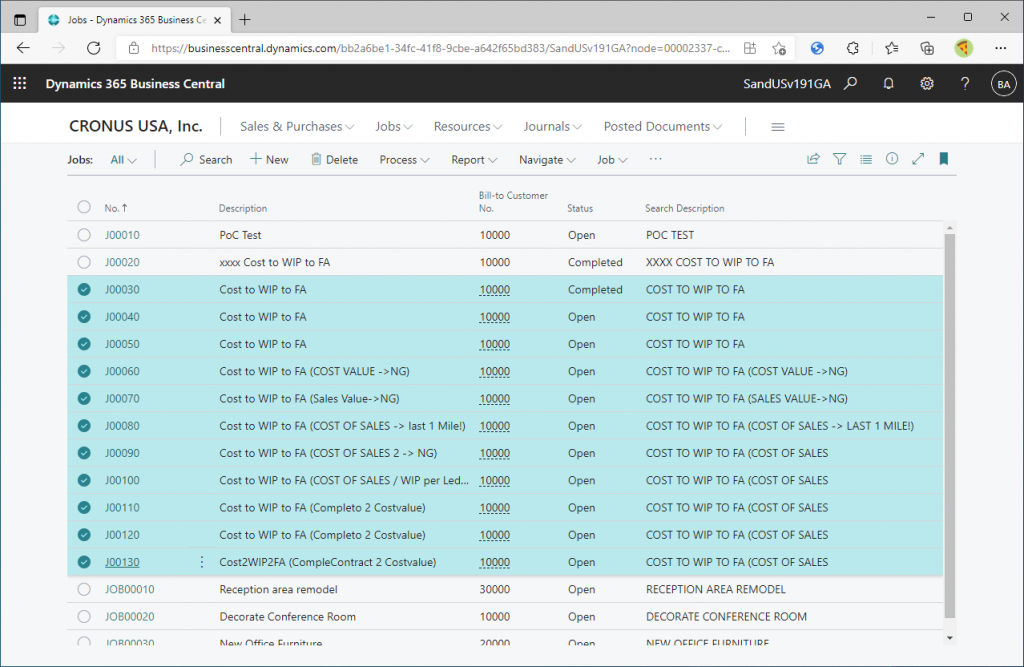
In fact, you don’t need to create so many jobs, which is the subject of this post.
– You can run the WIP calculation from the beginning again and again by changing the WIP Method in one job. In other words, you can compare the results of different WIP Methods with the same data.
– If you *design* the job task line and actual cost data well, you can use different WIP methods simultaneously in one job.
Let’s take a look at how this can be done.
Preparation
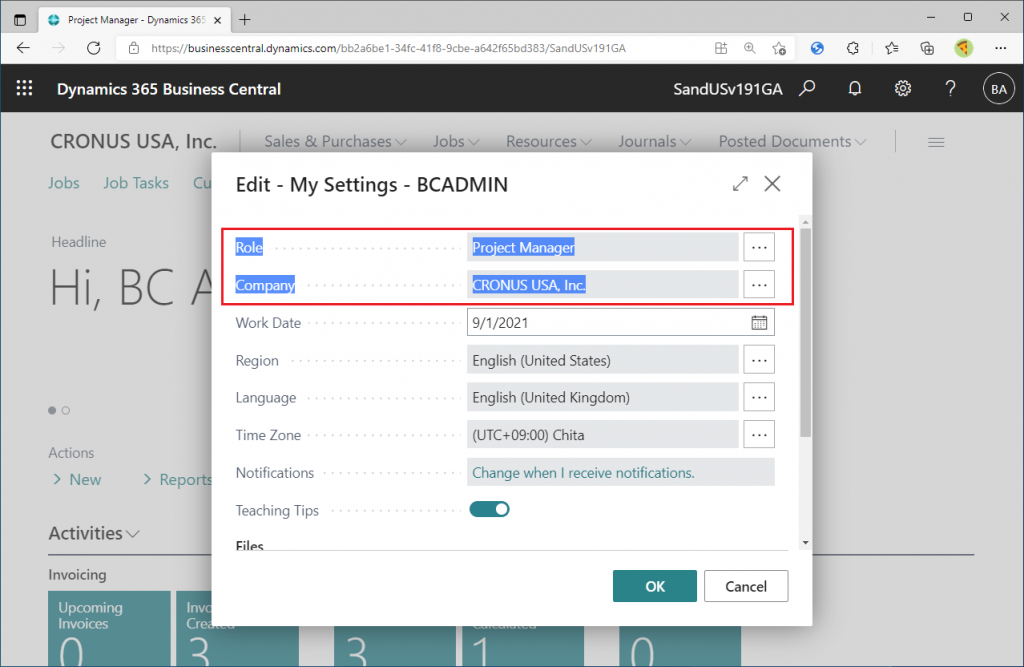
I will use Cronus, which is a standard DB proviced by Microsoft. It is convenient to change the role center in Project Manager.
Create one job for the experiment. Create two job task lines.
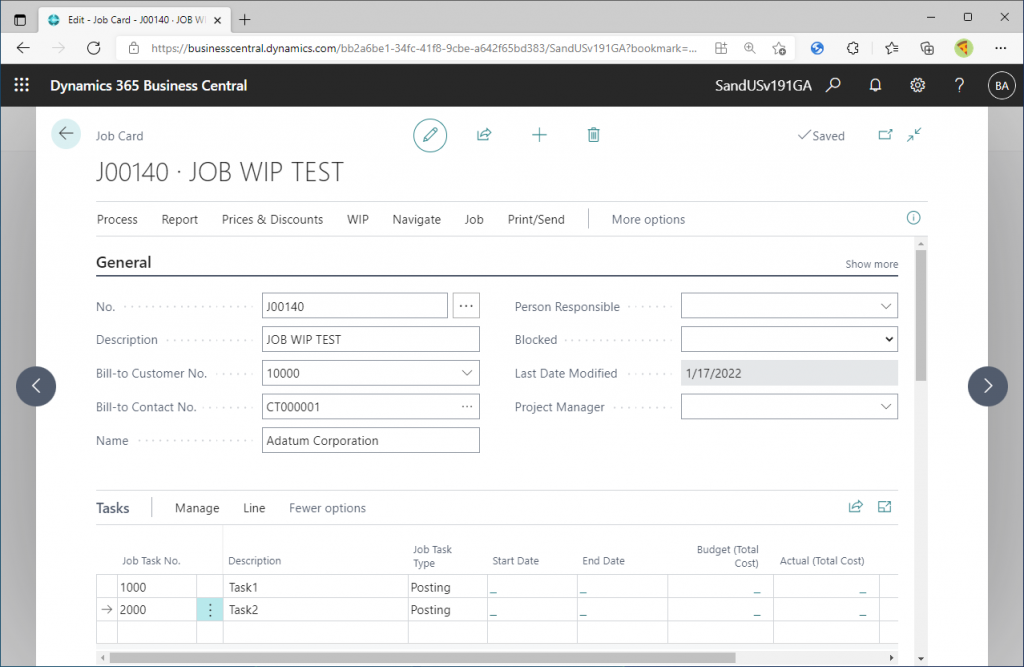
Set the status to ‘Open’. Set the Job Posting Group to ‘Setting Up’, which is provided by default. Set the WIP Method to ‘Completed Contract’.

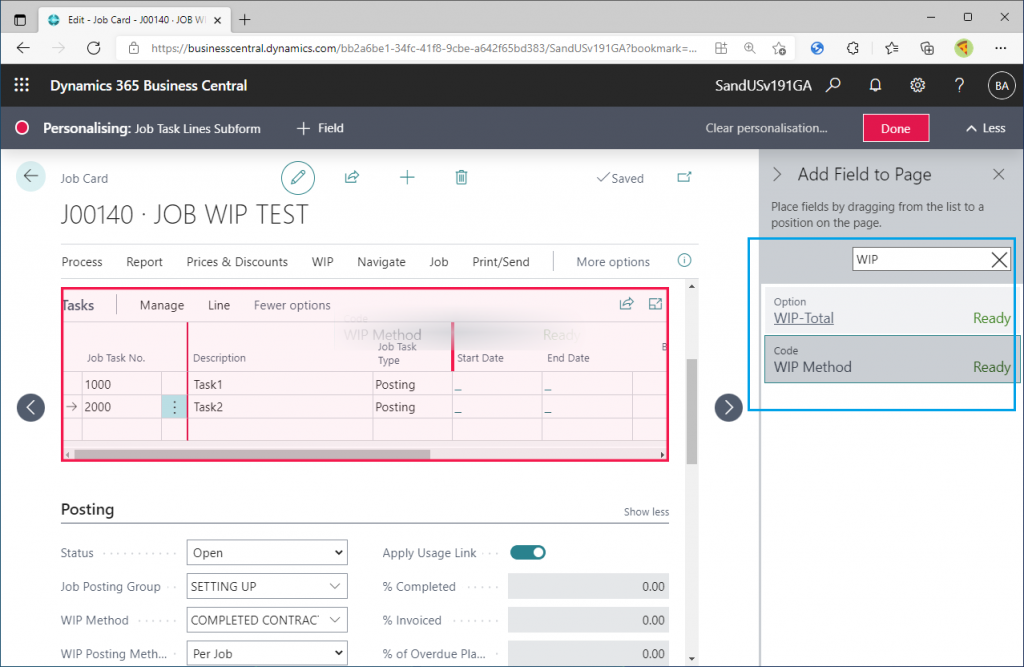
Tips & Trick 1: Add WIP Method and WIP Total Column to the Job Task Line subform
Using the Personalize function, you can add WIP Method and WIP Total to the Job Task Line subform. Many people think that WIP Method is only for the Job Card (Header) item, but actually the Job Task Line also holds WIP Method. WIP Total column will be explained later.
WIP Method and WIP-Total on Job Task line subform is blank by default.
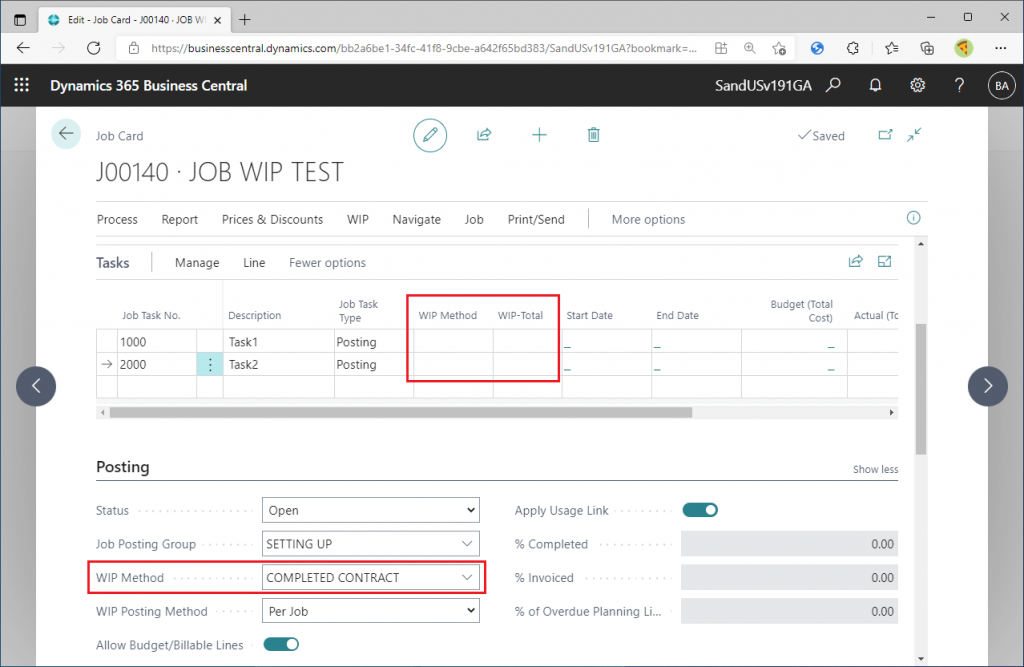
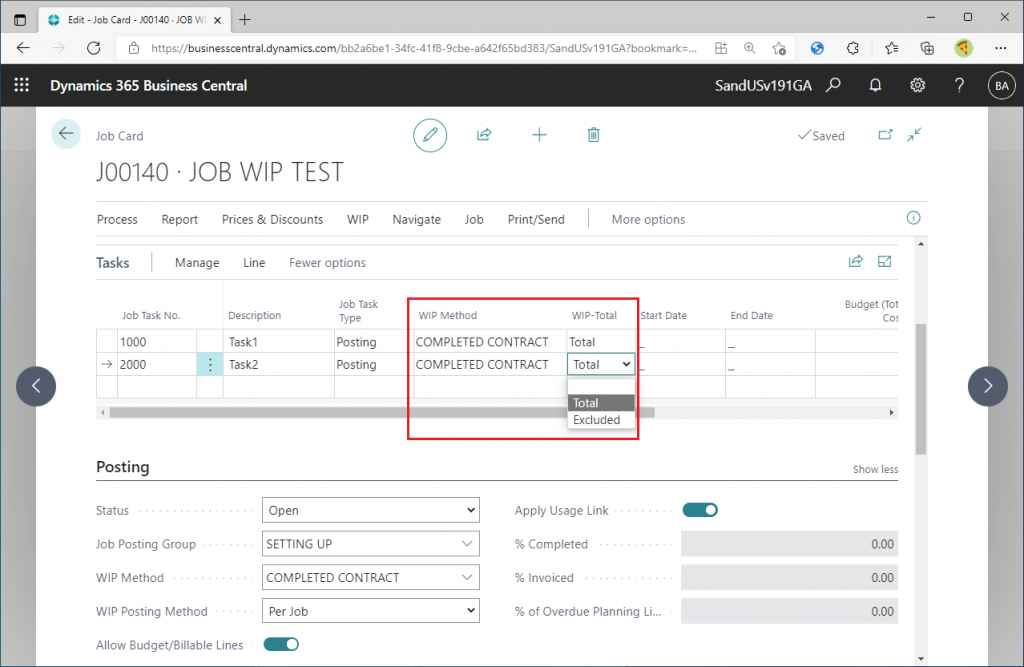
You can change the value of WIP Method if you modify the value of WIP Total to ‘Total’.
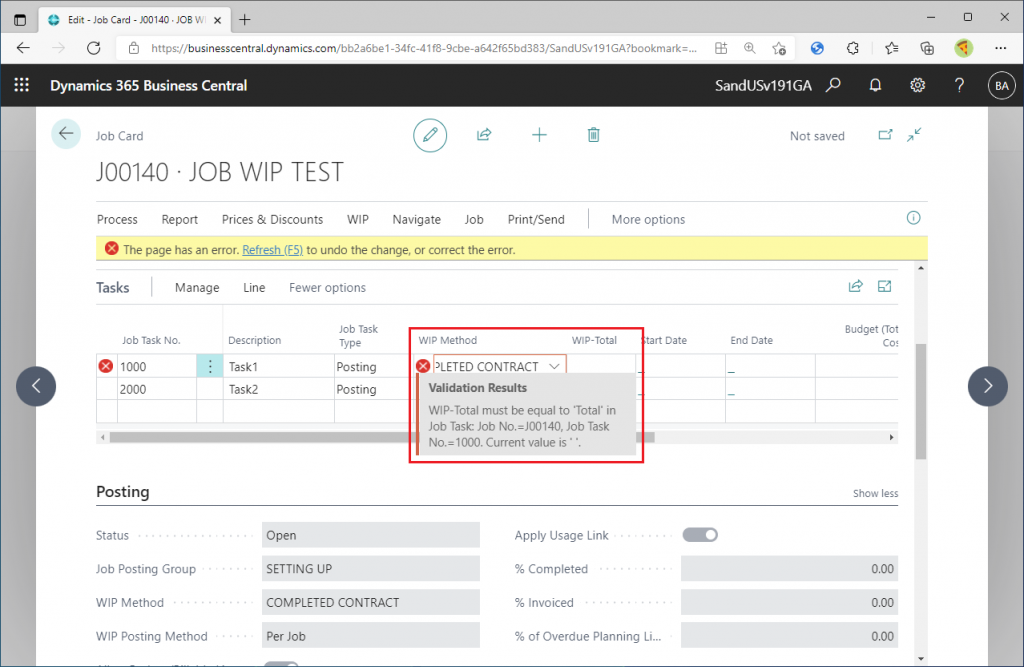
By the way, if you try to change the WIP Method first while the WIP Total is blank, you will get the following error. So, you need to change the WIP Total first.
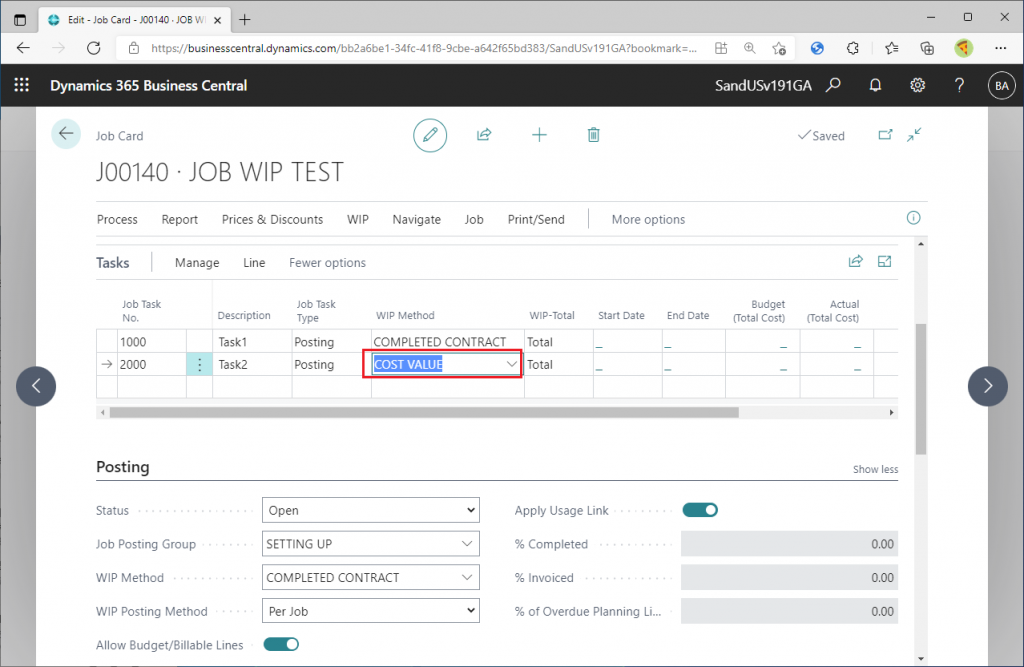
Tips & Trick 2: Different values can be specified for WIP Method in the each job task line.
It is possible to assign different WIP Method, for example, ‘Completed Contract’ for the first job task line and ‘Cost Value’ for the second job task line as shown here.
Note that the WIP Method is blank by default. In the case of blank, the value defined at the header level of the job card (‘Completed Contract’ in this case) is applied to the work-in-progress calculation.
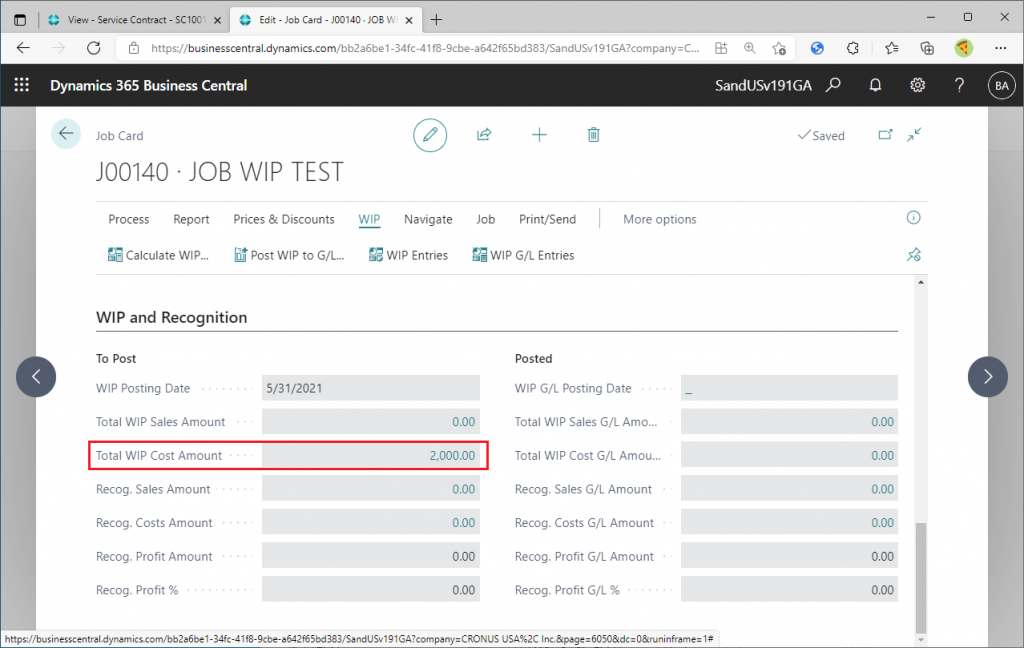
How will the WIP calculation be done when multiple job task lines with different WIP Method? Let’s execute WIP calculation after posting 1,000 and 2,000 actual costs to those job task lines.
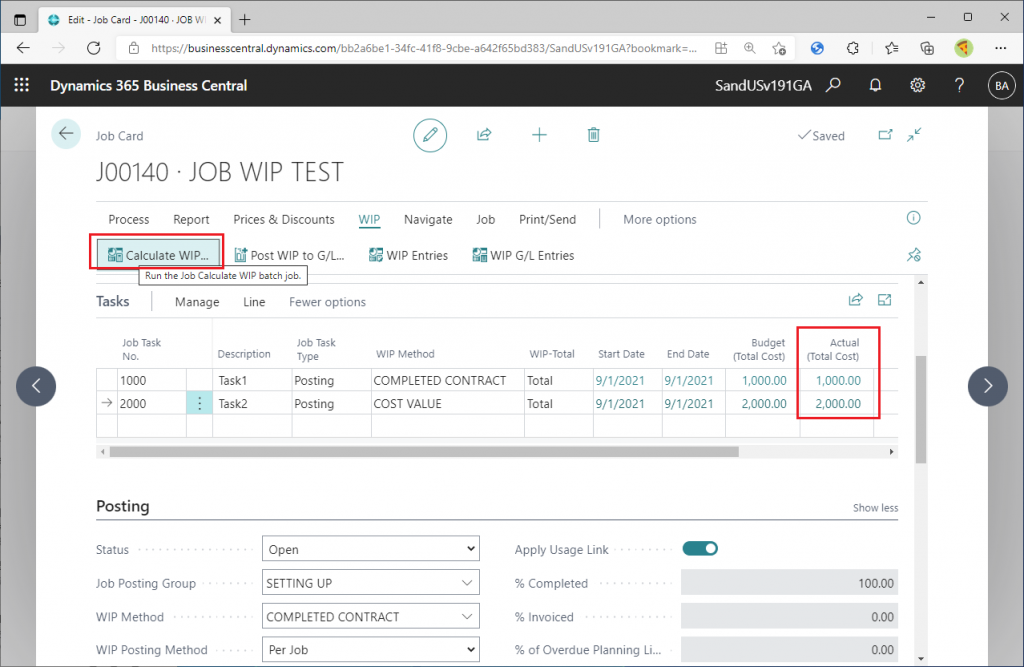
Thus, the WIP Cost (=Current Assets) is estimated to be 1,000 and the Recog. Cost (=Cost of Sales) is estimated to be 2,000. In this way, the WIP calculation is executed according to the WIP Method specified for each job task. Let’s post to G/L.
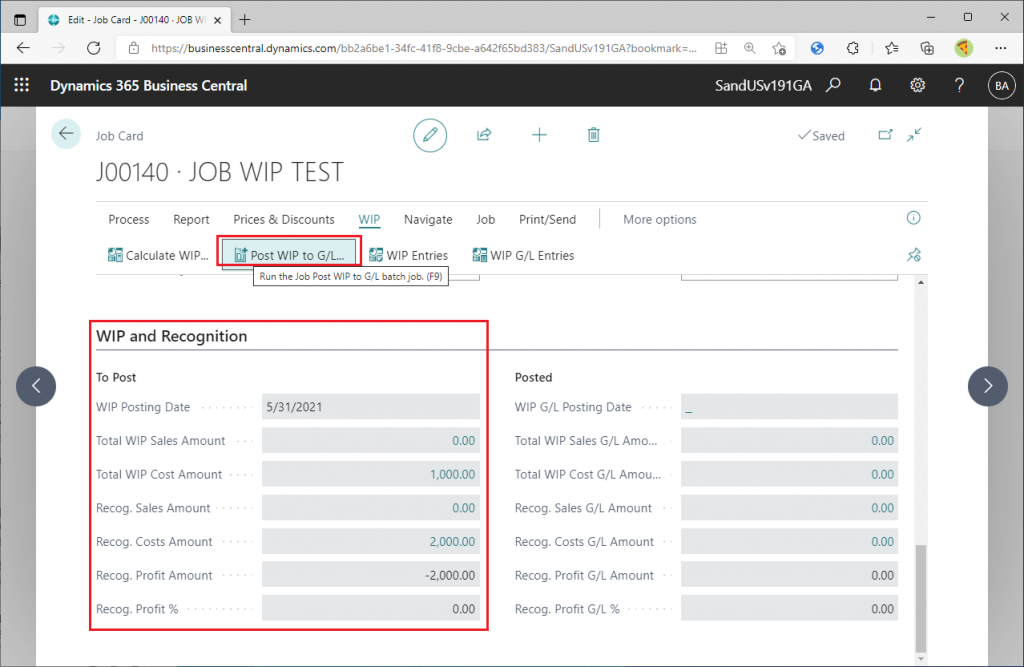
The values on the left side (To Post) will be directly transferred to the right side (Posted).
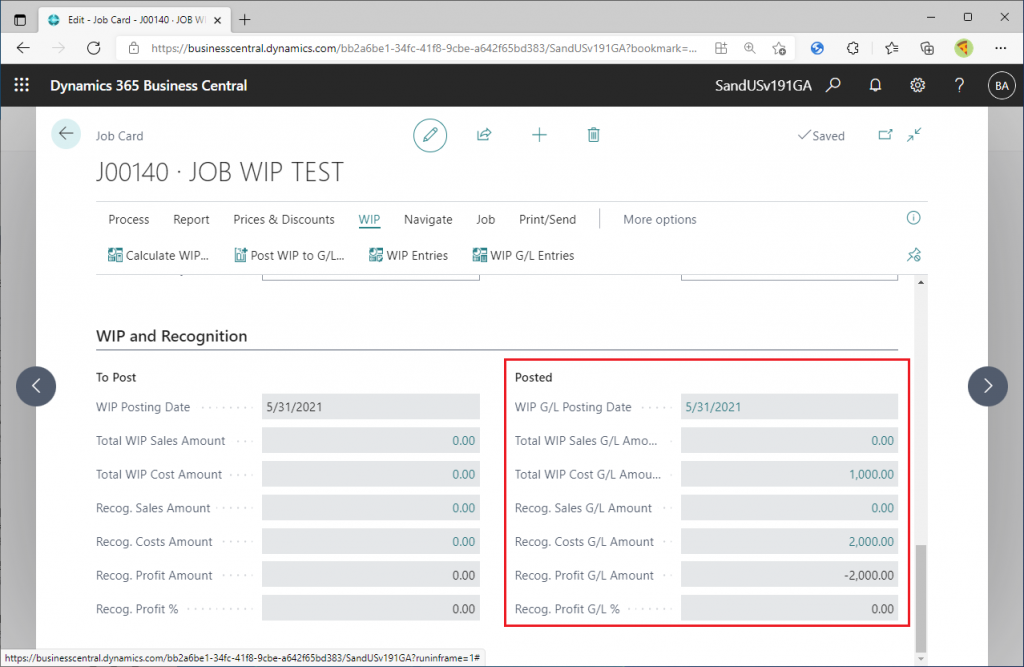
Let’s check the General Ledger that has just been created. The General Ledger associated with the largest G/L Register number looks like this. The actual cost of Job Task 1 (Completed Contract) is posted as JOB WIP (Work in Process). You can see that the actual cost of Job Task 2 (Cost Value) is posted as JOB WIP (Work in Process), and then immediately converted to Job Cost (Completed Cost). It is easy to identify when you set the actual cost amount of the two job tasks to different values.
Tips & Trick 3: *Reset* WIP calculation by using the reverse function.
As written at the beginning of this blog post, if the actual cost data is the same scenario, it is possible to change the work-in-progress method (WIP Method) of the job and re-execute the WIP calculation. To do so, you need to *reset* the work-in-process calculation of the job. Even if I say *reset*, we cannot delete the G/L entries that have already been posted, and we cannot change the WIP method and execute WIP calculate with a different WIP method while still having the amount of the WIP calculation result as shown in the figure below.
Therefore, *reset* is defined as the following.
(a) The reversing G/L entries will be posted, and the balance of the WIP related accounts in the General Ledger for this job will be zero.
(b) All the amounts in the WIP and Recognition section on this job card will be zero.
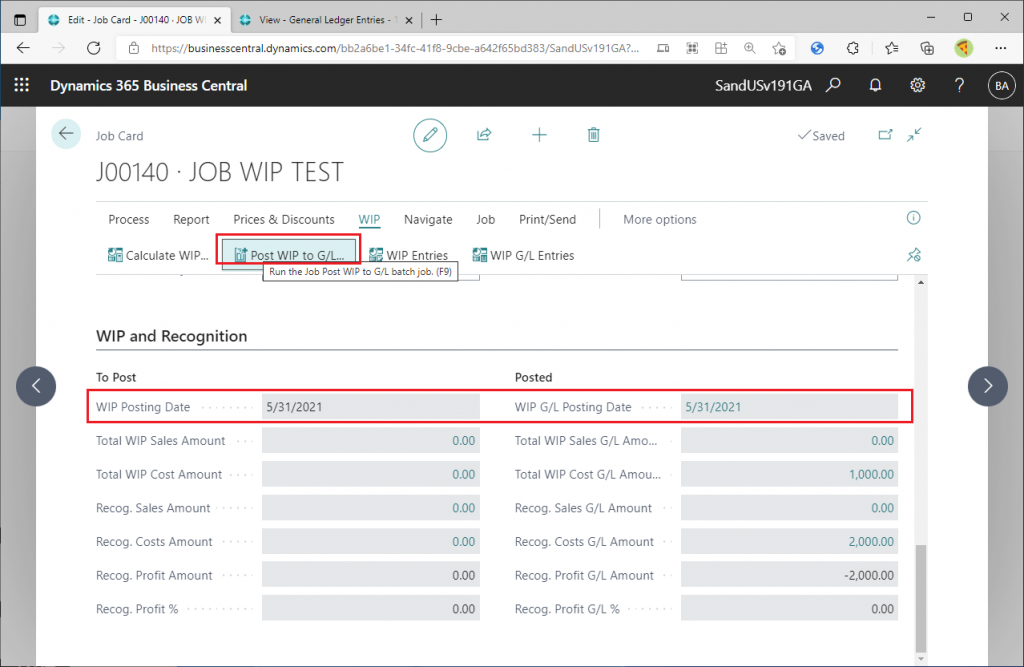
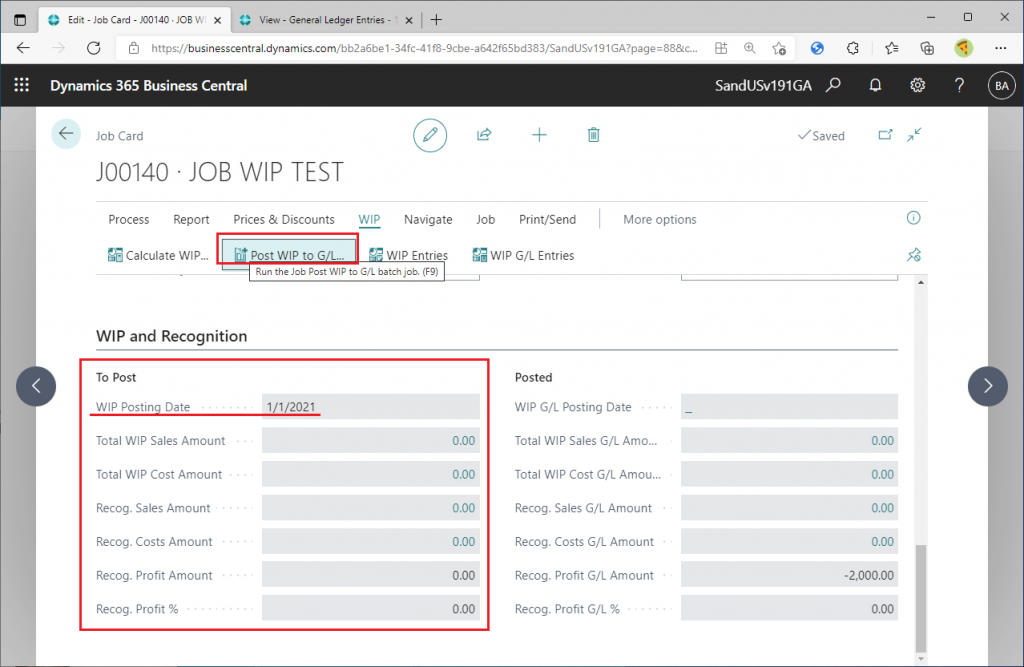
First, check the last date that the work-in-process was calculated in the job card, which in this case is May 31, 2021. Click on the Post WIP to G/L button.
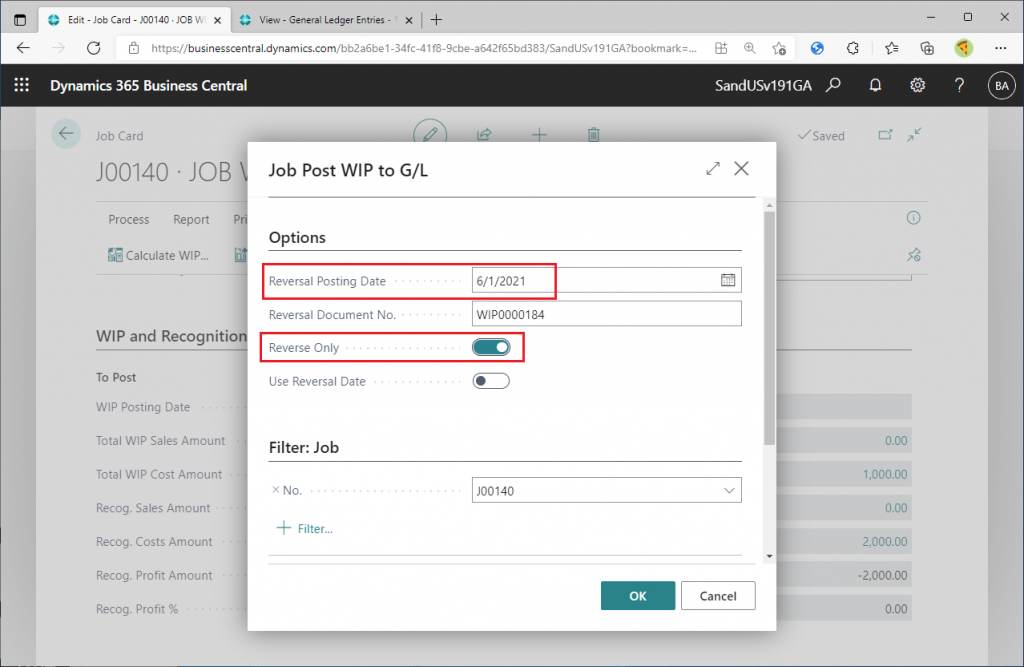
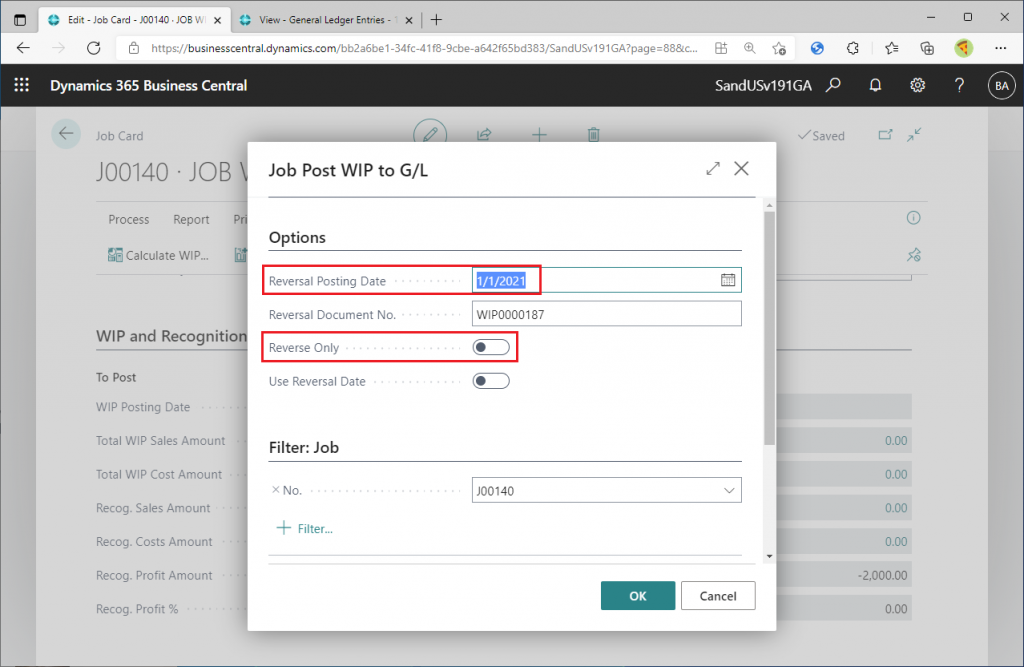
The key point here is to turn on “Reverse Only”. This will post the canceling G/L entries for the last posted WIP Calculation results. Set the Reversal Posting Date to the day after the last posting date (in this case, June 1, 2021). It is also possible to use the same posting date as the last time the WIP calculation was posted (May 31, 2021), but I intentionally shifted the date by one day to make it easier to identify the difference when looking at the journal later.
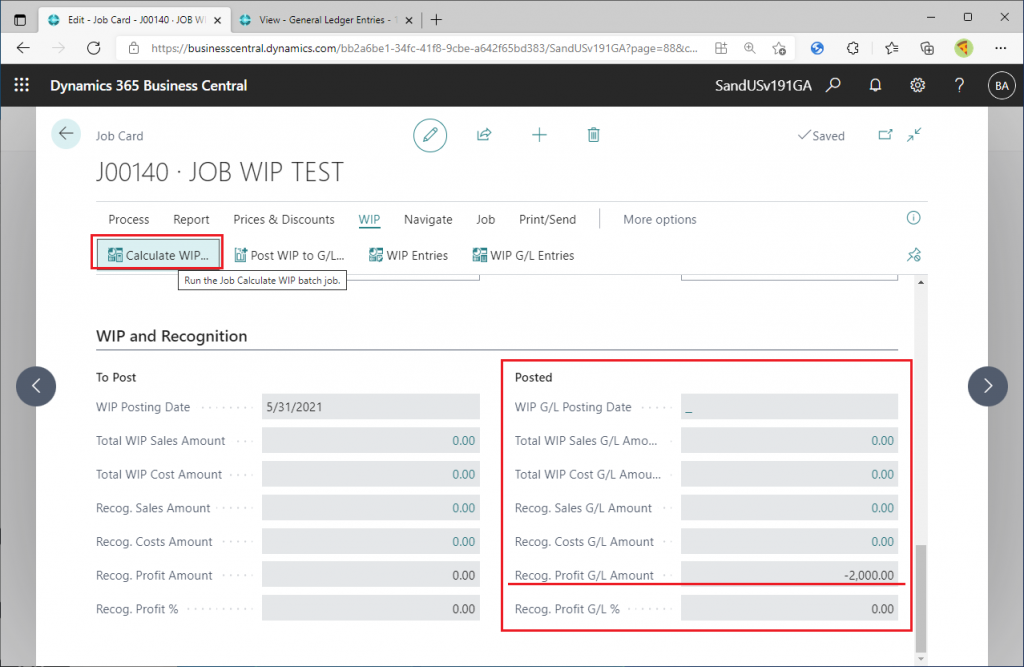
This is the screenshot of the job card after the successful posting to G/L. Only the Recog Profit G/L Amout is left -2,000. I can’t find a good explanation for this. But I will delete it from now on because it is disturbing to *reset* WIP calculation. Click “Calculate WIP” again.
Now, specify a date for the Posting Date that is earlier than the start of the project. In other words, specify a date that is earlier than the earliest posting date of the actual cost that are posted to the job ledger for this job. In other words, specify a date that is sufficiently far in the past that nothing will be posted when the work-in-progress calculation is run.
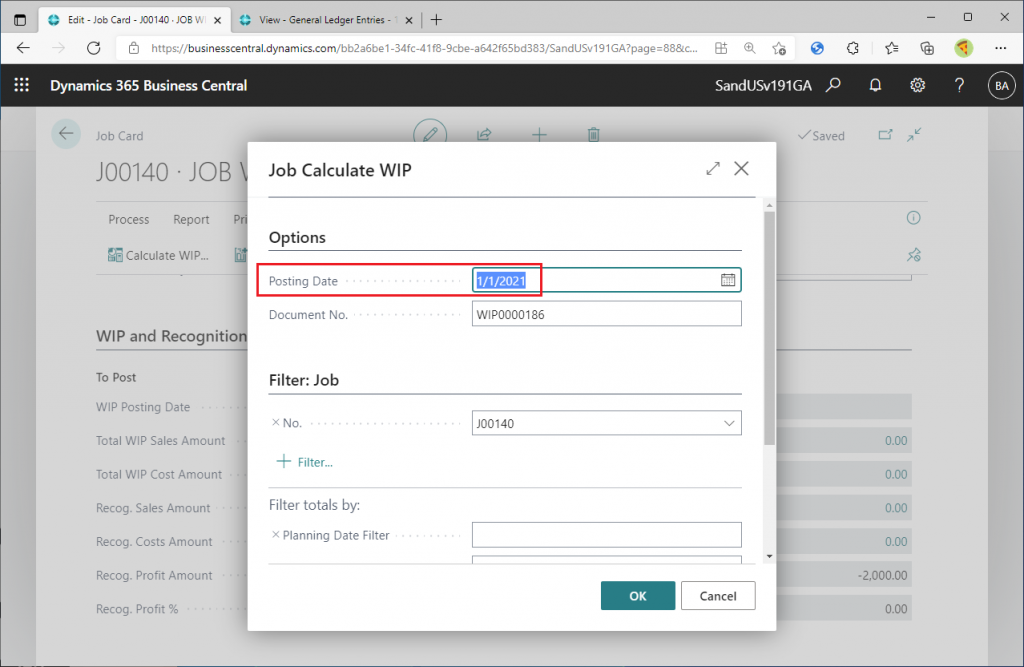
The results of the WIP calculation are now all zero. Continue to post the WIP to G/L entries.
Set the Reversal Posting Date to the same past date as Calculate WIP. Set “Reverse Only” to Off here. This is important.
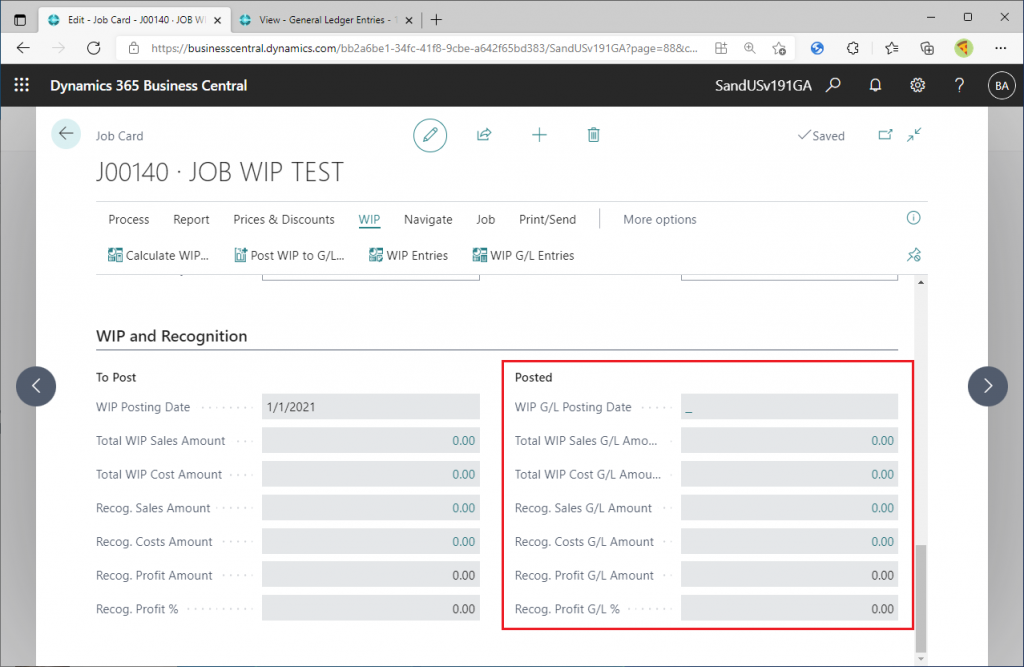
You can see that all Posted amounts are now zero. Now “(b) All the amounts in the WIP and Recognition section on this job card will be zero.” has been achieved.
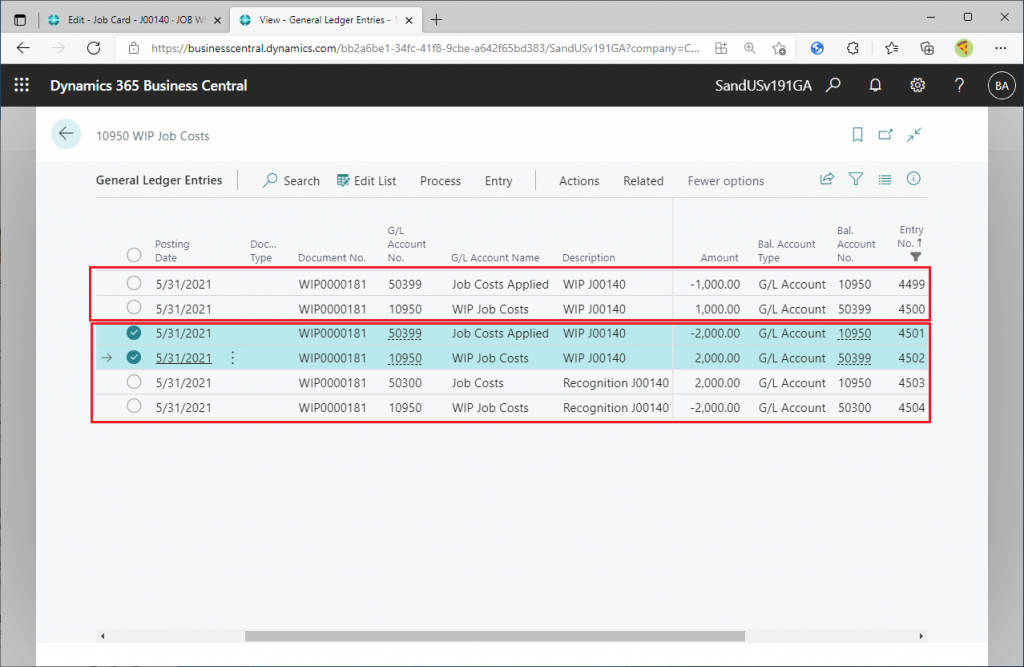
Check the G/L Entries (Accounting Ledger Entries). Check the G/L entries associated with the last registration number (in this case No.=917) and the previous registration number (No.=916).
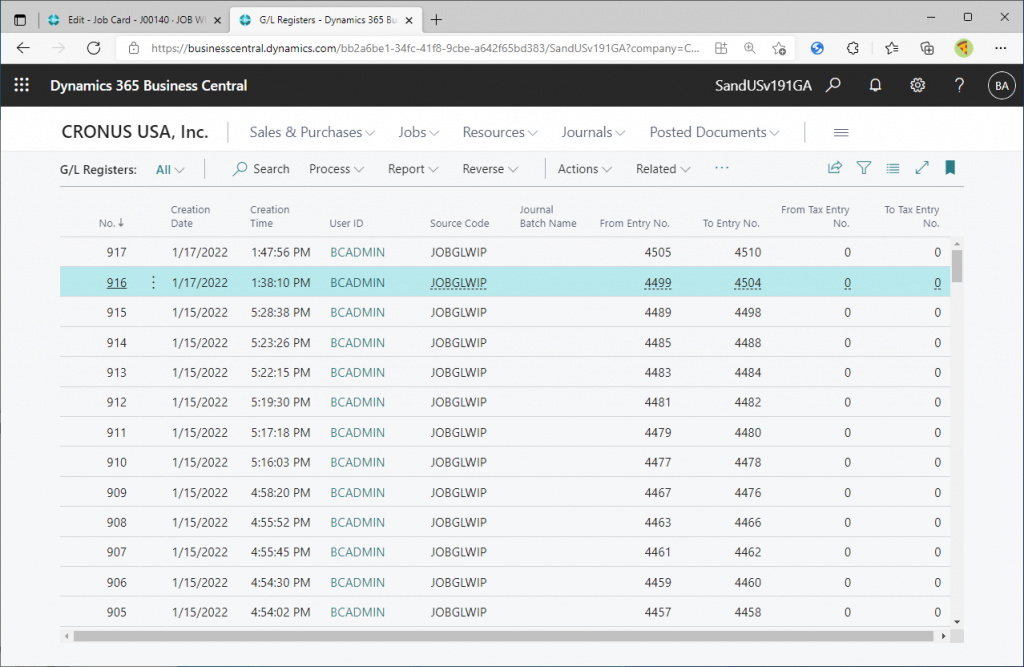
You can check both G/L entries related to last WIP calculation and reverse calculation at once by setting the entry number in the filter condition of G/L entries list page. In this case, the Entry No filter is “4499…”. “4499” is the “From Entry No.” of G/L register number 916.
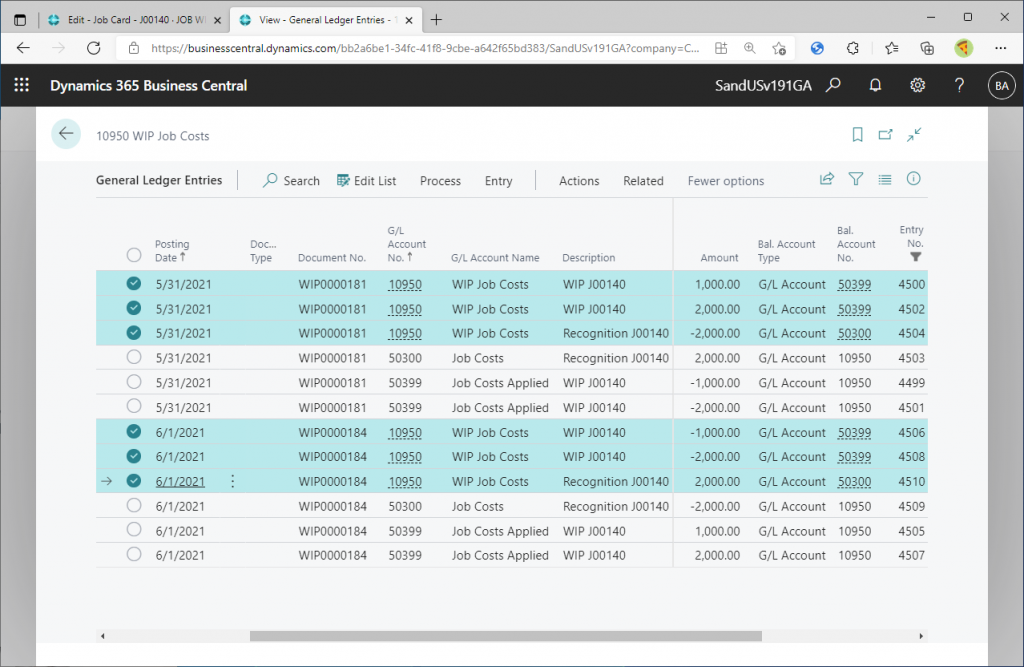
We can see that there are G/L entries for May 31, 2021 and G/L entries for June 1, 2021, which offset each other. Now you can see that “(a) The reversing G/L entries will be posted, and the balance of the WIP related accounts in the General Ledger for this job will be zero.” has been achieved.
The job WIP has been reset, so we can change the job WIP method.
Tips & Trick 4: You can change the WIP method and calculate WIP again by resetting WIP.
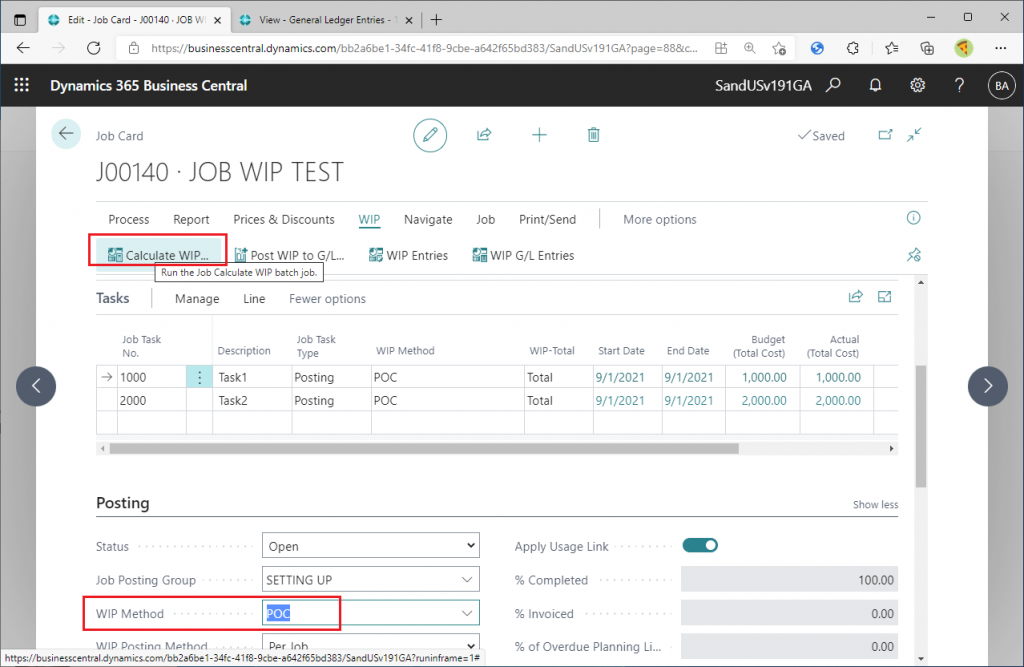
You can change the job WIP method now because the job WIP was “reset” in the previous step. For example, in the example below, the WIP Method is changed to POC (Percentage of Completion) and the work in progress is calculated. There is no need to post the actual cost again to the Job Ledger. It has already been posted. You can use the job ledger of actual cost for testing different WIP methods. This is very useful. Try out various WIP methods. You can try different WIP methods as many times as you like by doing a “reset” after trying them.
Tips & Trick 5: Set WIP Total to make only specific job tasks included in the work-in-progress calculation.
I mentioned above that you need to set the value of WIP-Total to “Total” before changing the WIP Method in the Job Task line. This WIP-Total has an interesting feature. If you set the value of WIP-Total of a job task line to “Excluded”, you can exclude that job task line from the WIP calculation. For example, set the WIP-Method of Job Task 1 to ‘Excluded’ as shown in the following figure. Then the WIP Method is cleared and becomes blank. (BTW, this specification is a little unsatisfactory; it would be better to just exclude the WIP-Total from the calculation without clearing the WIP Method.) In this state, click the Calculate WIP button to execute the WIP calculation.
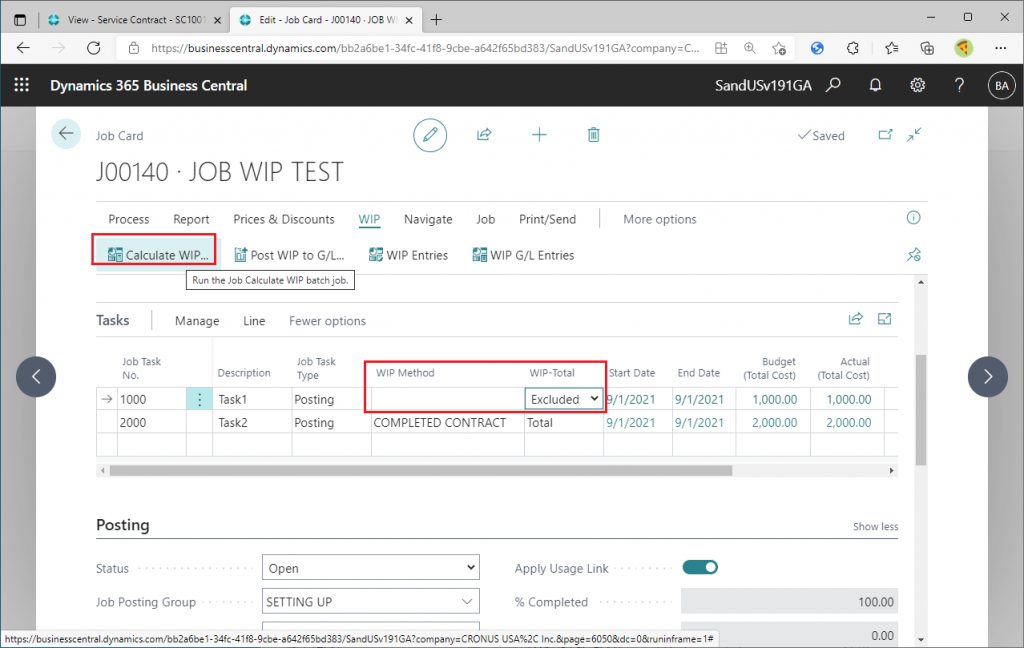
Then, only the cost of Job Task 2 was recorded as WIP.
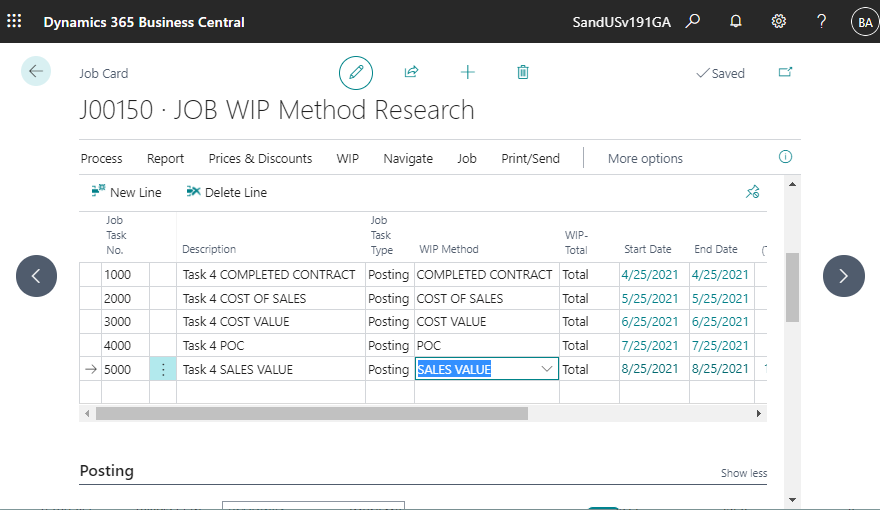
Tips & Trick 6: Examine different WIP methods simultaneously.
This is an advanced technique that applies the tips & tricks described above.
Create multiple job task lines and set different WIP Method for all of them. Then, submit different actual cost as shown in the figure below.
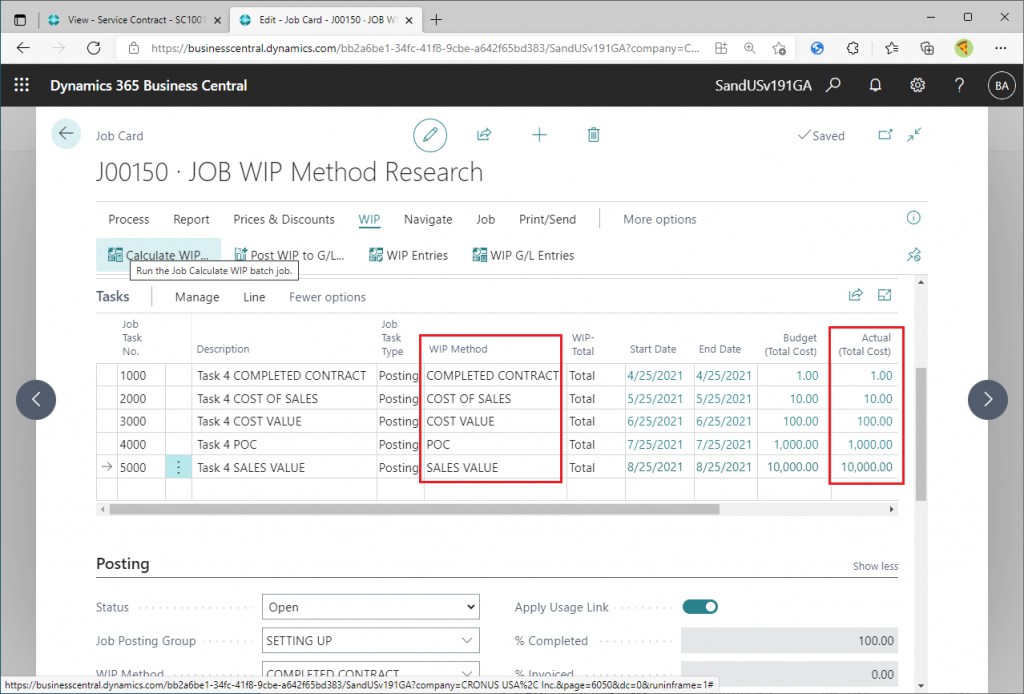
Then run the WIP calculation. You can see which WIP methods will be posted to WIP cost and which WIP methods will be posted to Recog Cost.
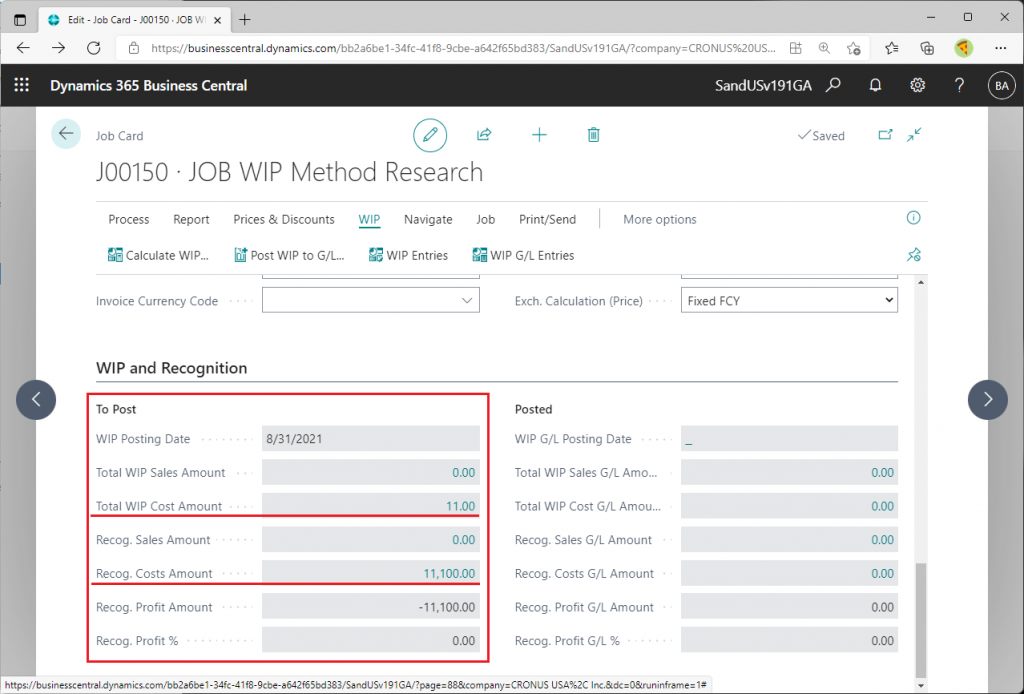
Post to G/L.
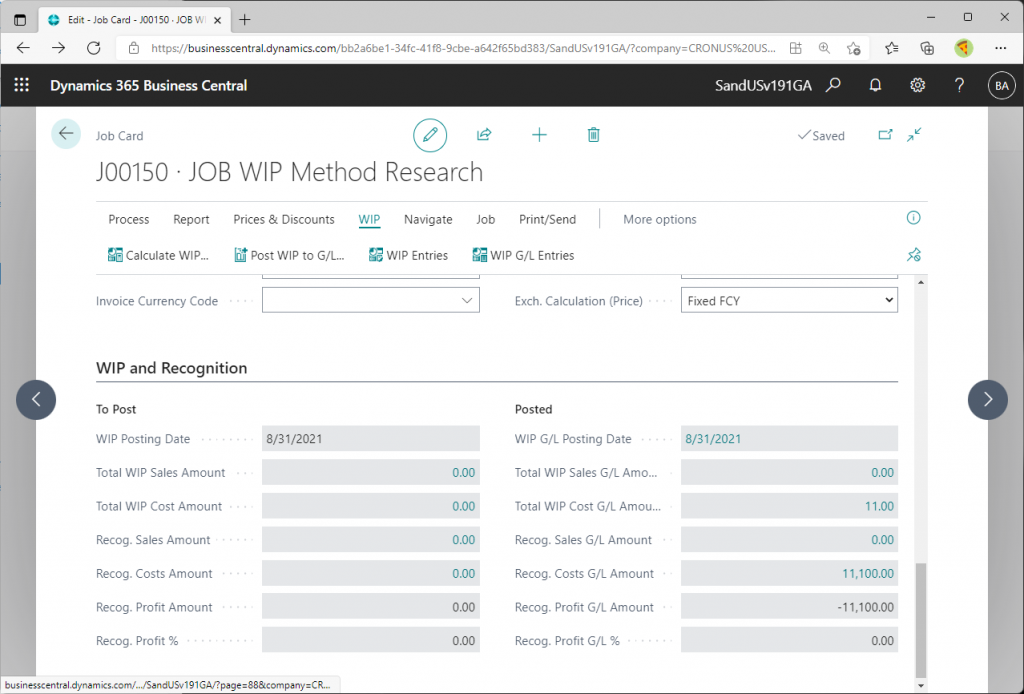
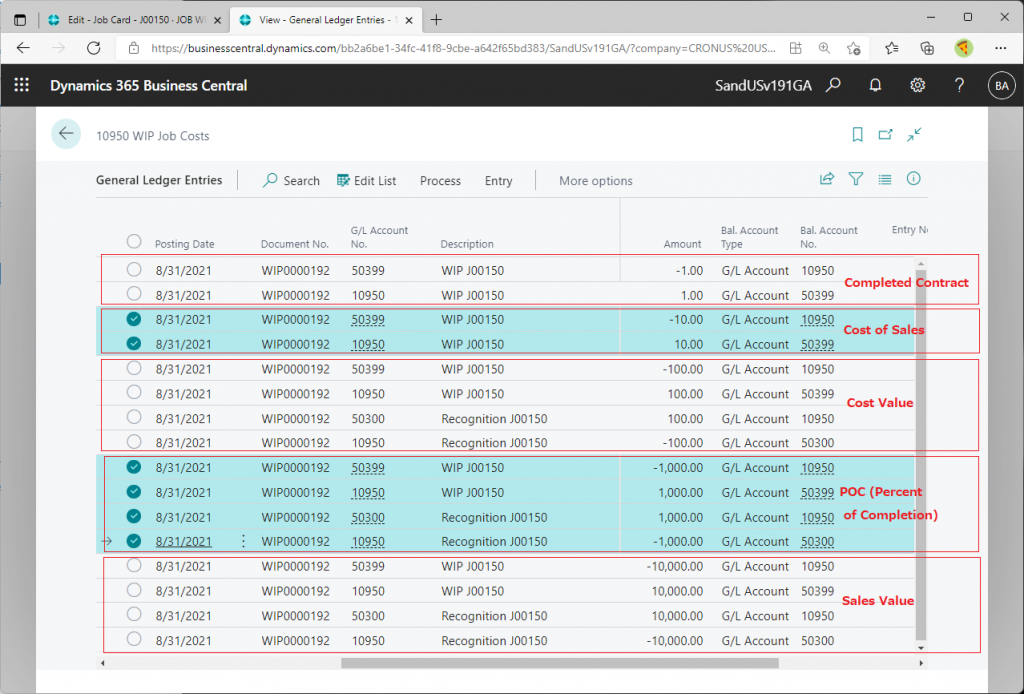
Check the G/L entries. By setting up the actual cost amount well, you can see at a glance which WIP method has been posted to which G/L account.
There was no need to separate jobs by WIP method, post actual cost for each job, and run WIP calculations for each job!!
Well, as a matter of fact, it’s easier to calculate each work-in-process method than to calculate them at the same time, so I recommend that you do that (lol).
I believe these tips & trics will make it easier for you to research and troubleshoot WIP calculations, so I encourage you to use them.
Thank you for reading.