

This is a sub contents of How to Setup Workflow of D365BC
In this article, I will use the Assisted Setup feature to create a BC workflow and understand the basic structure of a BC Workflow.
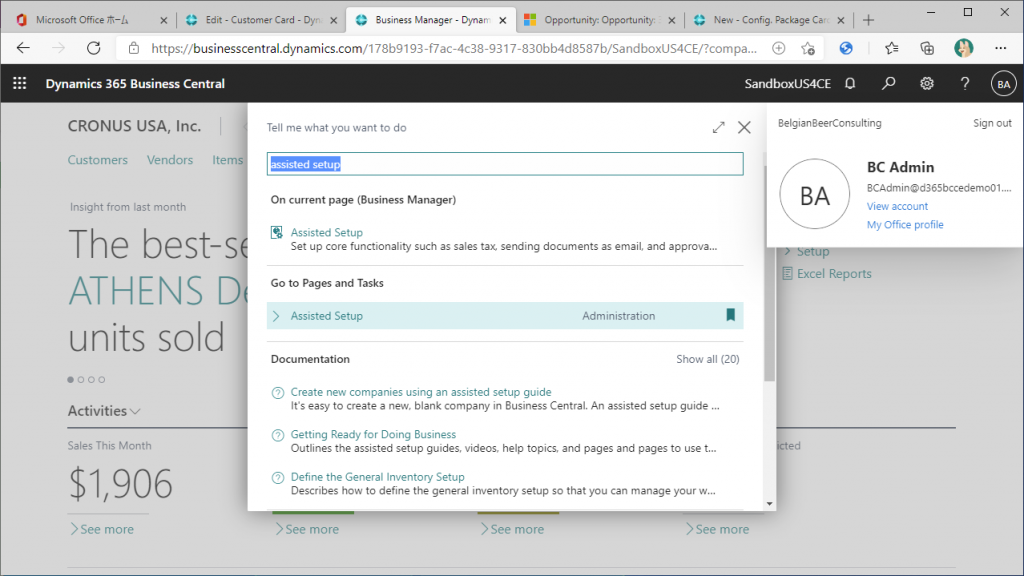
First, find and run the Assisted Setup feature.
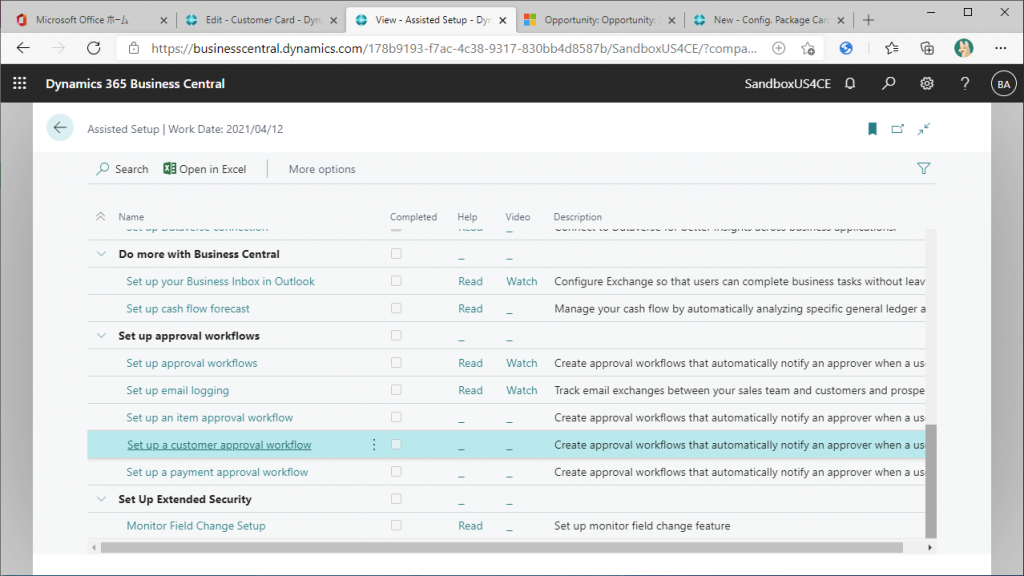
There are six rows under the category “Set up approval workflow”. You can create workflows in the bottom three rows. We will use the second row from the bottom. Click on ‘Set up a customer approval workflow’ to start the wizard.
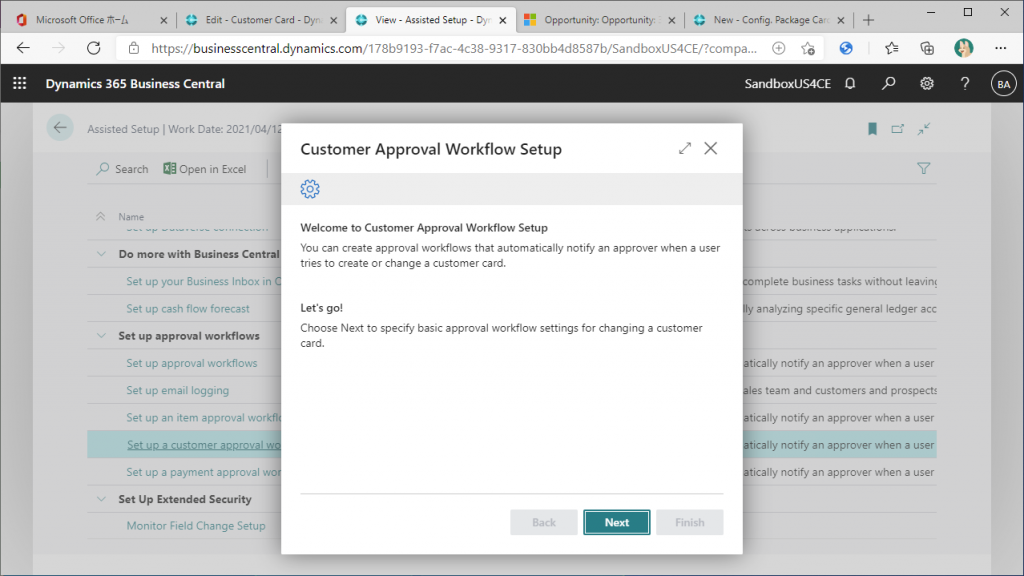
After reading the instructions on the first page, select “Next”.
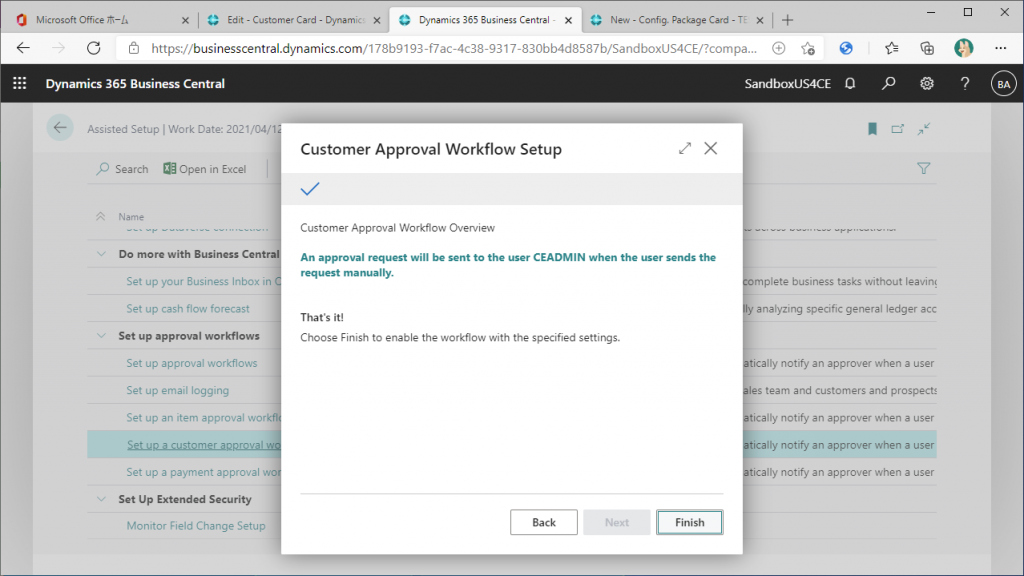
There are two types TRIGGER of BC workflows. One is ‘when a user manually click on the approval request button’. The other is ‘when a specific field is changed’. In this article, we will use an example of the first one. So choose ‘The user send an approval requests manually‘. Do not press Next yet.
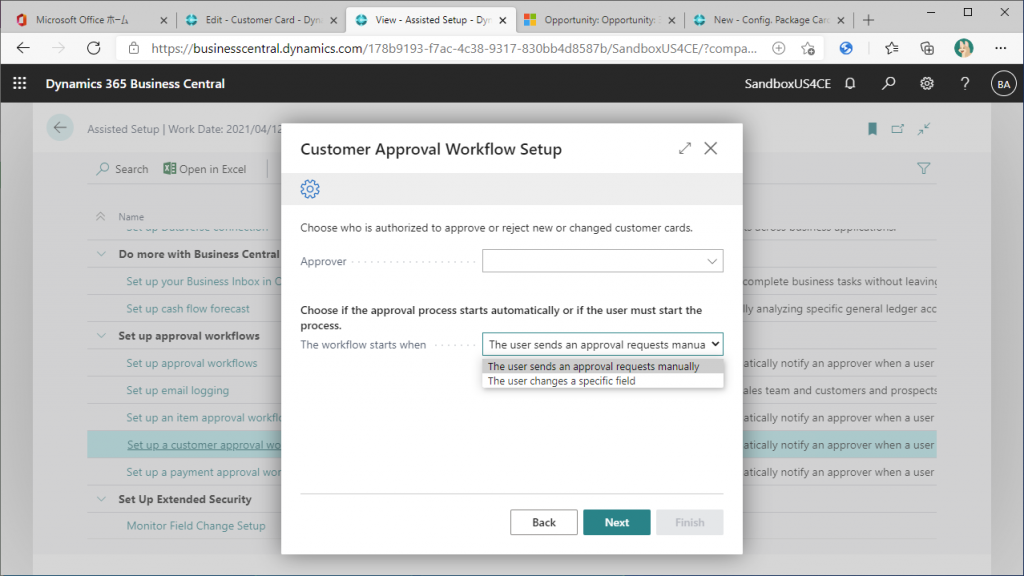
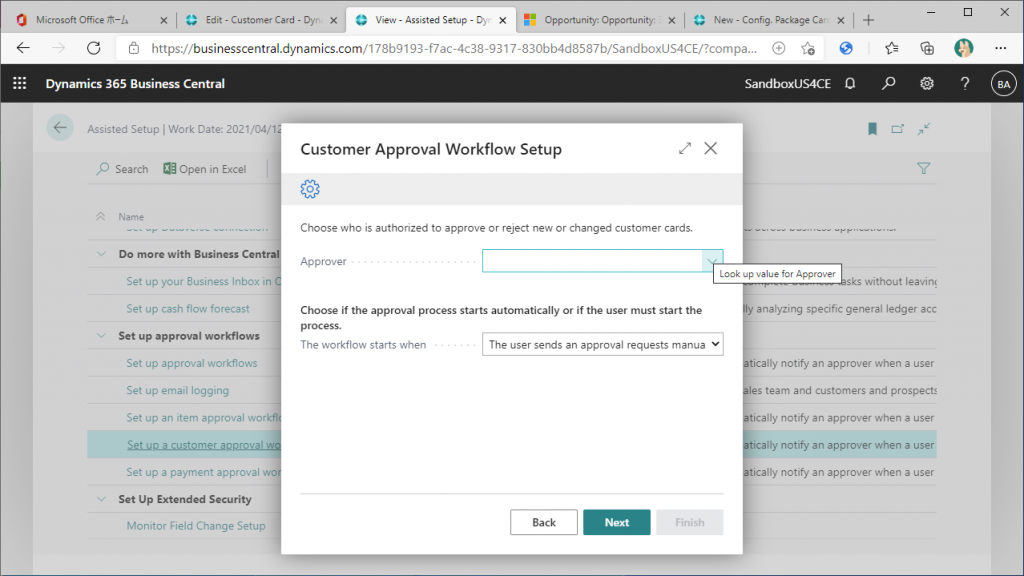
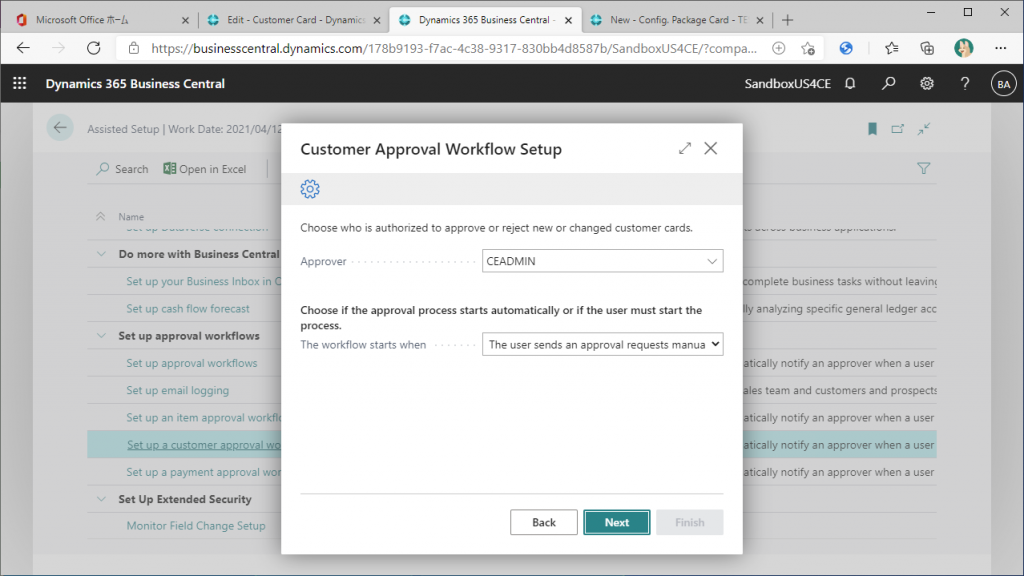
Next step is to specify the ‘Approver’. Determining the approval route of workflow is a very havy topic, so in this example, we’ll simply say that a certain fixed user is the approver. Press the pull-down button then…
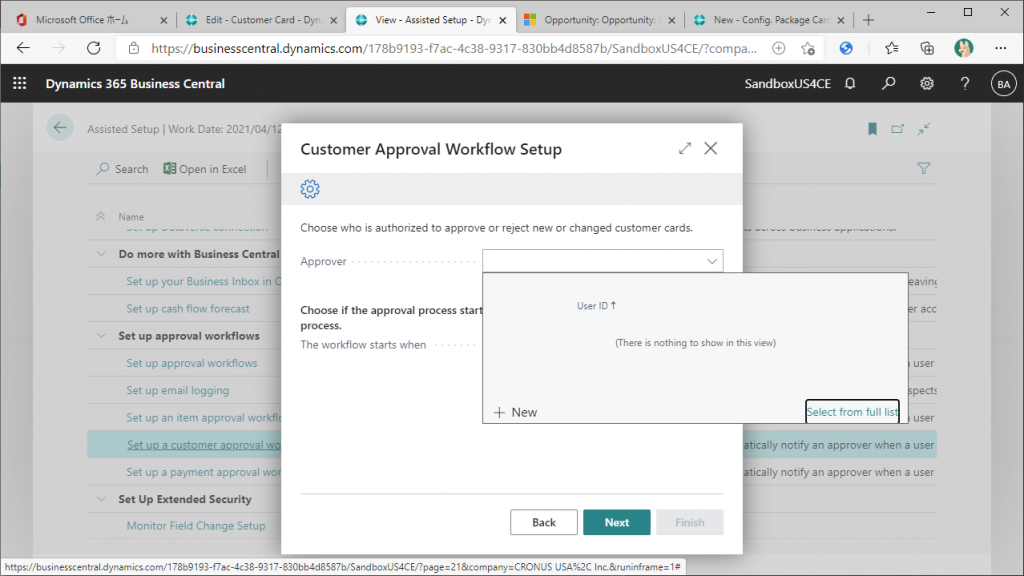
No entry is here… This is because no one has been set up as an approval user of workflow. Click on ‘Select from full list’ button shown in the bottom right of the pull-down box.
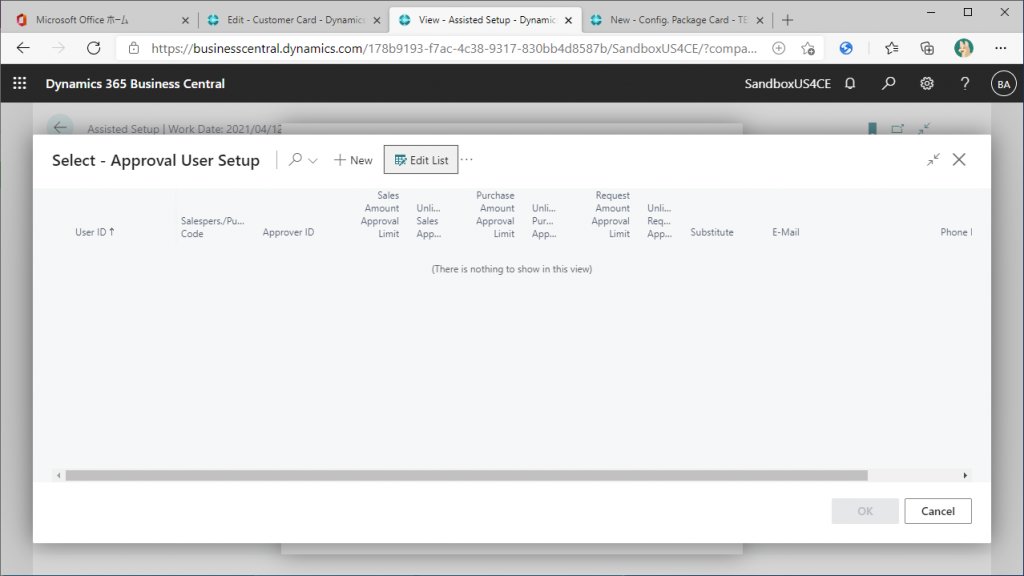
No one has been added yet. Now click on ‘Edit list’.
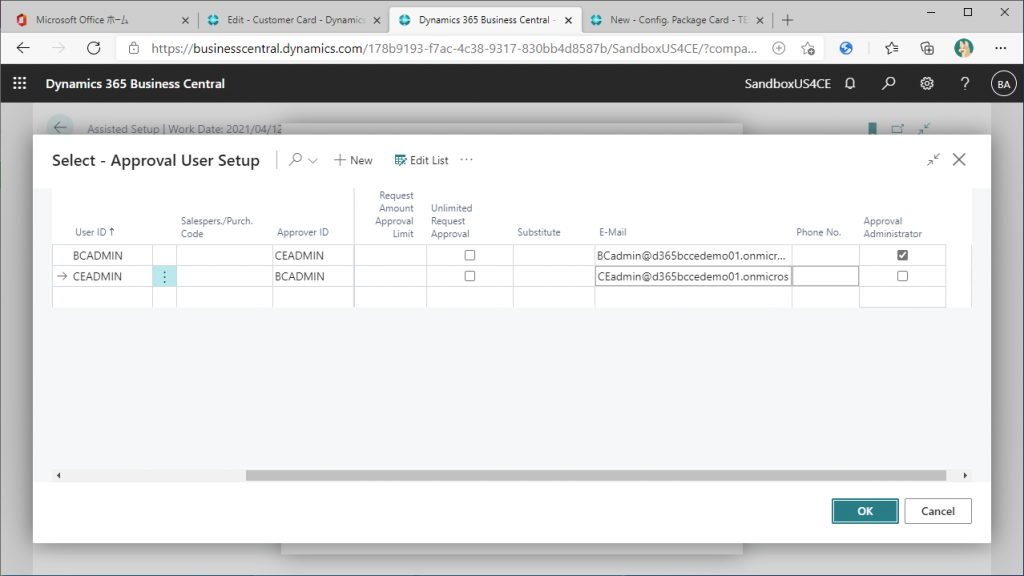
As a basic specification of BC, if you set yourself as the approver, the approval will be completed the moment you request it. Therefore, you need to specify a user other than yourself. When you register an approver, you need to set the userID as approver in the Approver ID field, as shown below. Then select a user other than yourself and click the OK button.
A user other than yourself has been set as an approver. Now click Next.
This is the last page of the Wizard. All settings are now complete, so click Finish.
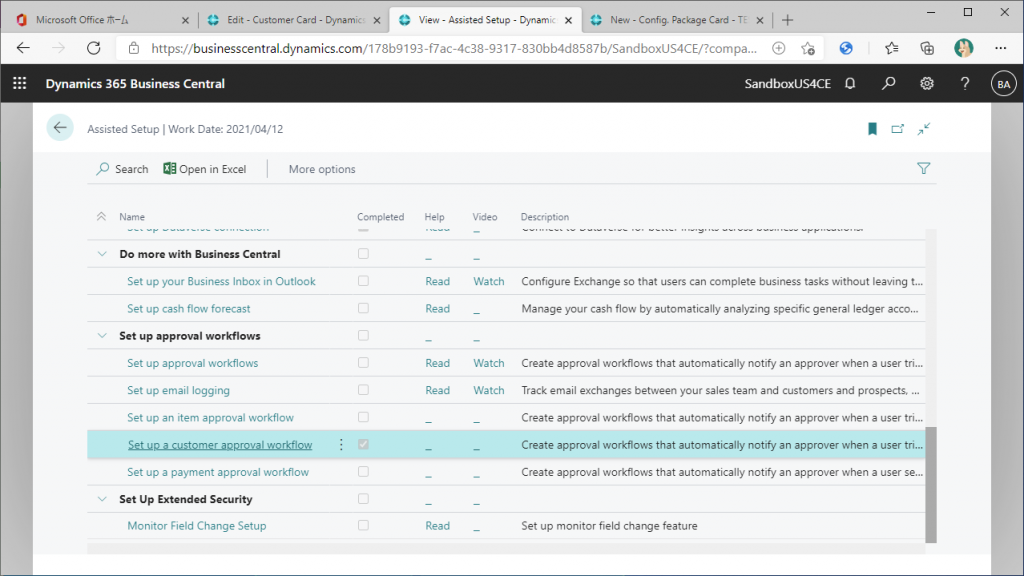
You are now back at the Assisted Setup page, with the Completed column set to ON. The setup is now complete.
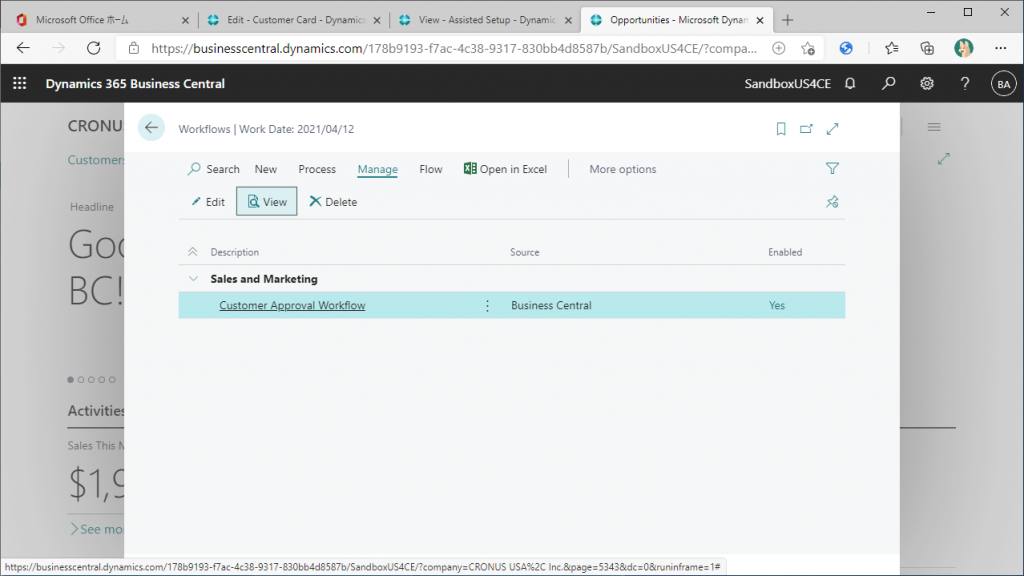
Let’s take a look at the workflow just created. Search for ‘Workflow’ and run the function.
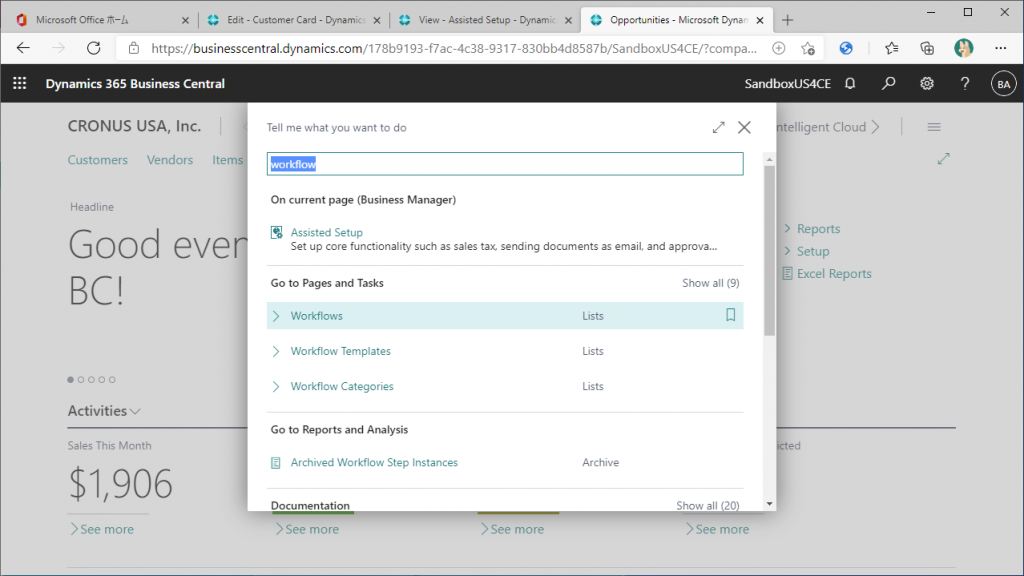
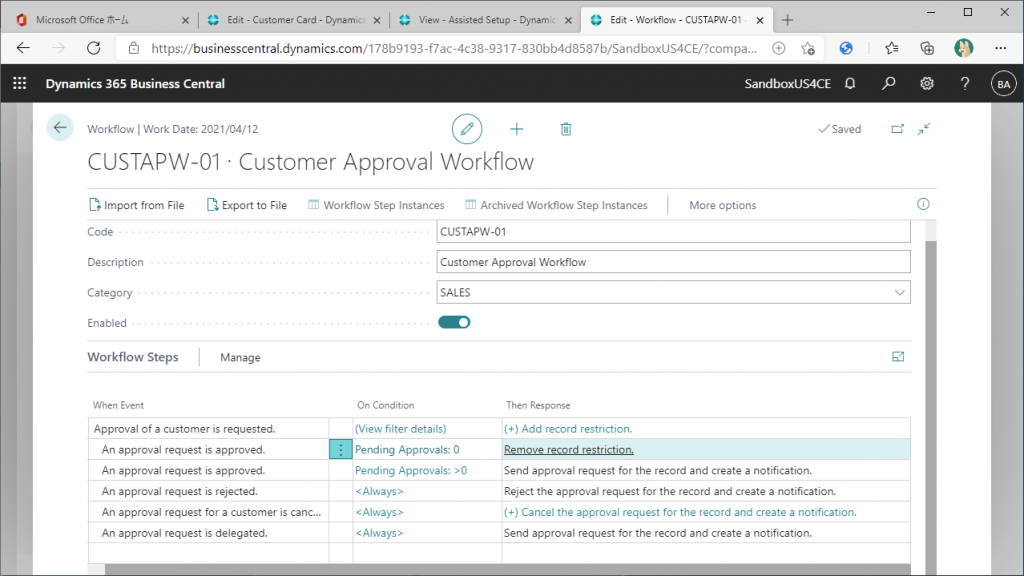
This is a list of workflows, and there is one workflow named Customer Approval Workflow. Let’s click on it.
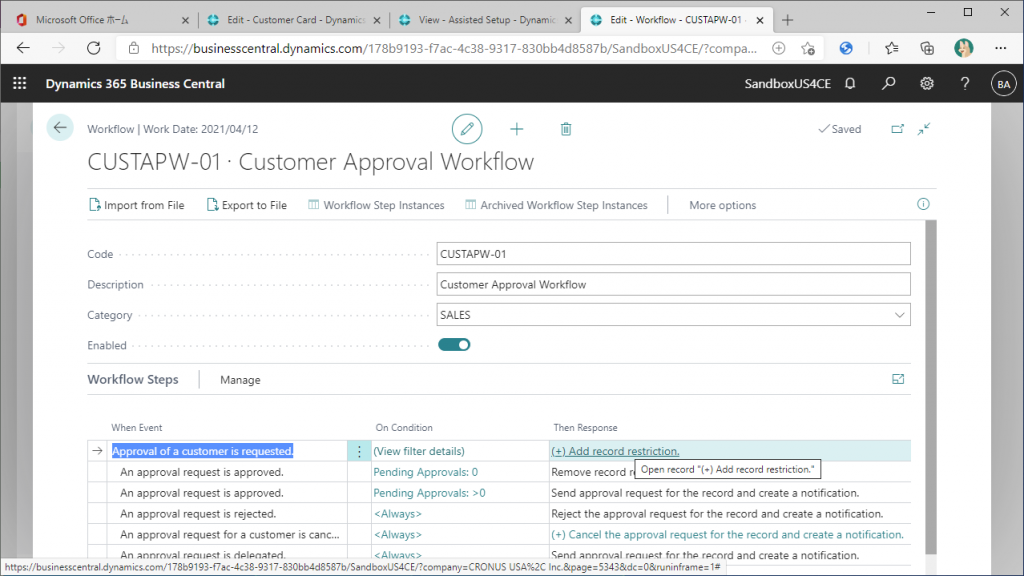
Let’s take a look at the structure of the workflow. The header part of this card page contains the code, name, and category of the workflow. The line part of the page specify the behavior of the workflow. Specifically
“When Event” column describes the event that create or process workflow
“On Condition” column describes the filter condition of event
“Then Response” column describes what will be done when event occurred with condition
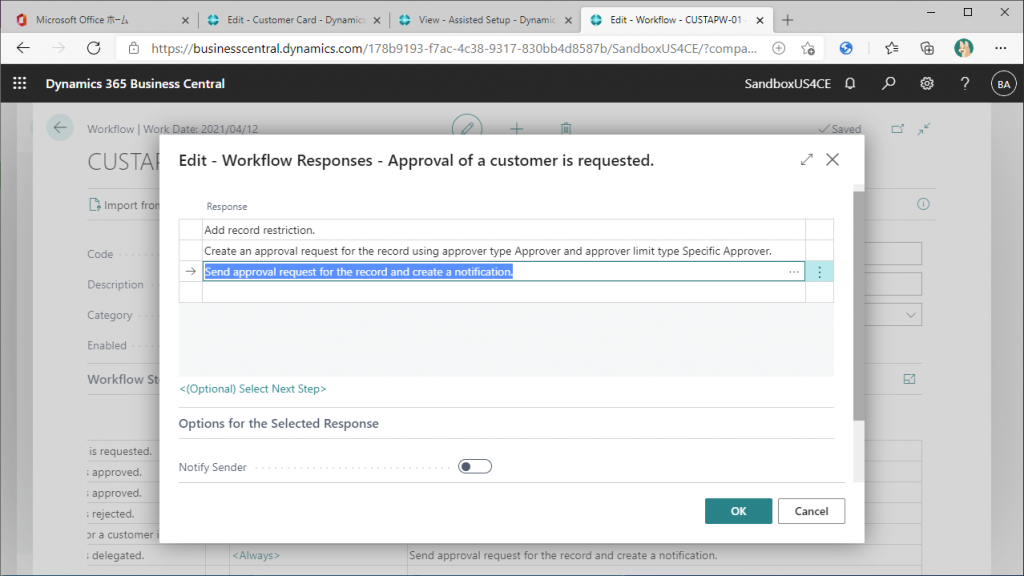
The first line of line subform parts describes the trigger of this workflow and first response action, meaning what to do when the approval request button is clicked on the card screen of the customer master. Let’s click on ‘Then Response’ link.
There are three lines in the response, and the 1st line says to add a ‘Restriction Record’ (when the approval request button is pressed). This Restriction Record is difficult to understand a bit at first, but simply put, if a Restriction Record exists for specific record, it will prevent processing of that record. For example, if there is a restriction record for customer A, any sales order cannot be posted. The Restriction Record will be deleted when the workflow is approved, rejected, or withdrawn.
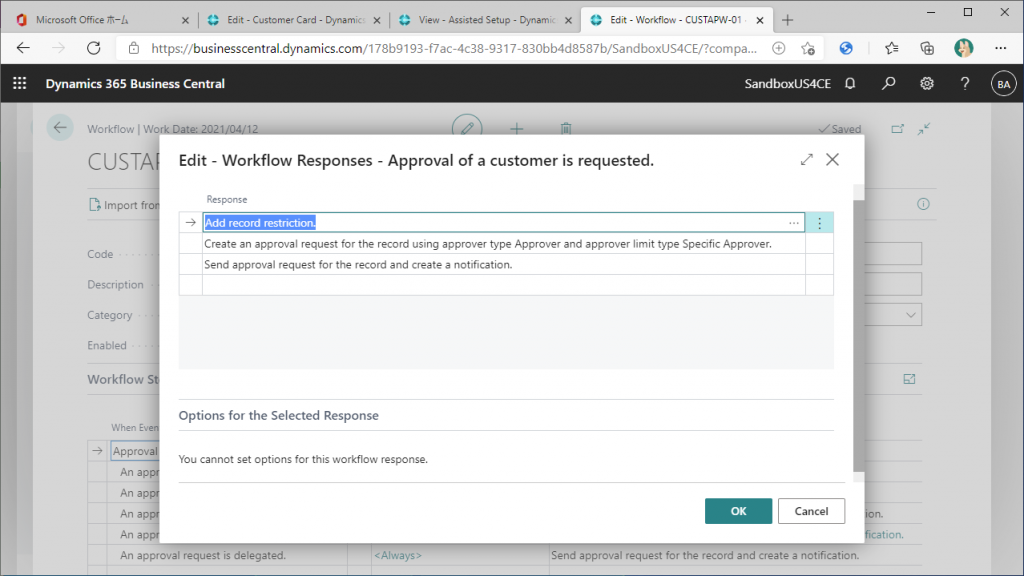
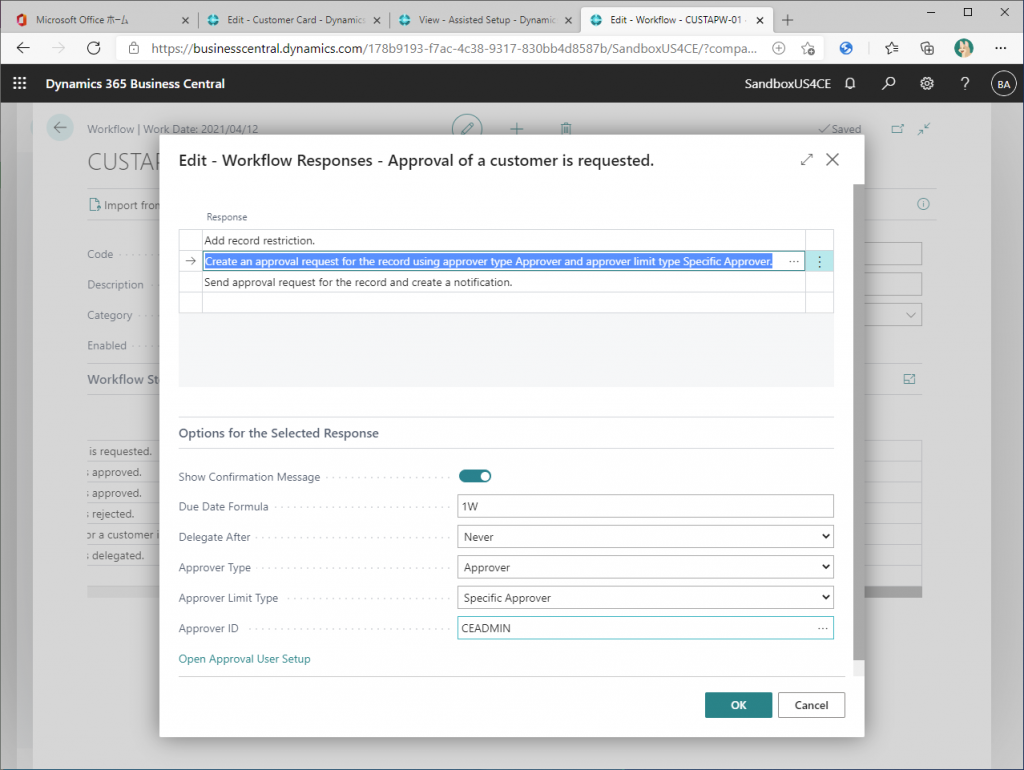
In the 2nd line an approval request record for the approver will be created. Based on this record, the approver know he/she have approval requests and proceed with the approval process. The approver is specified here. In this case, the user is CEADMIN. This userID was specified in Wizaird.
The 3rd response line is the notification of an approval request.
Click on cancel button to close this page and back.
The contents after the second line are the specification of when the final approval was done / when the non-final approval was done/ when it was rejected…etc.
That’s all for setup workflow. In the next article, let’s try to actually run this workflow.
3件のコメント