
Now we can use the Wizard to perform the initial setup required to use the timesheet. This is a new feature added in D365BC 2021 Release Wave 2.
Unlock time sheets in Business Central using assisted setup and data entry on mobile devices | Microsoft Docs
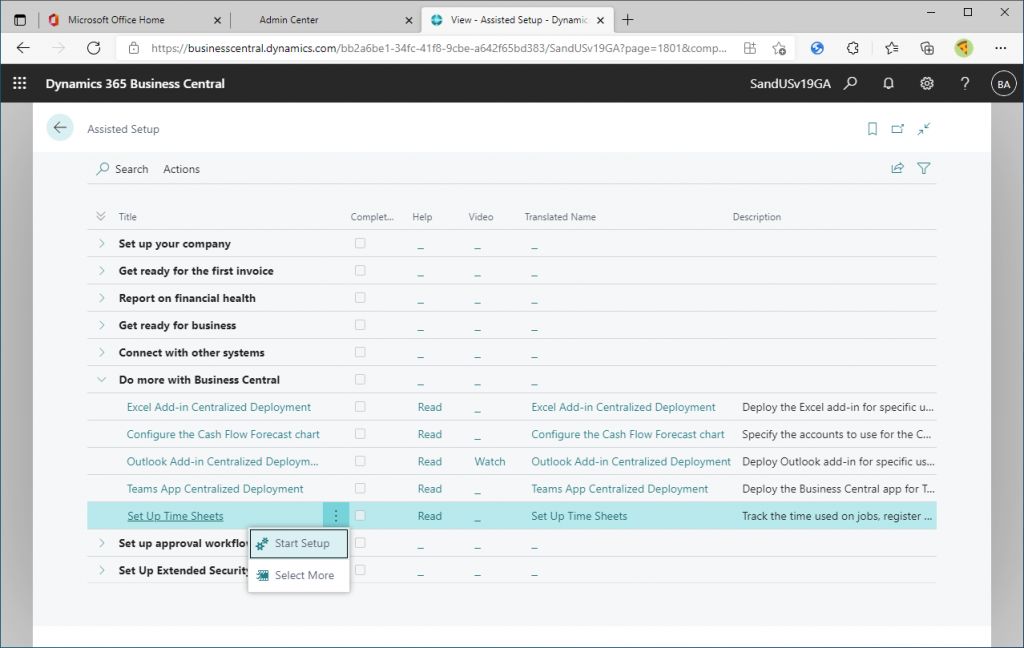
Execute “Set Up Time Sheets” on the Assisted Setup page. The Wizard will start up.
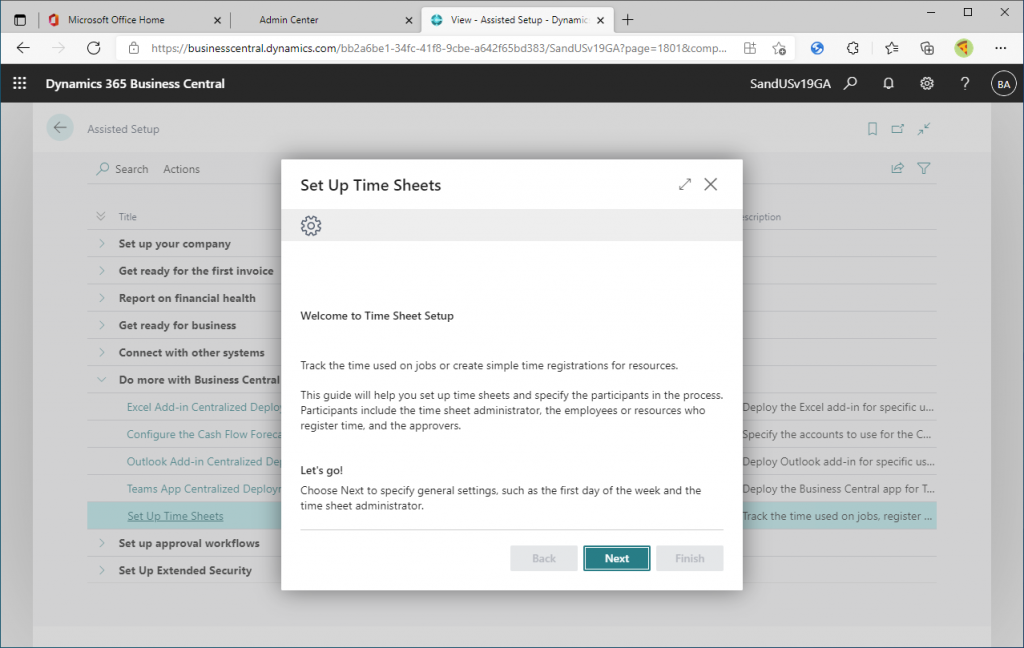
The first page is an explanation of the wizard. Read the instructions and click Next to continue.
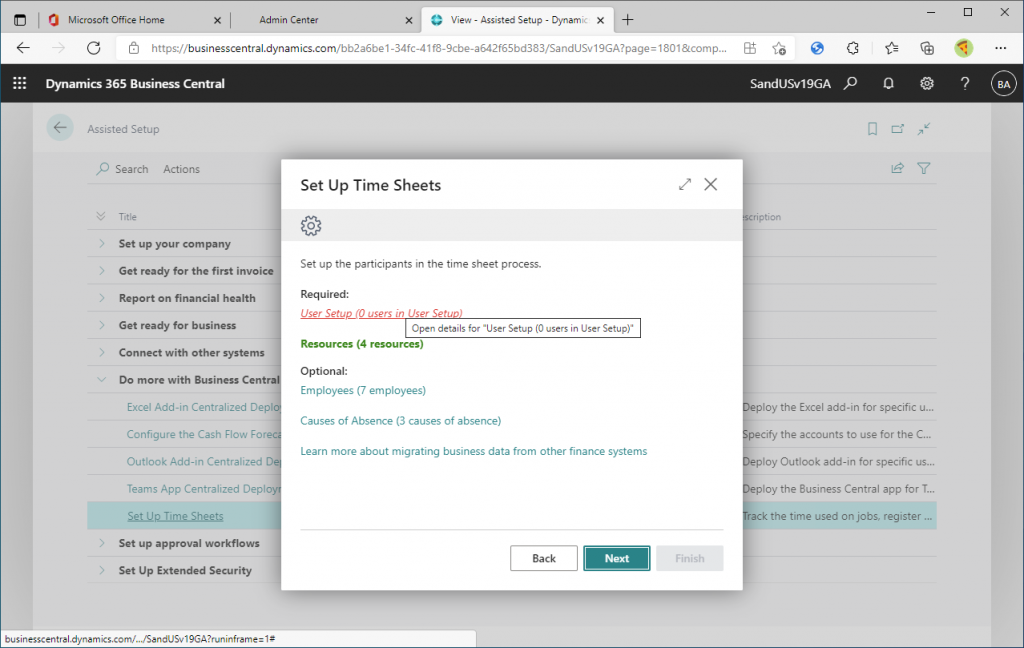
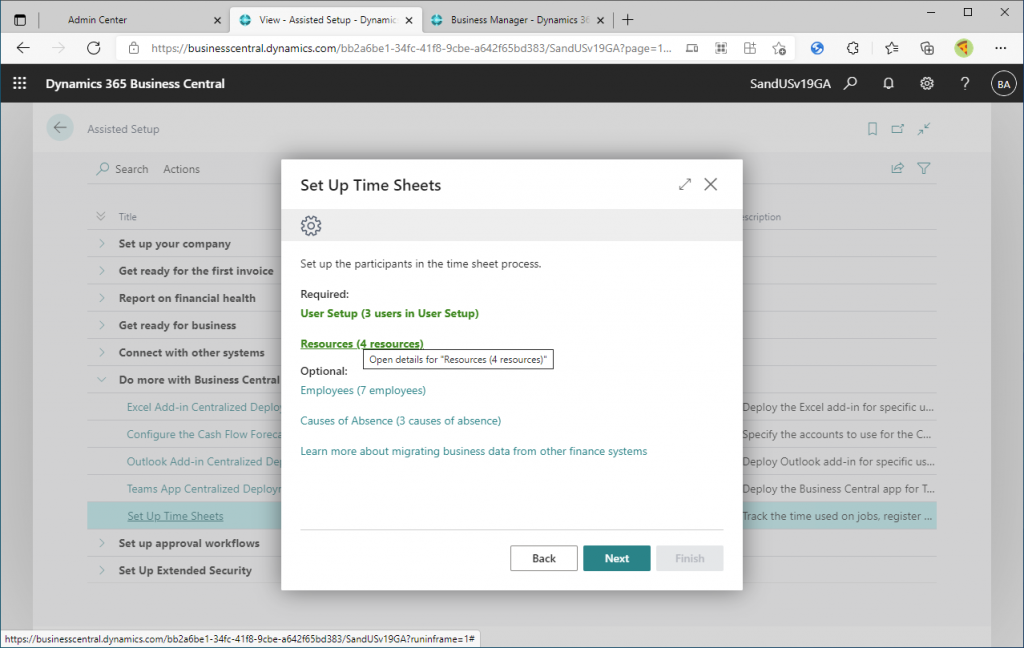
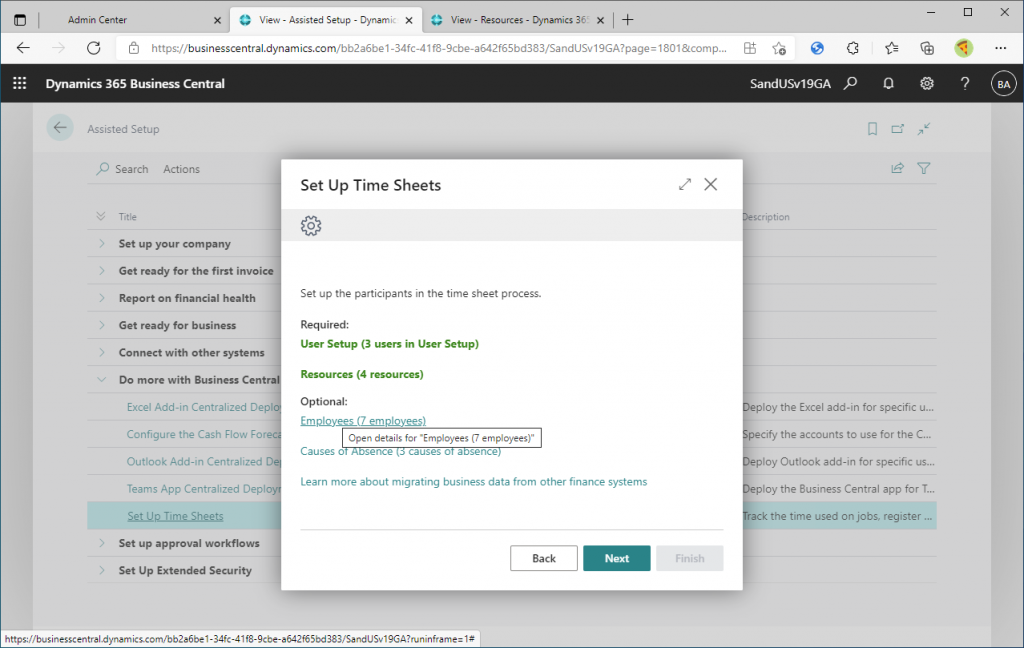
On the next page, links to the masters you need to set up to use the timesheet will be displayed. The required masters are User Setup and Resource. The Employee master and Cause of Absence are optional(not required). For each of these links, the number of master records already registered is displayed on the page. First, let’s set up the master records of User Setup.
This is the User Setup page. This example shows that there is no record yet. In this list page, you need to specify all the users who can register and approve timesheets.
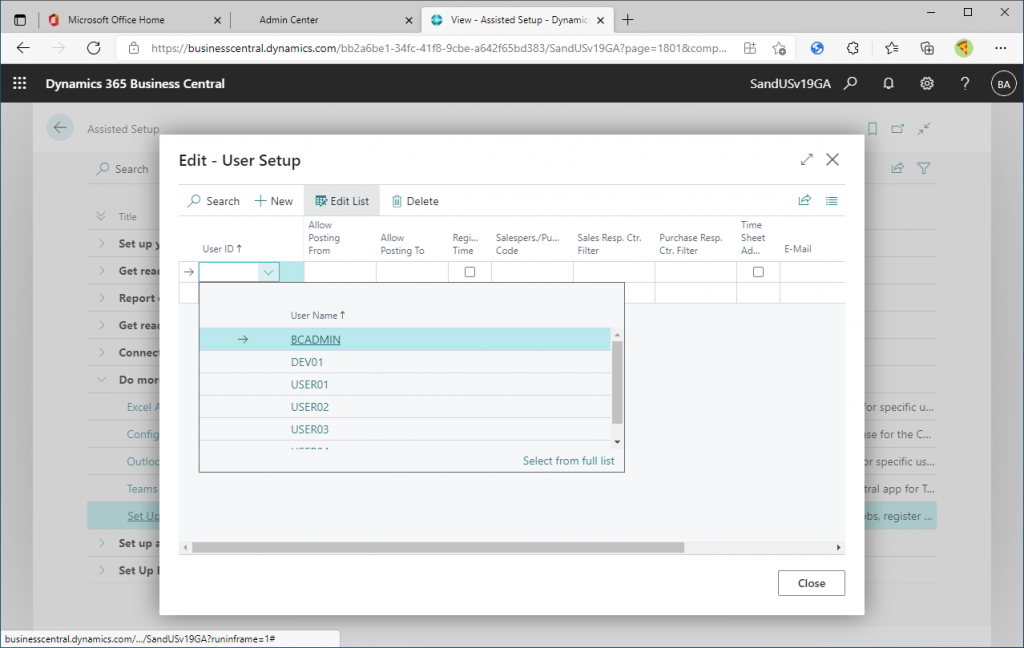
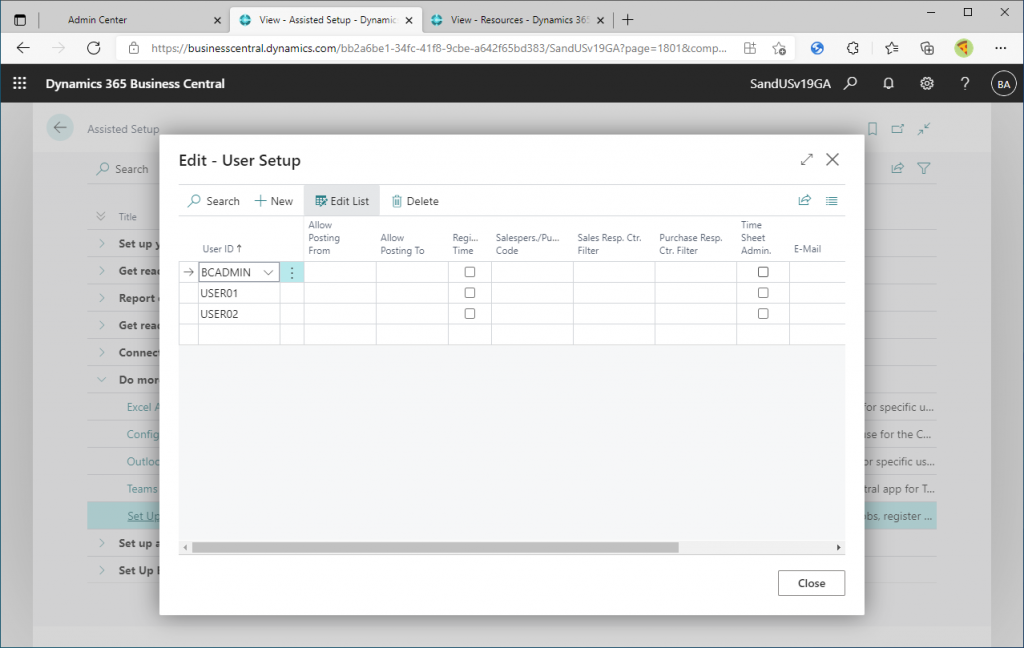
Register the records for the two timesheet users and the administrator (timesheet approver) as shown here. In the previous version, Timesheet Admin would be assigned in this page, but here I will leave it as it is and move on.
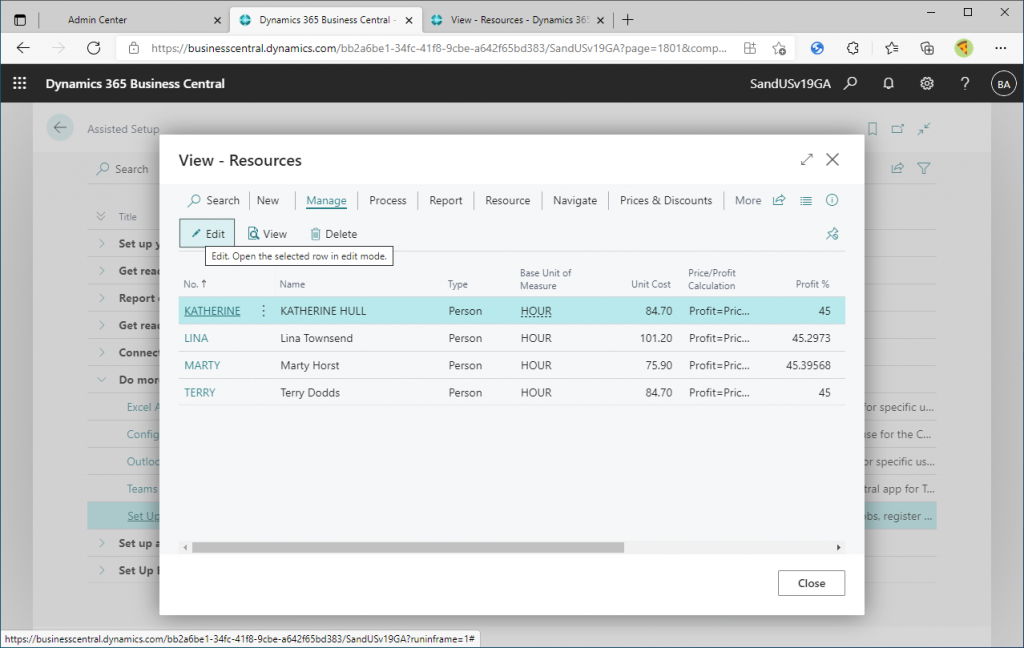
The next step is to register the resource master.
There are four sample resources already registered in CronusDB. Let’s open the card for the first resource (Katherine).
In the General tab, specify the owner and approver of the timesheet. In the sample data, the default values for both owner and approver are blank.
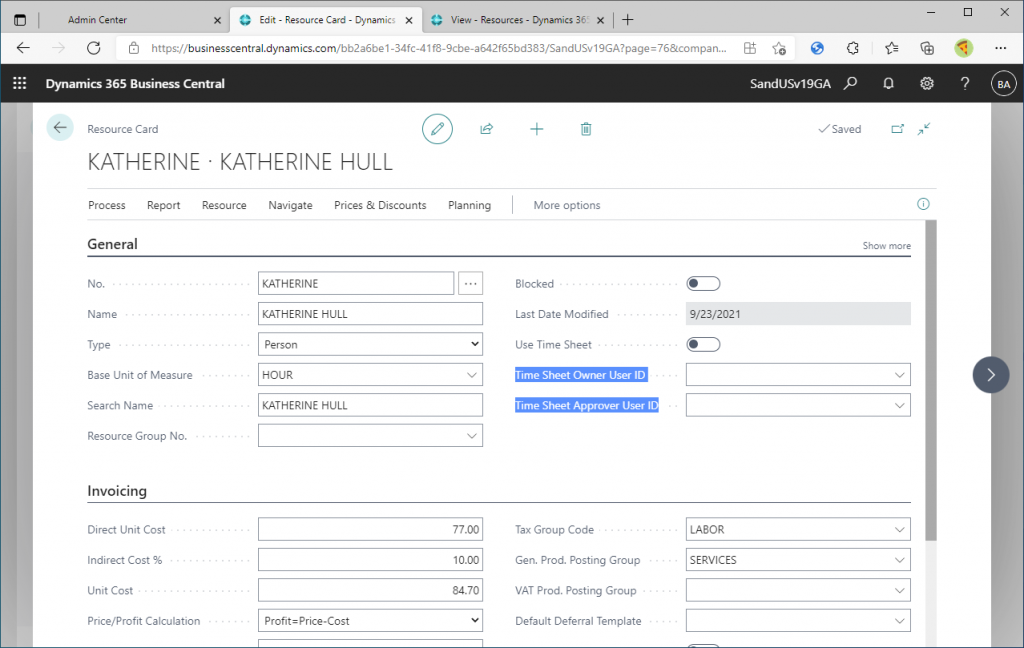
Set the owner and approver.
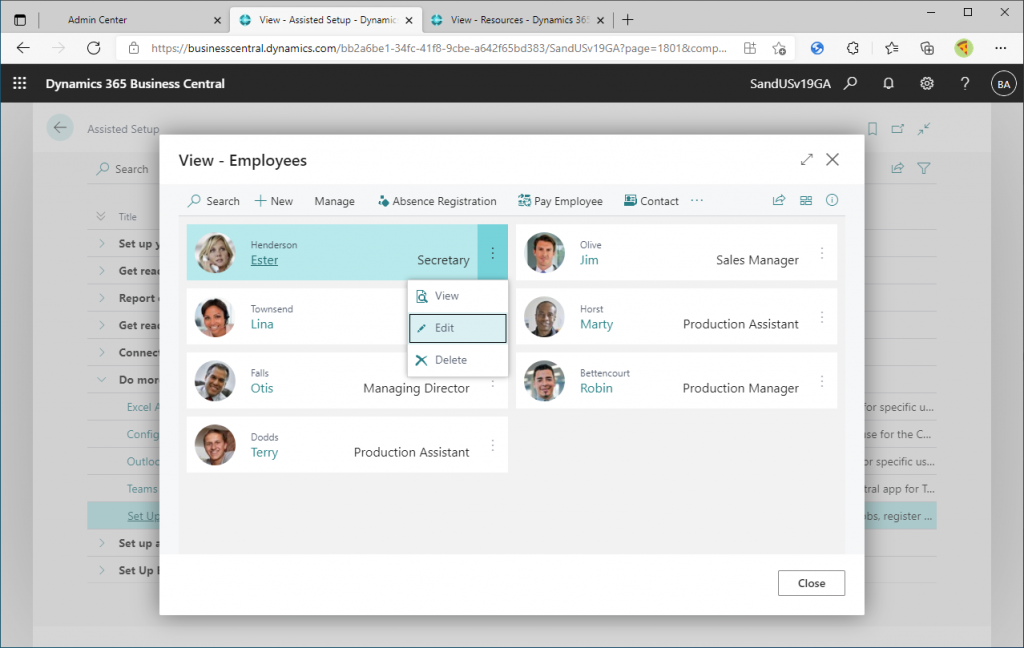
Return to the masters link page of Wizard. Let’s also set up an employee master, though it is not mandatory to use the timesheet. Click on the Employees link.
The list of employees will be displayed. Open the card page for the first record.
Scroll down to the bottom and you will find the Administration tab with a field to specify the resource number. Resources and employees are both masters that represent people, but they are different masters. This item is used to associate the two masters records.
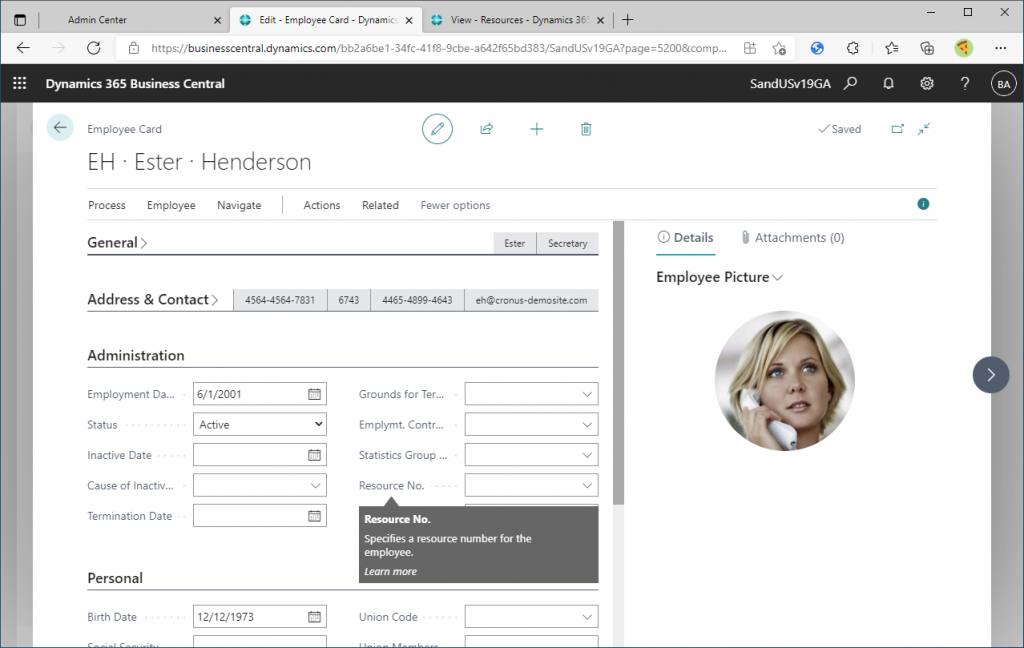
Normally, same person should be linked, but since there is no same person in CronusDB, I chose a different person but an existing resource to be linked.

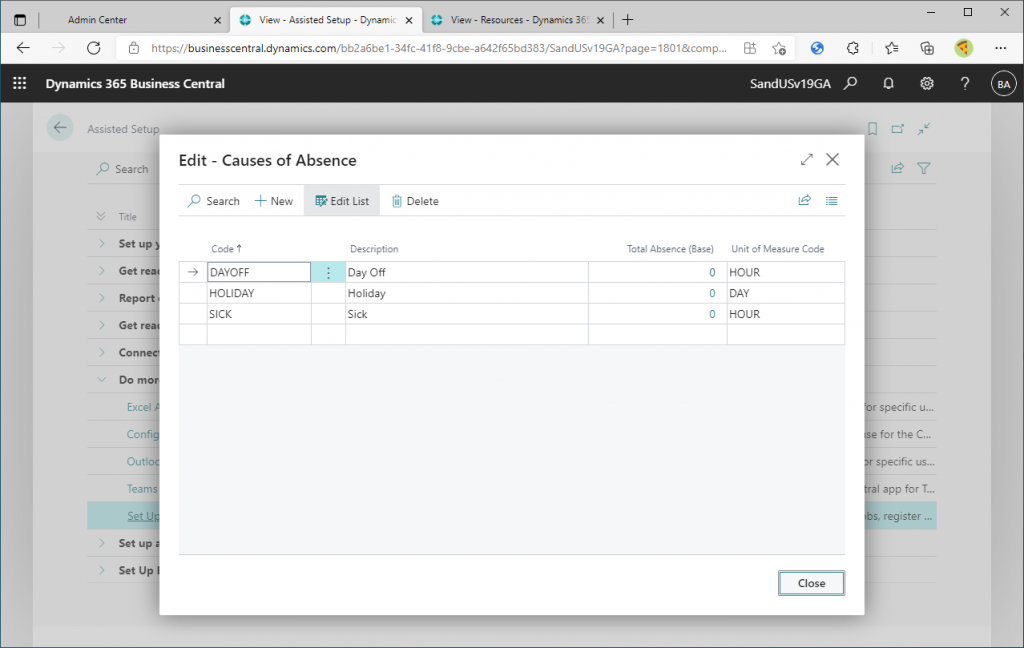
There is one more optional master. This is the Cause of Absence. Click on the link.

The master Cause of Absence will be displayed. Close this page leaving the CronusDB sample as it is.
Now that you have finished configuring the master, click Next to continue.

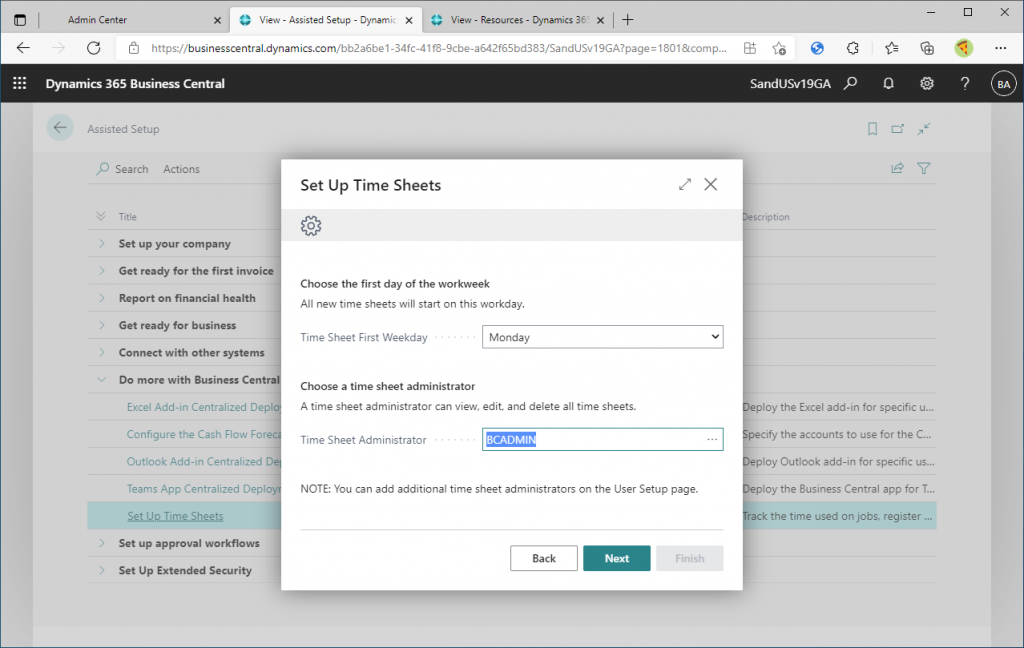
Specifies the first day of the week in the timesheet. The default value of Monday will be fine. This value can also be specified in the resource setup page, but you have to know it to set it, so it is convenient to specify it in the wizard.
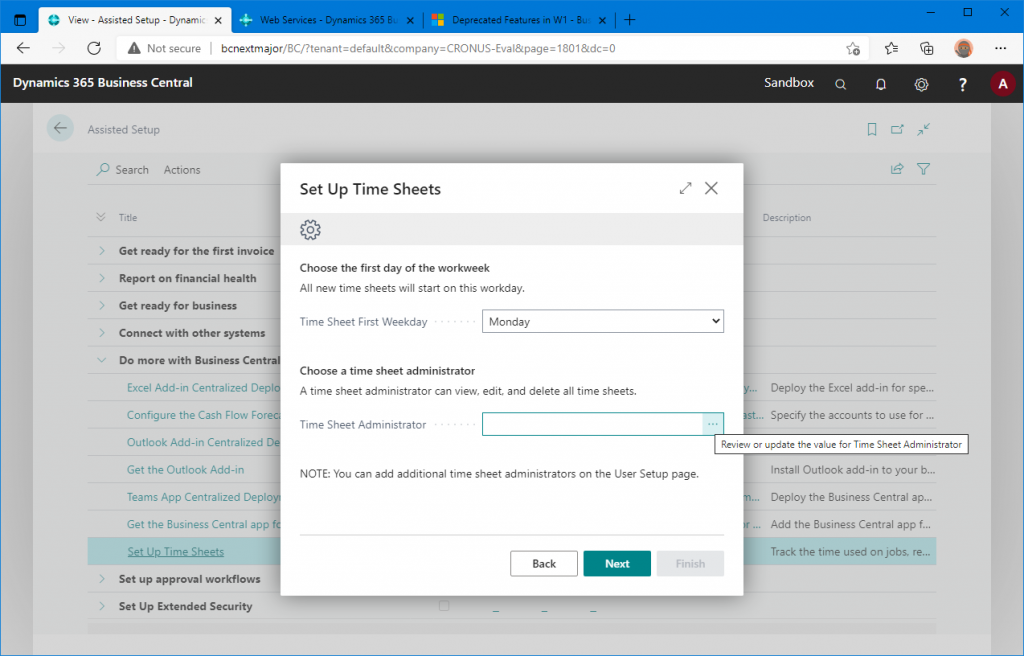
The next step is to specify the administrator of the timesheet. You can also specify this in the UserSettings page that I showed you earlier. However, it is convenient to be able to set this in the wizard because the settings will be left out if you are not aware of the settings screen. Click Next to continue.
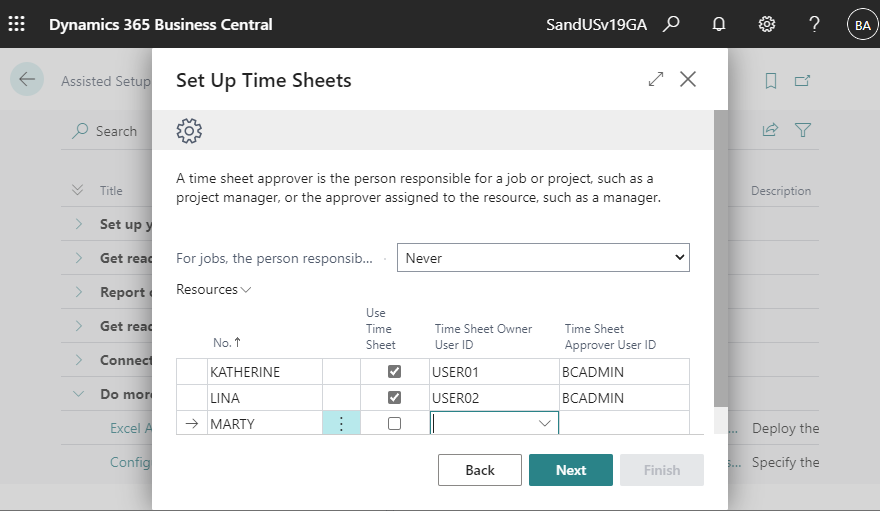
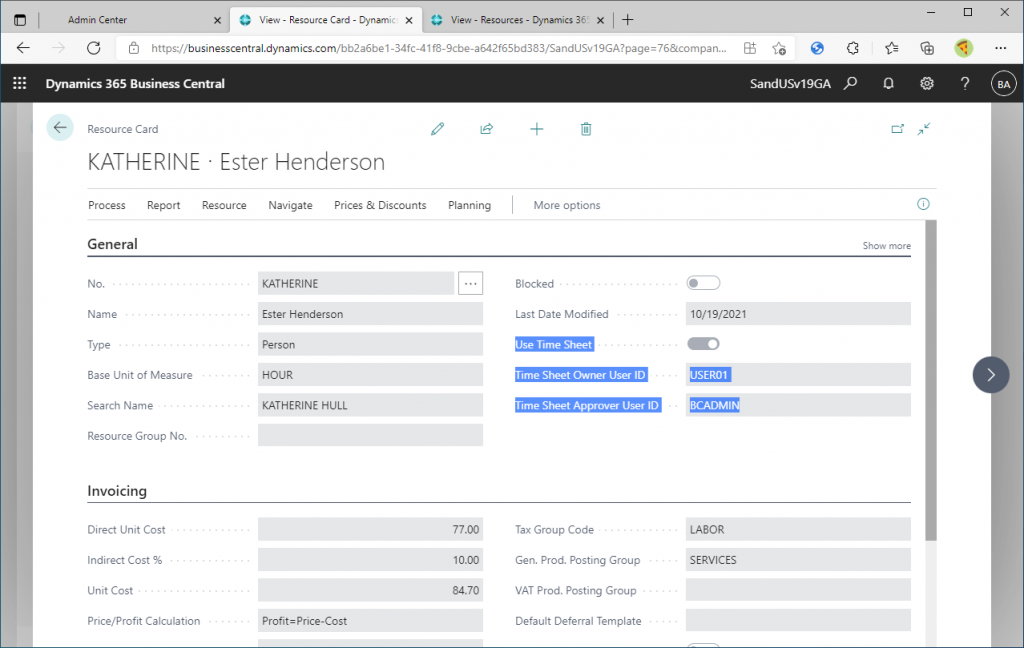
Specify the timesheet owner and approver for the resource. You can also set them in the resource card screen. In fact, the first line (Katherine) is shown in this list with the values you set in the resource card page earlier.
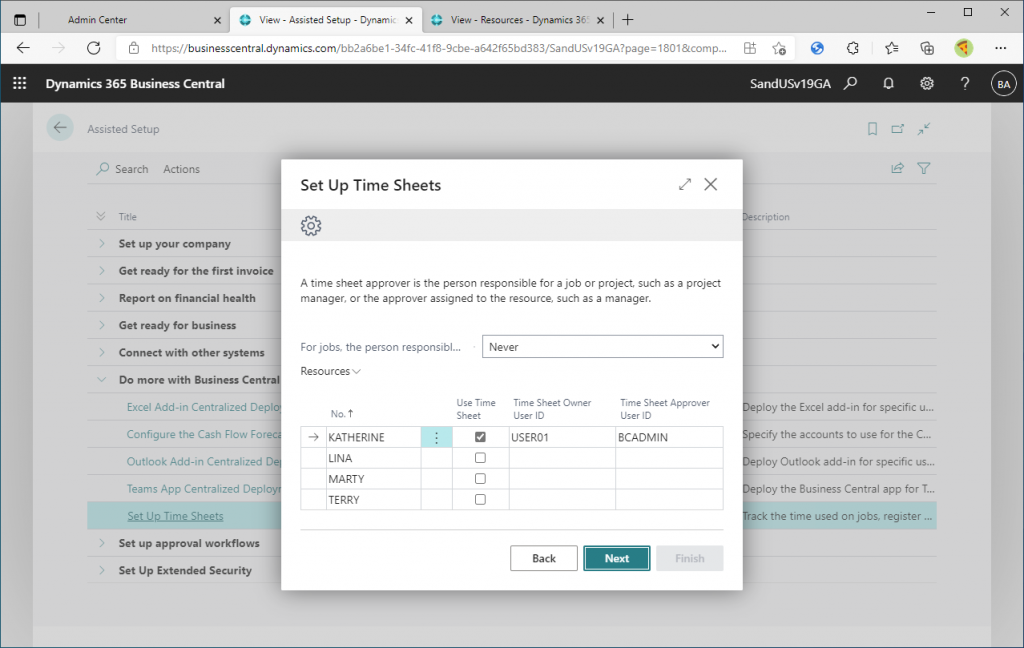
The Wizard is very convenient because you can set it on the list page.

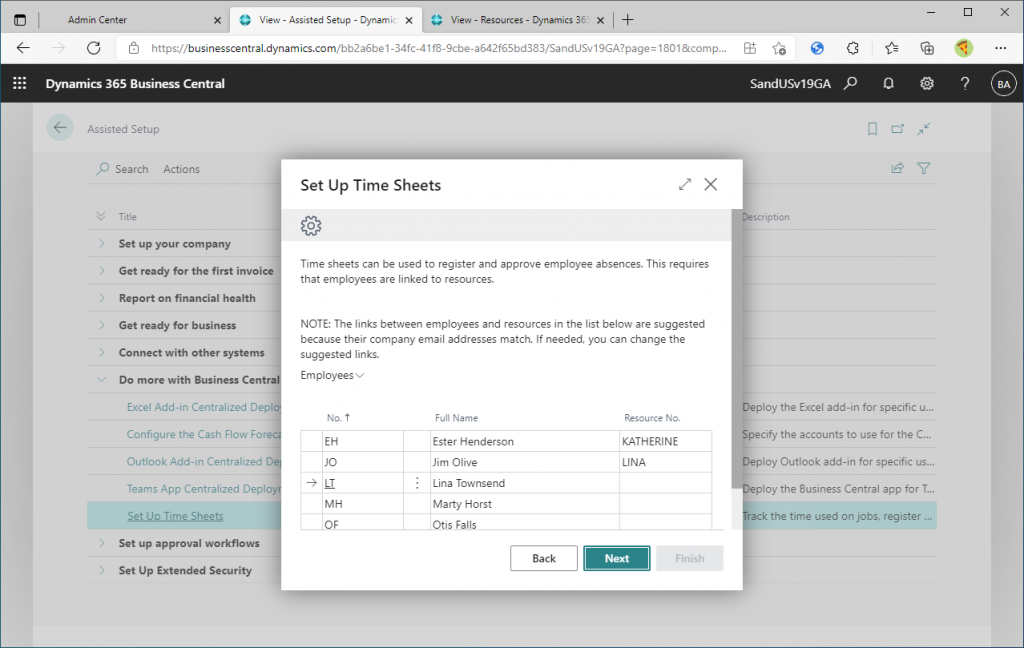
This is an optional setting that allows you to link resources to employees. This setting can also be configured on the employee’s card screen. In fact, the first case shows the resource number that we just set from the employee card.
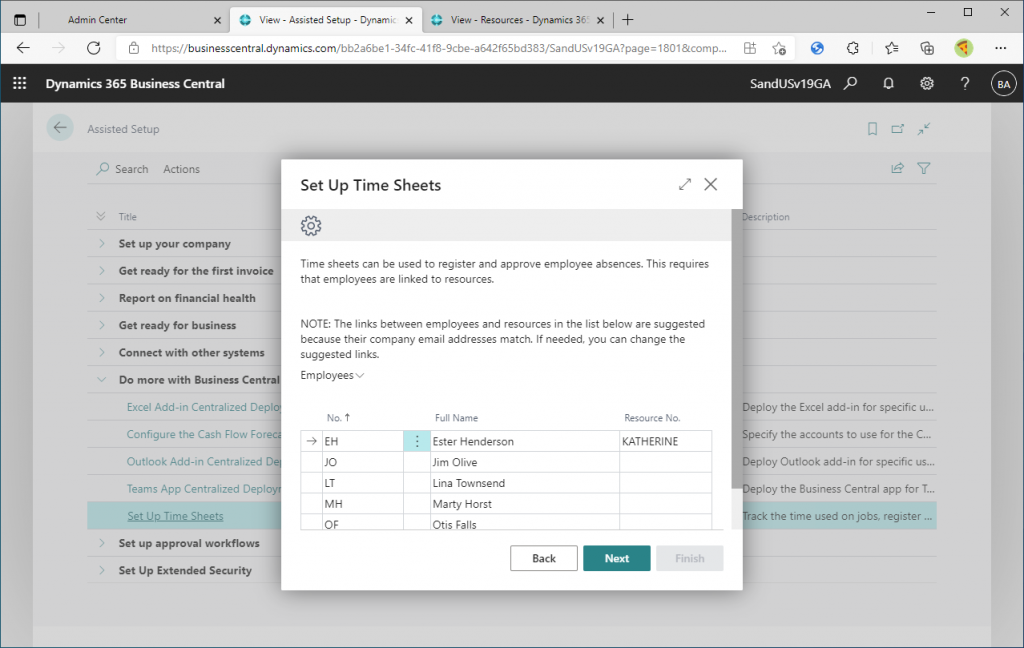
If you use the Wizard, it is very convenient to configure the settings on the list page like this.
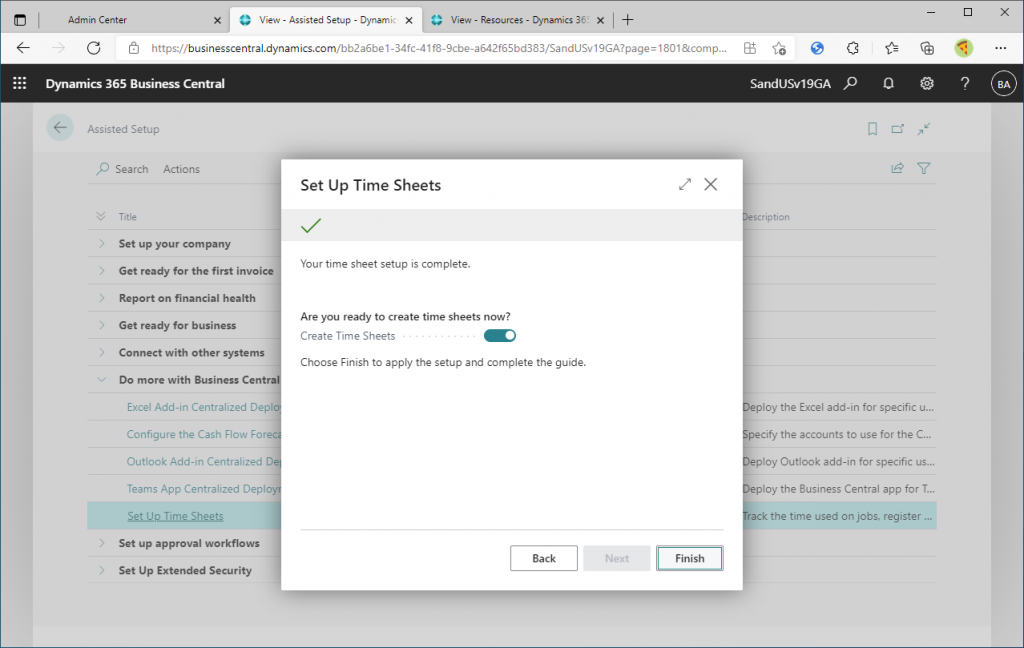
This completes the configuration of the master and master associations.
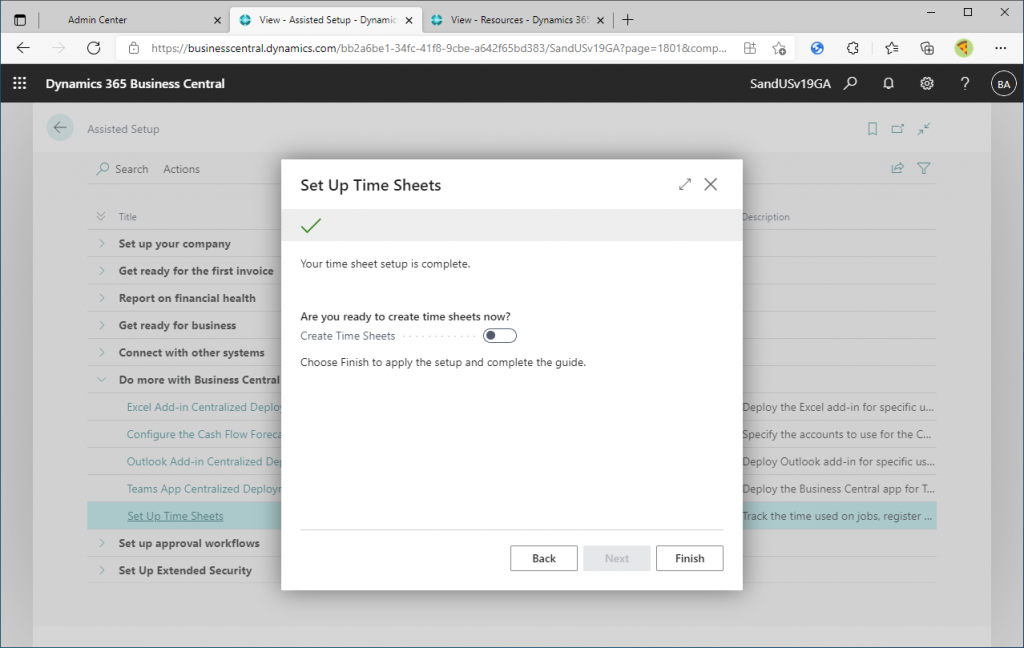
If you want to generate a timesheet, set the Create Time Sheets flag to On and click Finish.
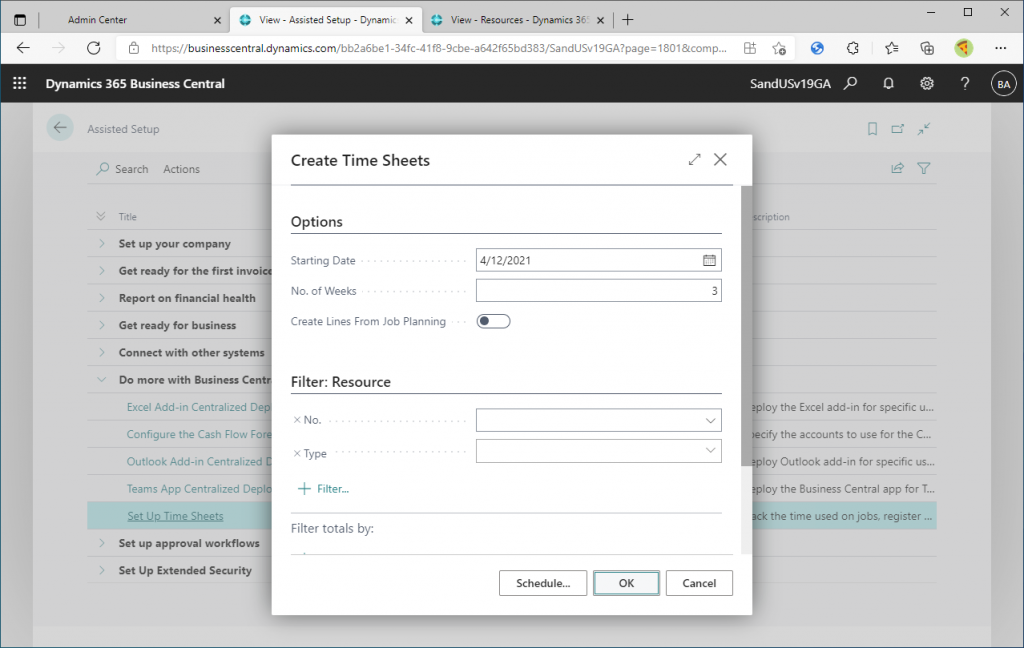
Specify the parameters such as the week and resource number to be created, and click OK.
Then a time sheet will be created.
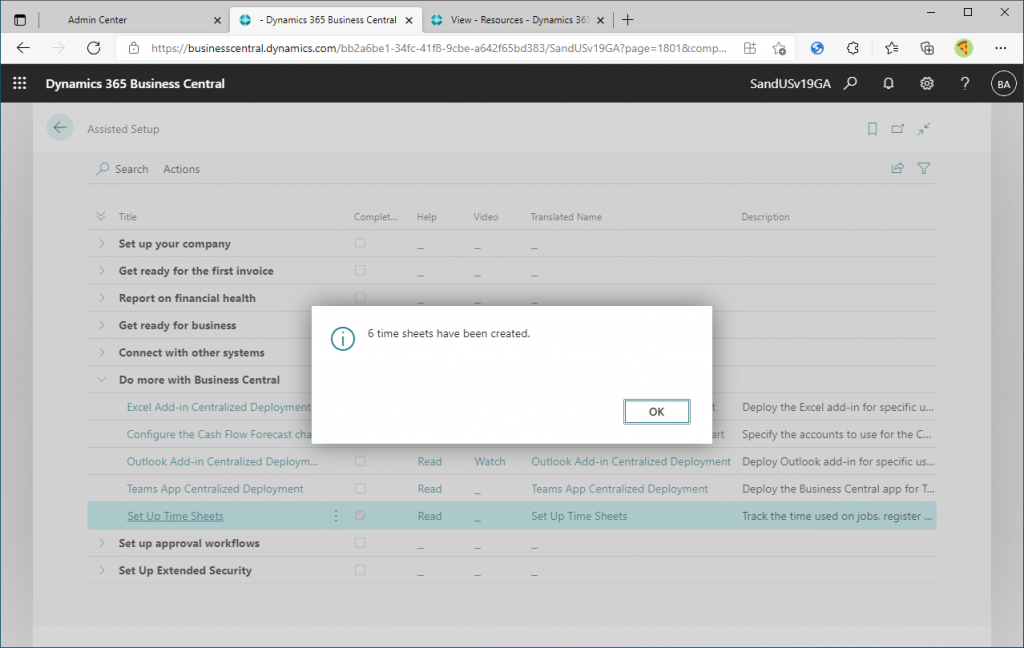
A list of created timesheets will be displayed. Let’s open the first timesheet.

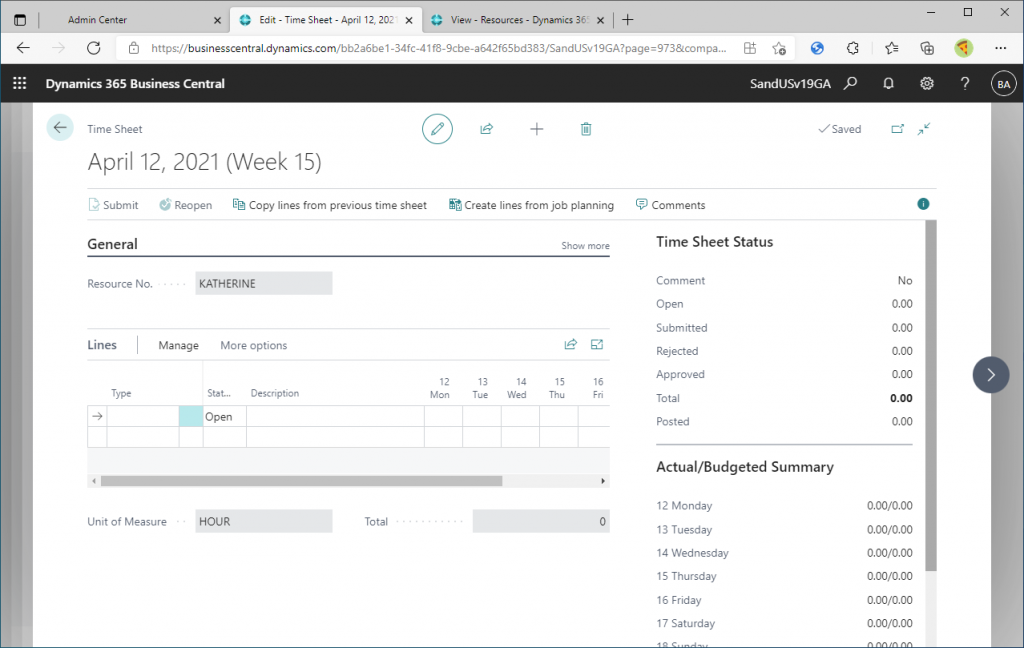
The timesheet is now displayed. At first glance, it looks the same as the previous version, but if you look closely, you will see that many things have changed. The biggest change is that the total time is now displayed. Also, the units of measure is displayed. The layout of the buttons in the menu has also been changed. As you can see from the page inspector, a new page object has been added for this version.
I will write about how to use the timesheet in my next blog. In this article, I introduced the Wizard for setting up the timesheet. Setting up the various masters and parameters is not so difficult if you know the setting page, but if you don’t, you will have to search around a lot. By using the wizard as in the new version, you can quickly access the desired pages and proceed with the settings without missing anything.
I hope you will try it too.
Thank you for reading.