
Business Central V21 CU03 has been released. This allows you to handle attachments and images on Business Central with Power Automate and Power Apps. This is a long-awaited new feature that was announced as a new feature in 2022 Release Wave 2. I would like to touch on this feature in this post.
Source
Add media/image support for Business Central connectors | Microsoft Learn
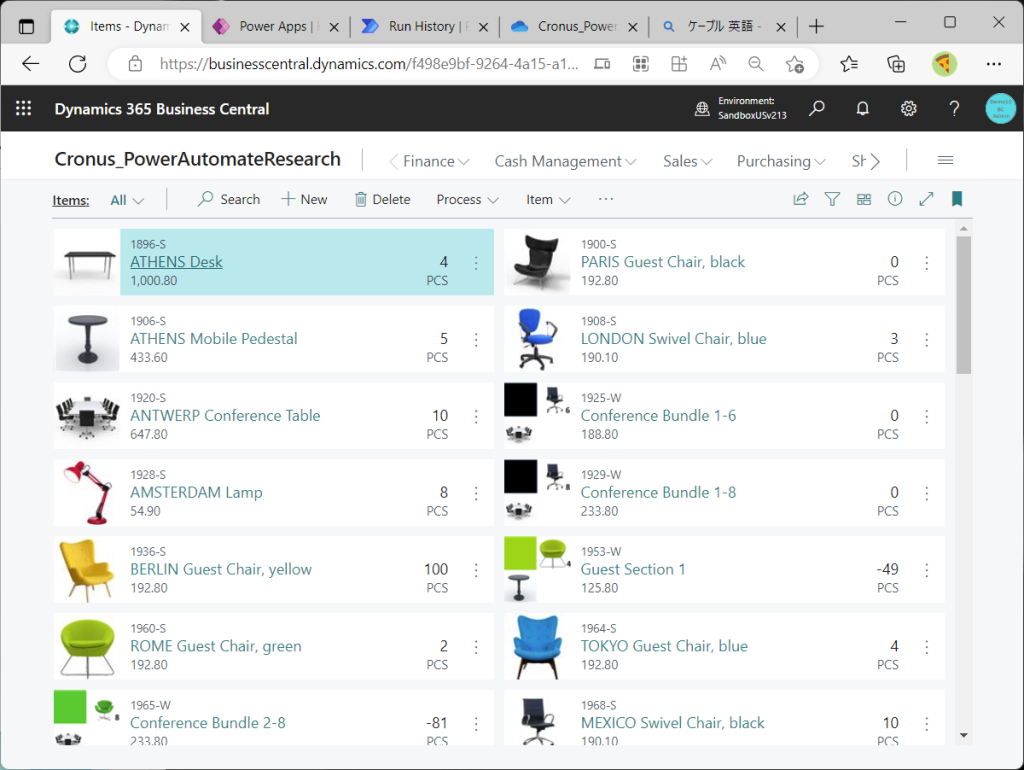
You can handle images and attachments of various master data and various transaction data by this new feature. In this blog post, I will explain with ITEM master’s image as example. Open Item list page of CRONUS company, and items and its images will be shown below. First try is to retrieve these images by Power Automate.
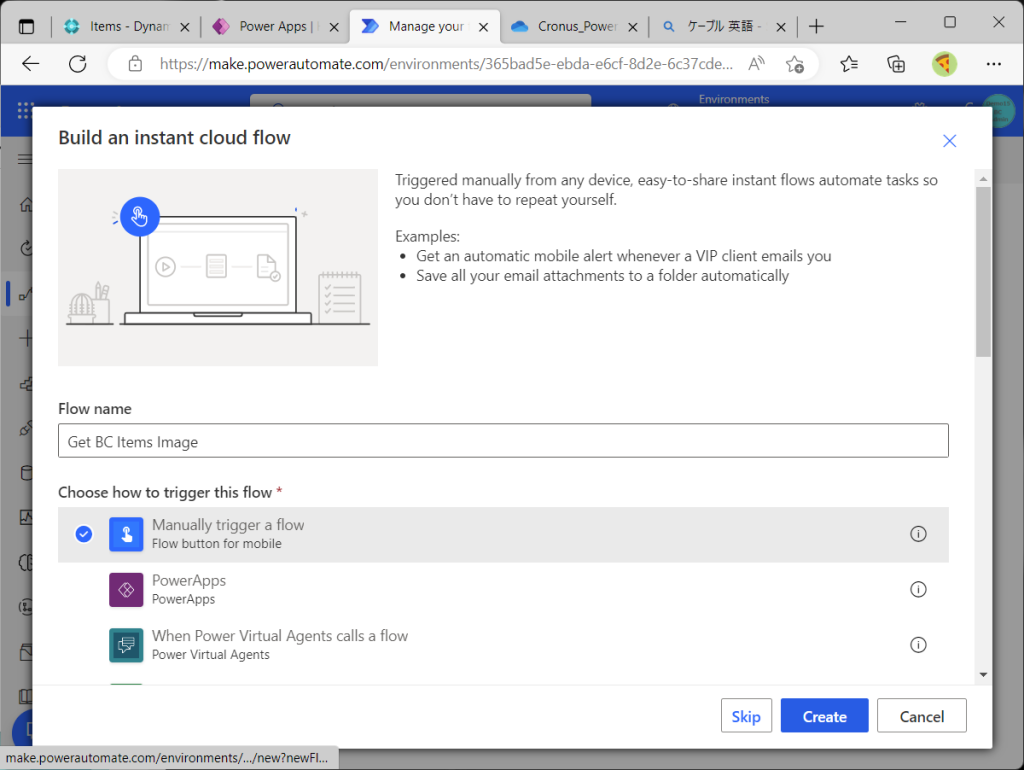
Create a new Instant Cloud Flow on My Flows page in Power Automate.
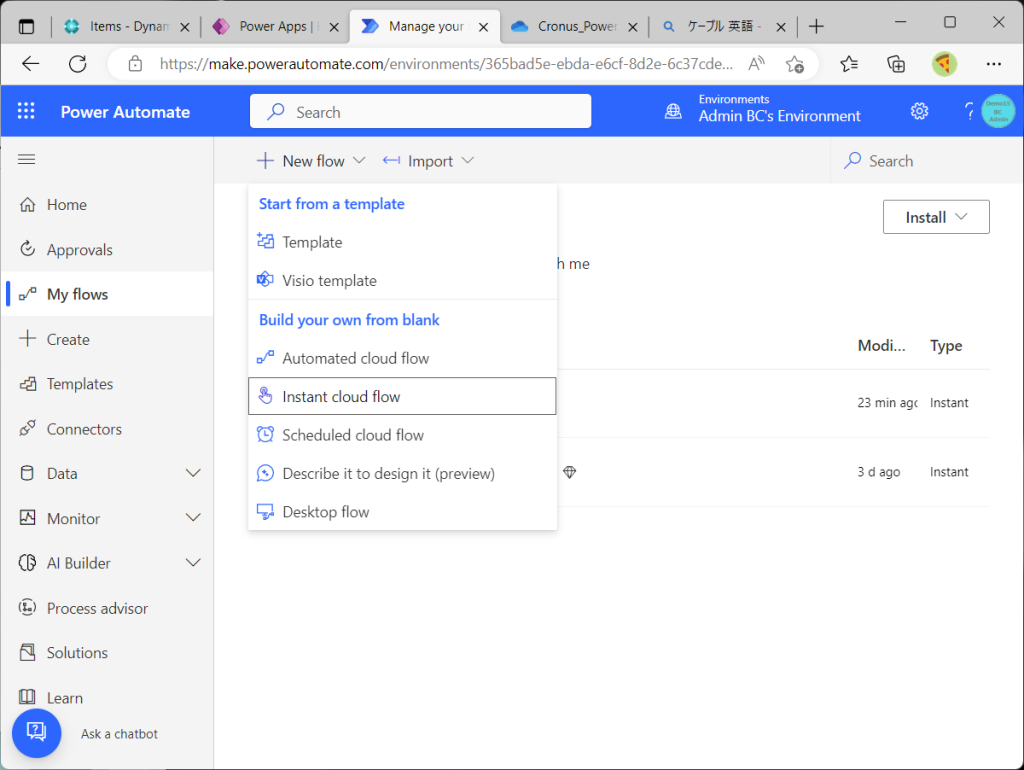
In this flow, I will trigger manually by cliciking a button.
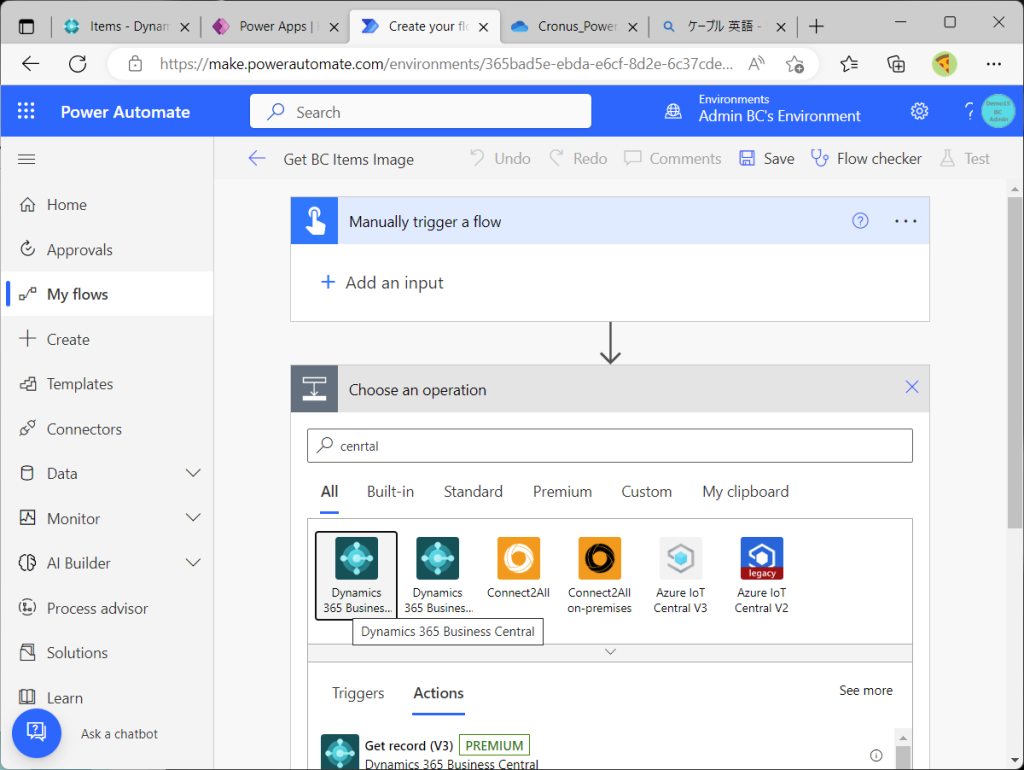
Specify the BC connector as second step for this cloud flow. Be careful not to select the on-prem BC connector by mistake.
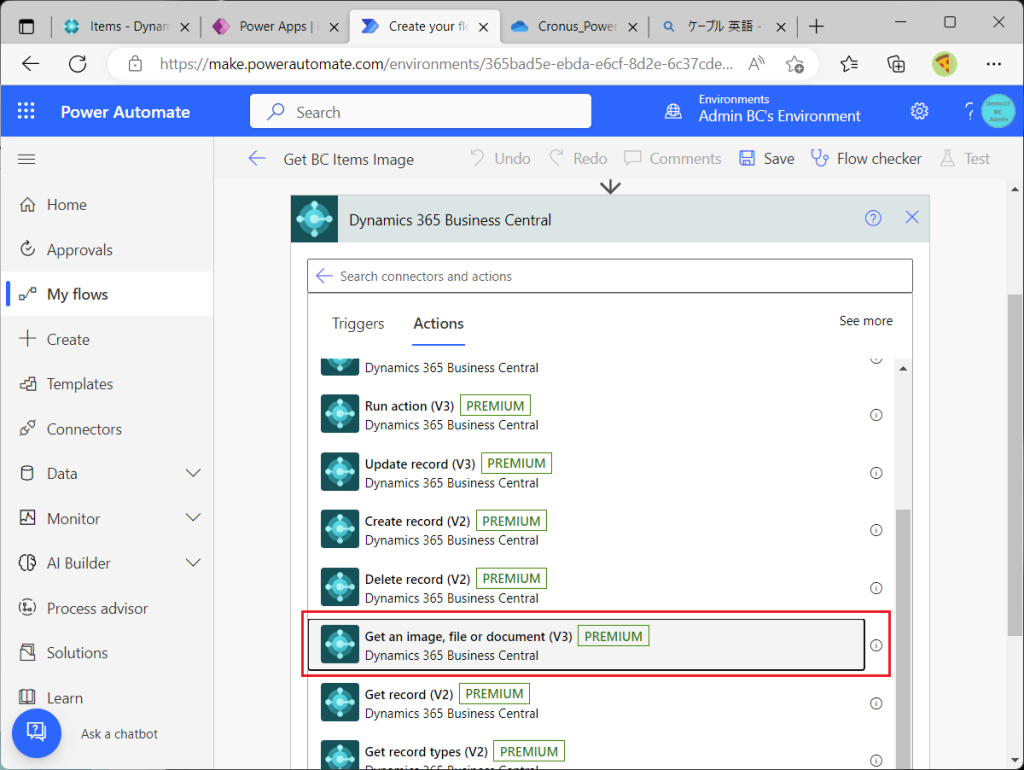
Choose “Get an image, file or document(v3)” action. This is the new feature.
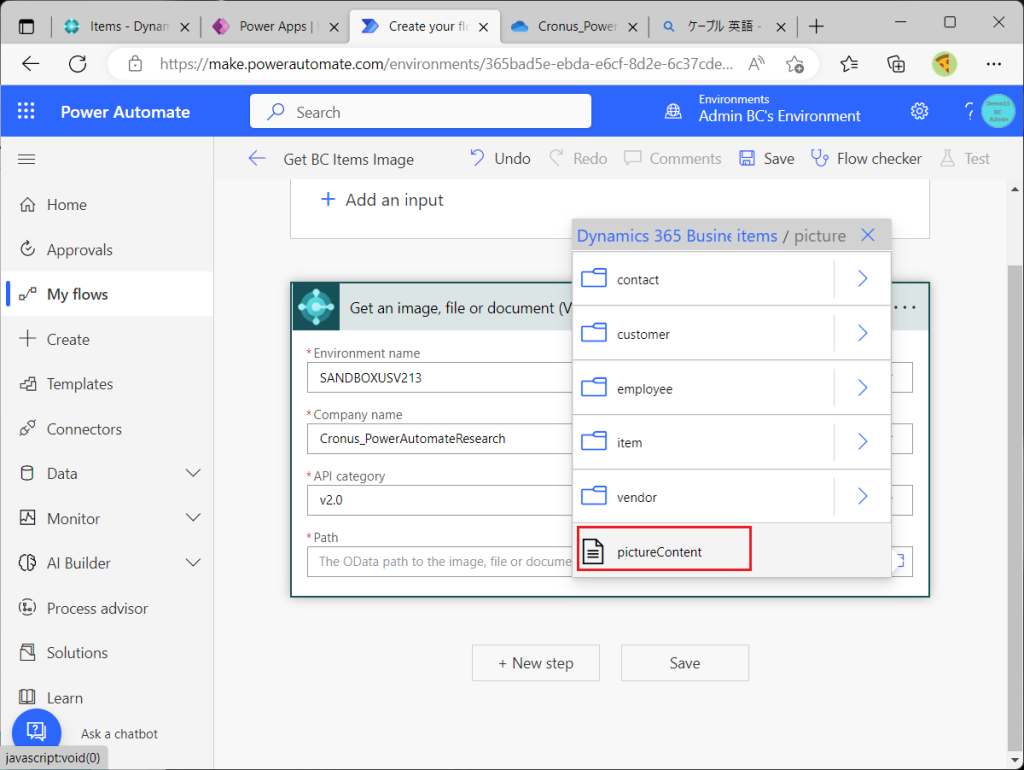
Specify the Environment name, Company name and API category. Choose “v2.0” for API category. The path specifies the location of the image file of Items. You can follow the hierarchy by clicking on the folder button, so you can refer to the appropriate reference in Docs or Learn to follow the hierarchy.
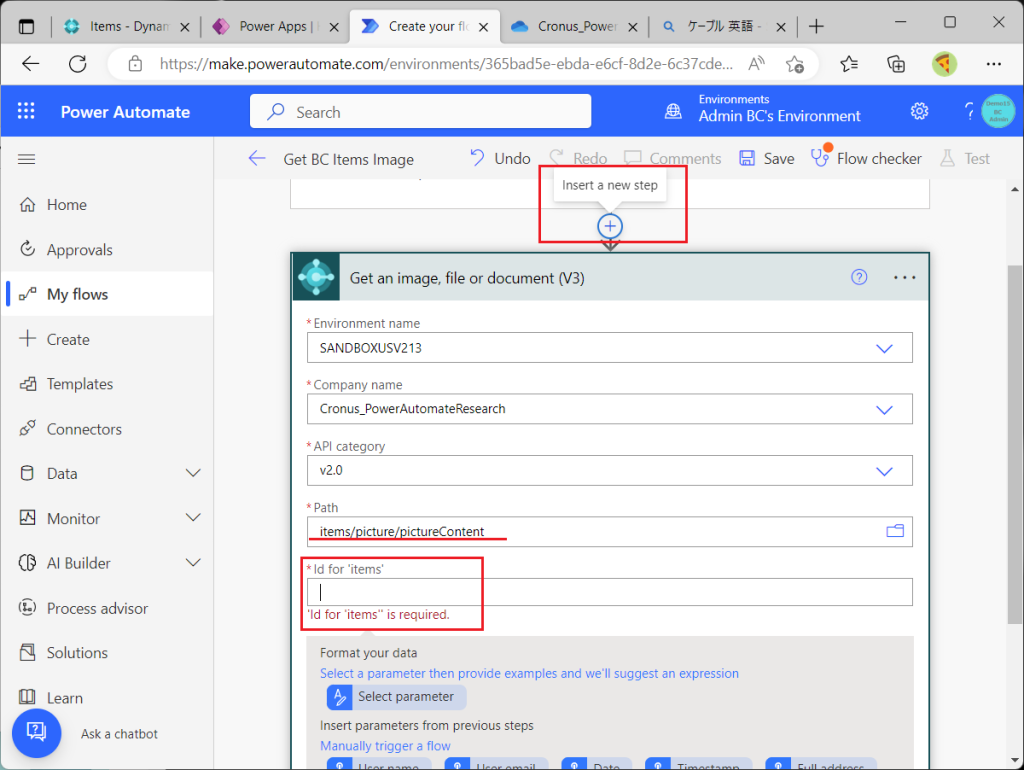
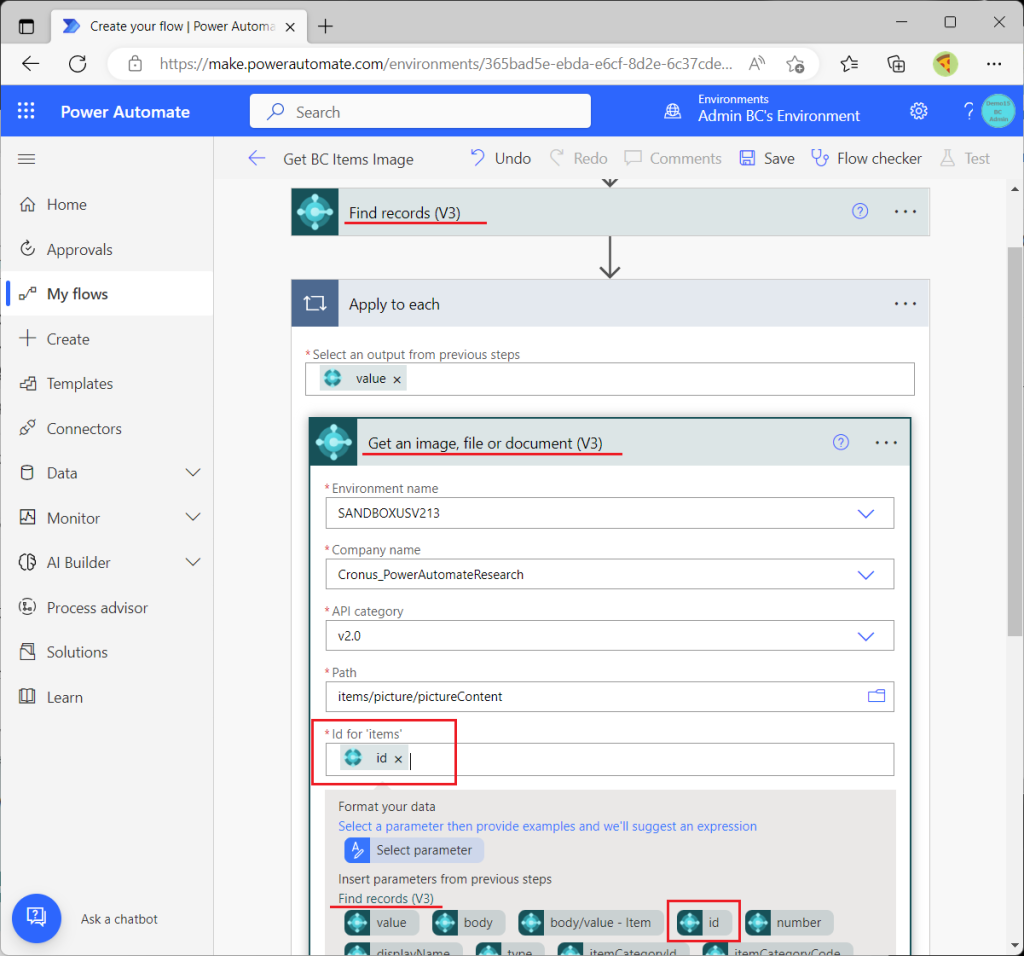
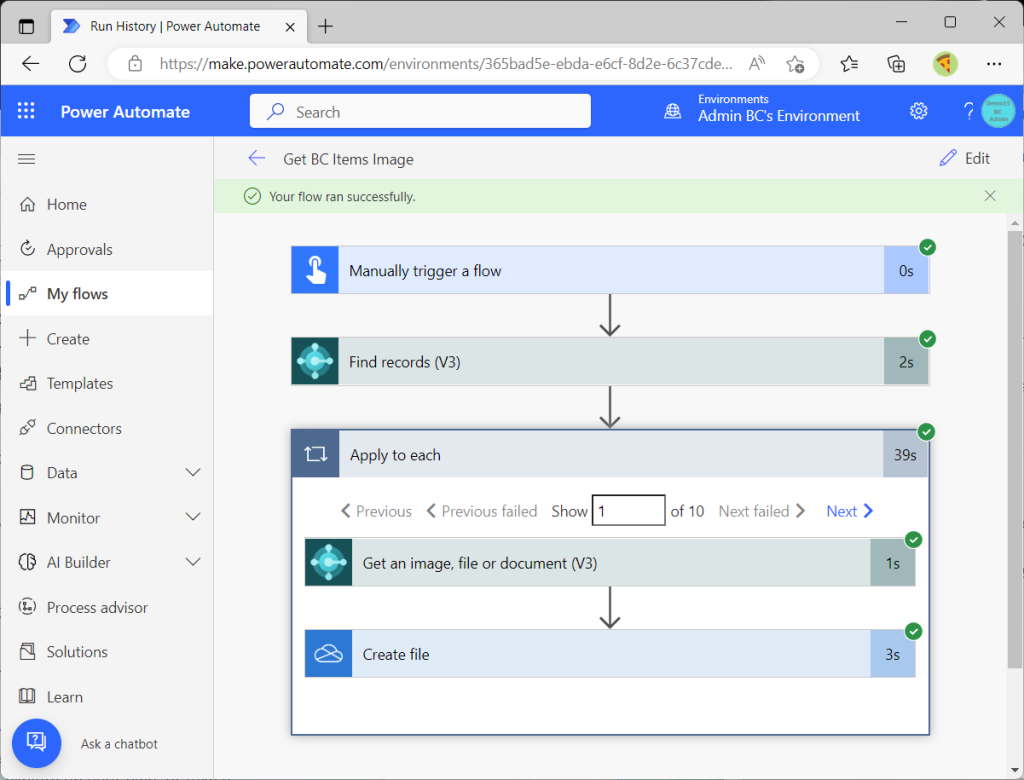
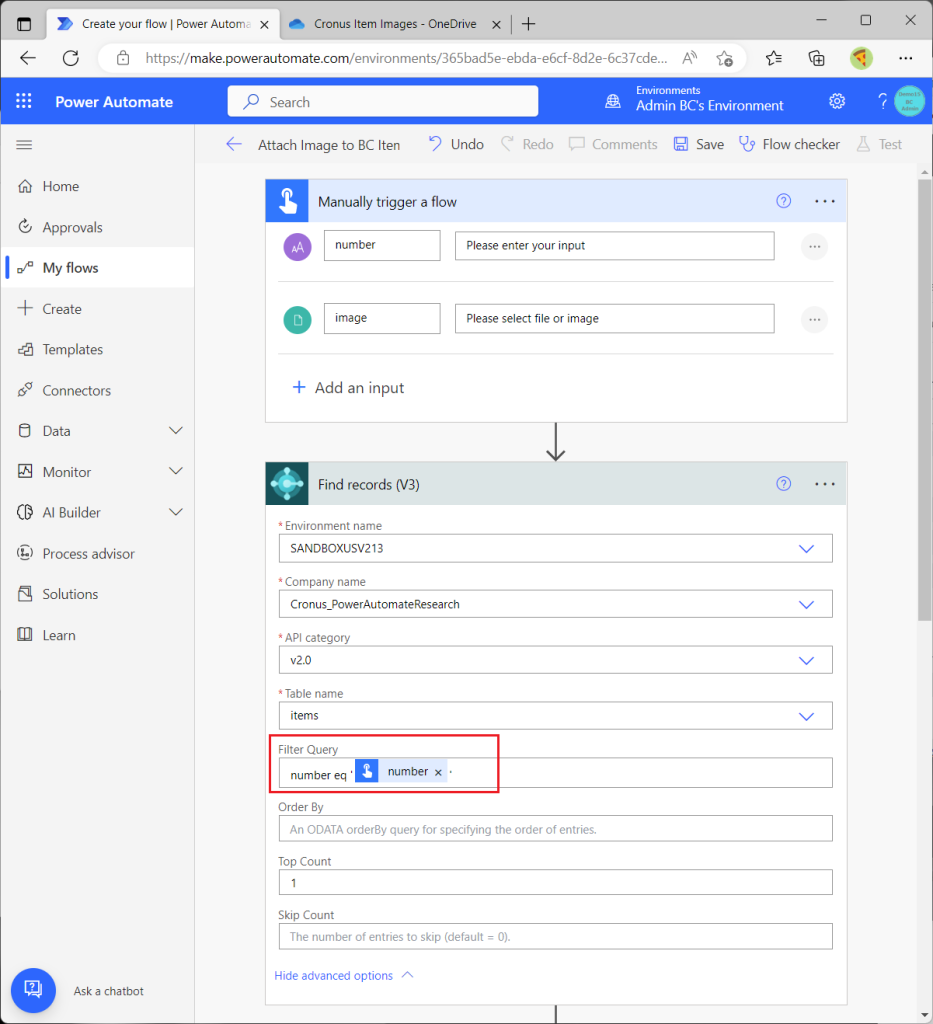
After successfully specifying the path, the next step is specifying ID of Item master records. However, the ID of each item master is unknown. So, as a preprocessing step, add an action to get the ID before “Get an image, file or document(v3)”.
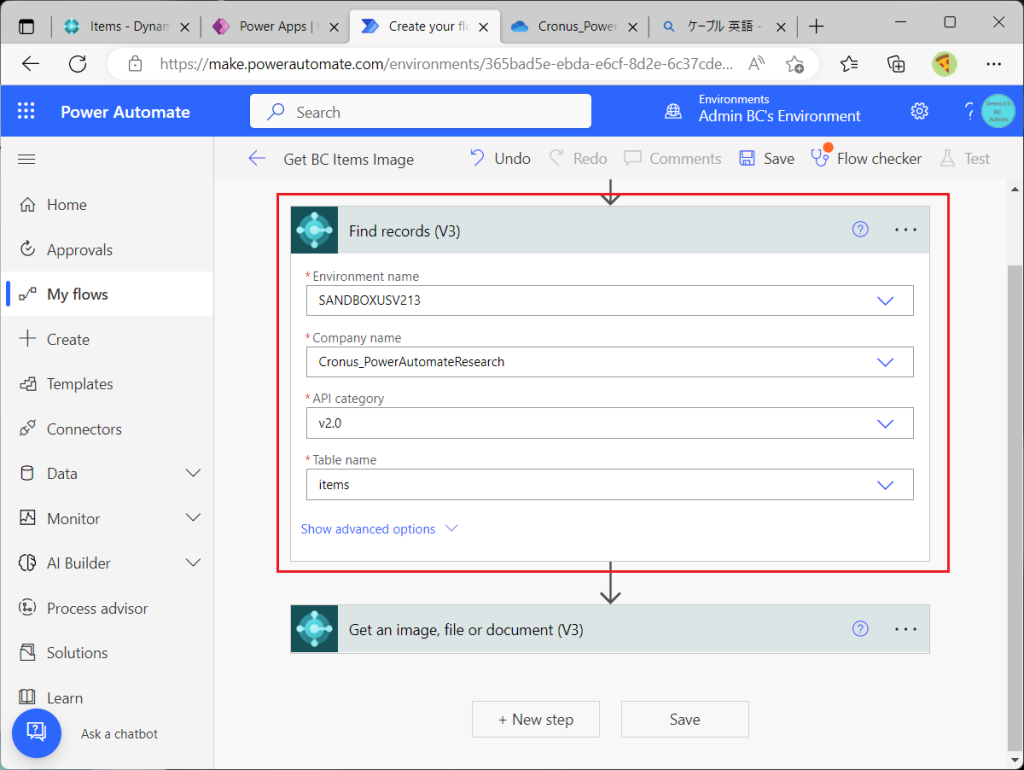
Insert a “Find records(v3)” action. Parameters are specified as follows.
Go back to the “Get an image, file or document” action, specify the “ID” got in “Find records” action.
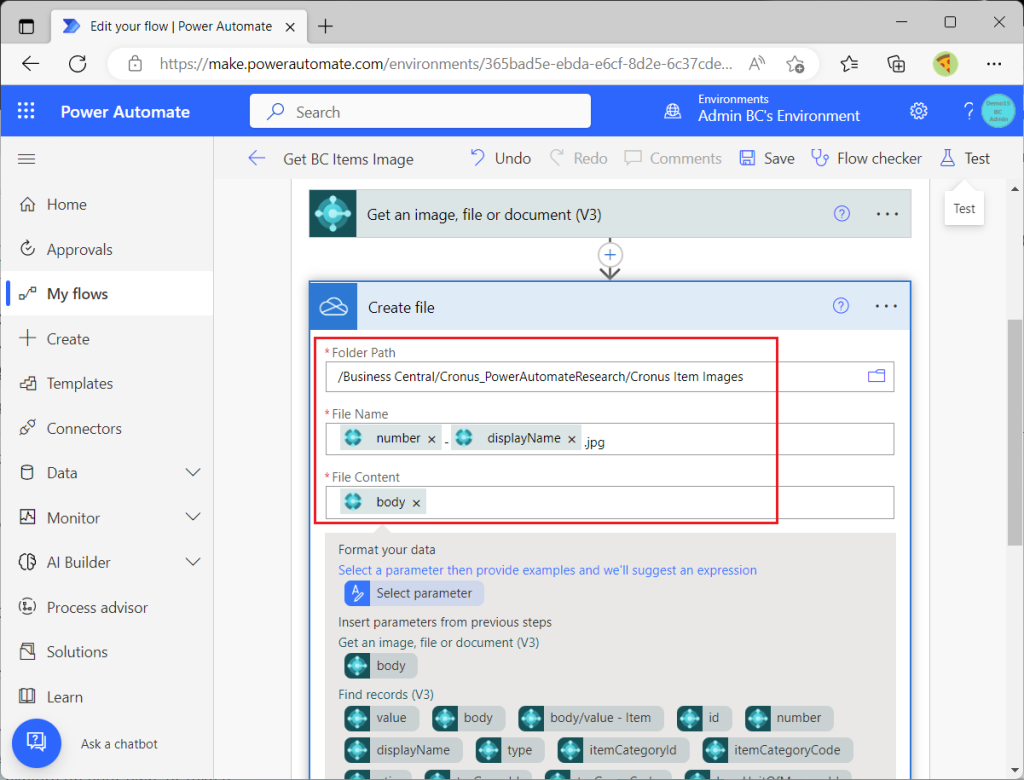
To check the image files got in the action, let’s store image files in OneDrive.

Specify the Create File action in the OneDrive for Business connector.
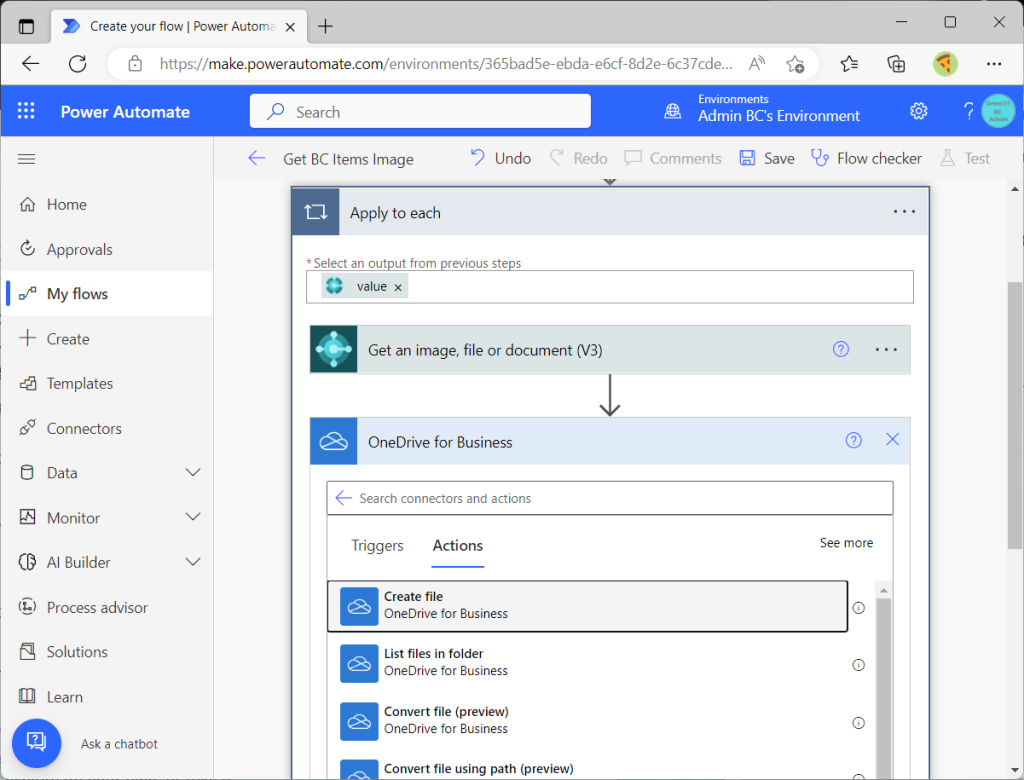
Create an appropriate location on OneDrive for storing the file and specify it in FilePath. For File Content, specify “body” got from the “Get an image, file or document” connector.
Save and run the test.
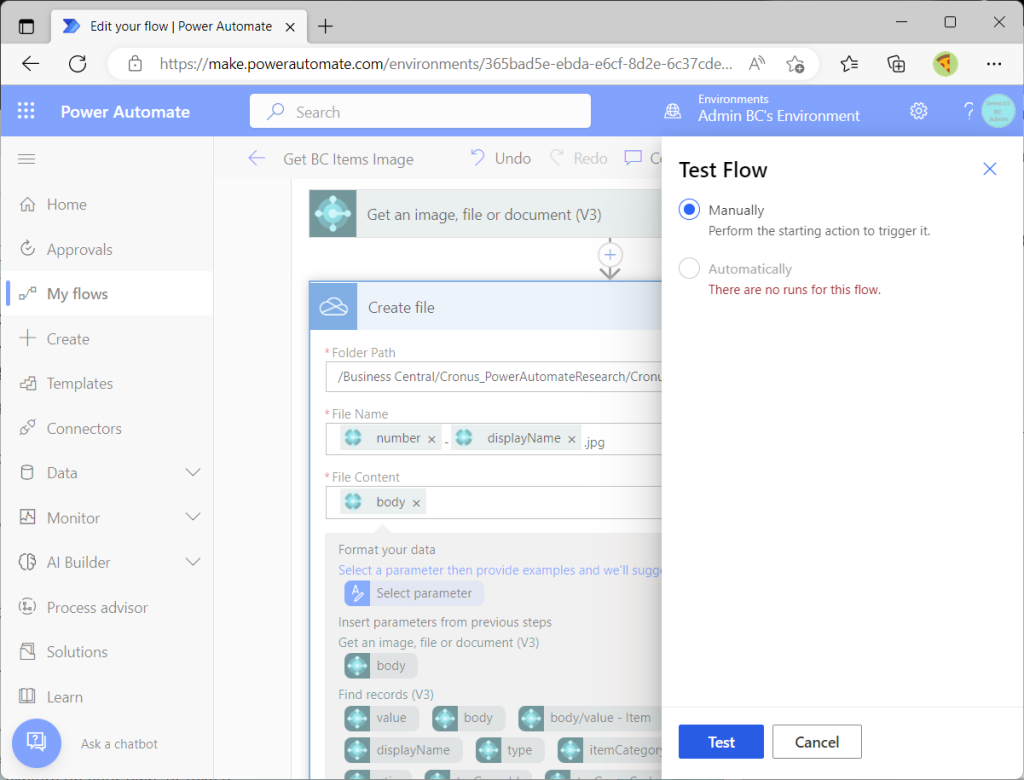
Execution completed without error.
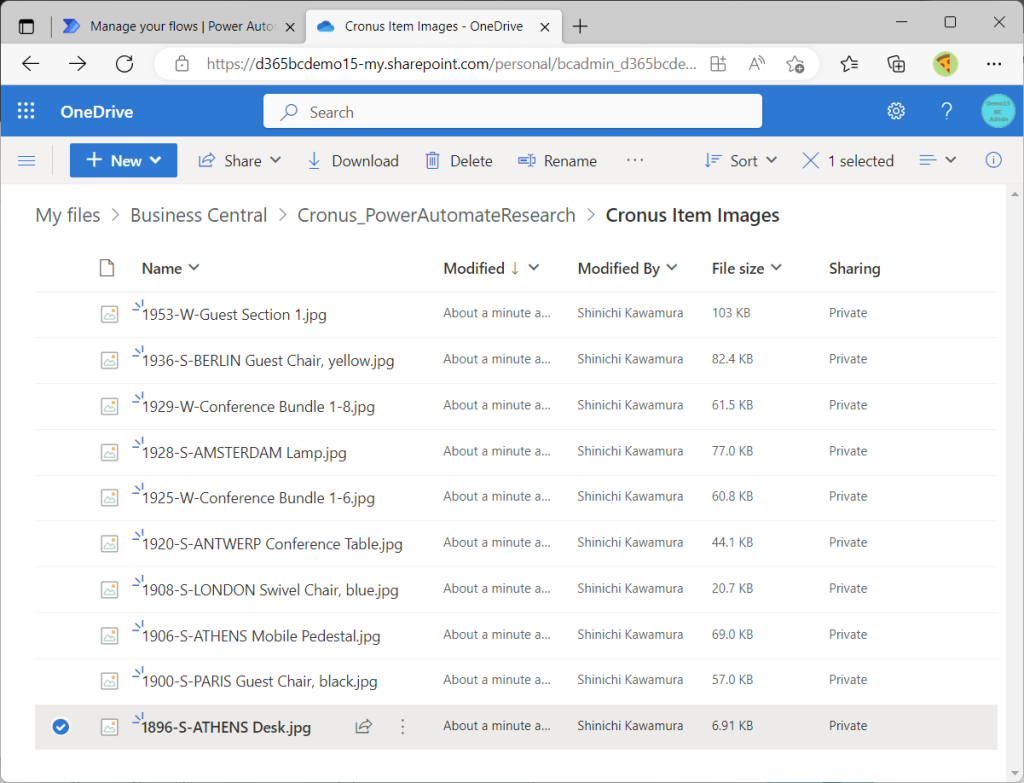
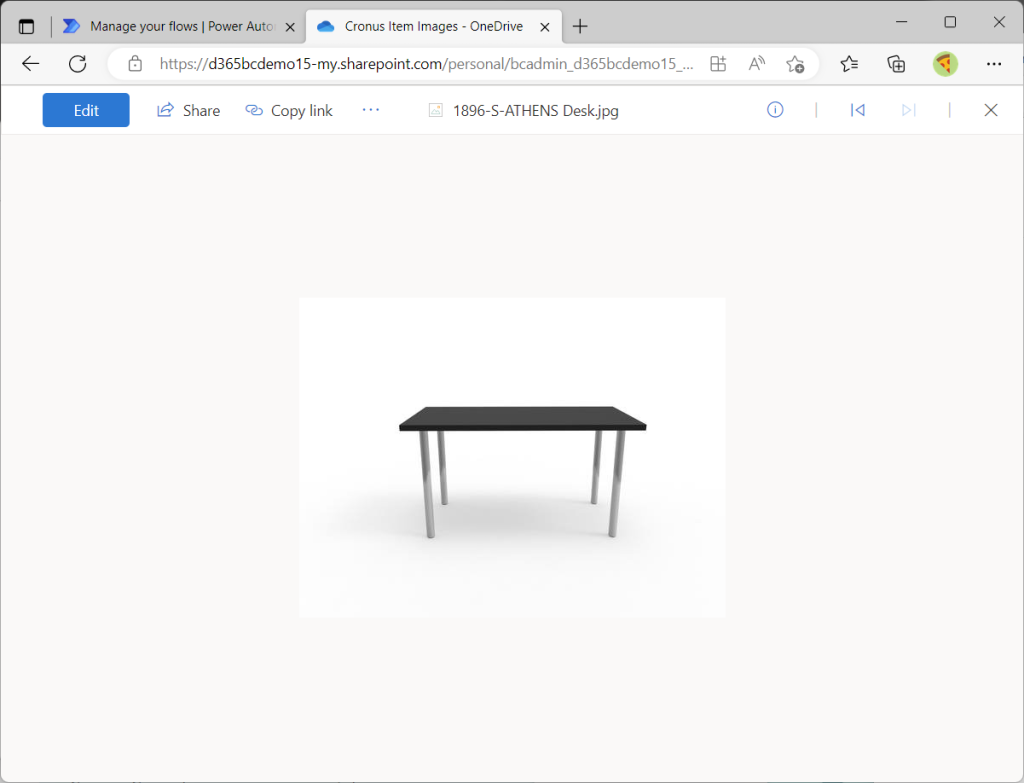
Check the OneDrive folder specified as the destination for storeing the images. Images are properly stored. Let’s open one of the files for a test. Open 1896-S Athens Desk.
The image is now displayed. This iamge is same as Item picture of the Athens Desk card page in BC. It’s correct.
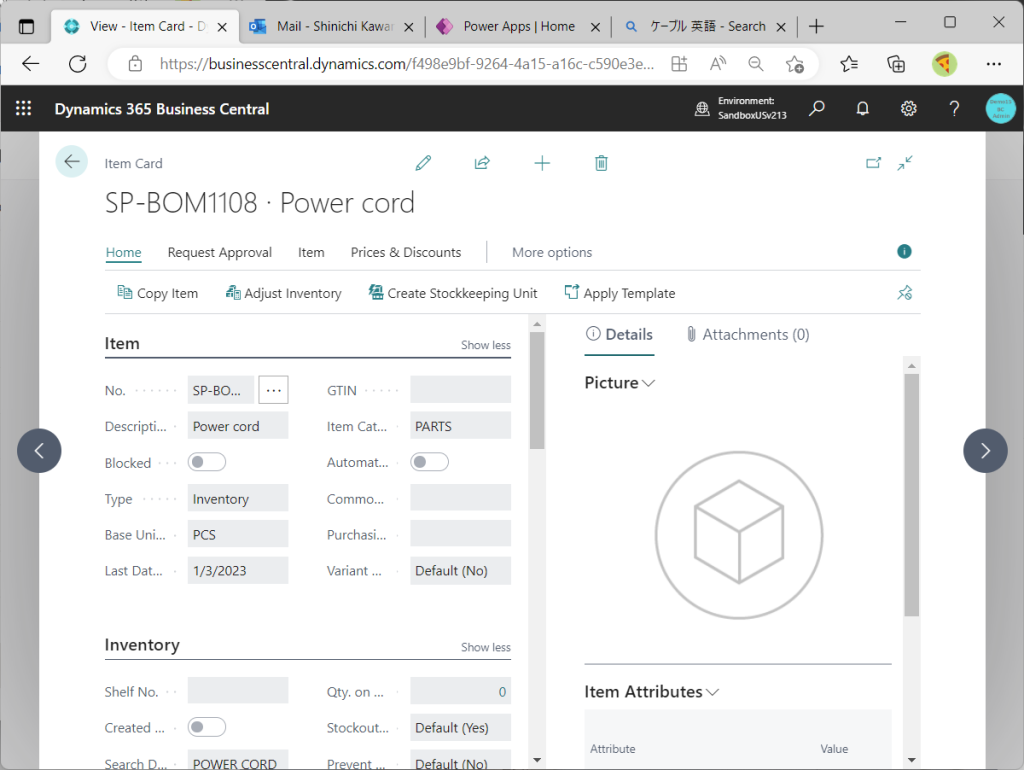
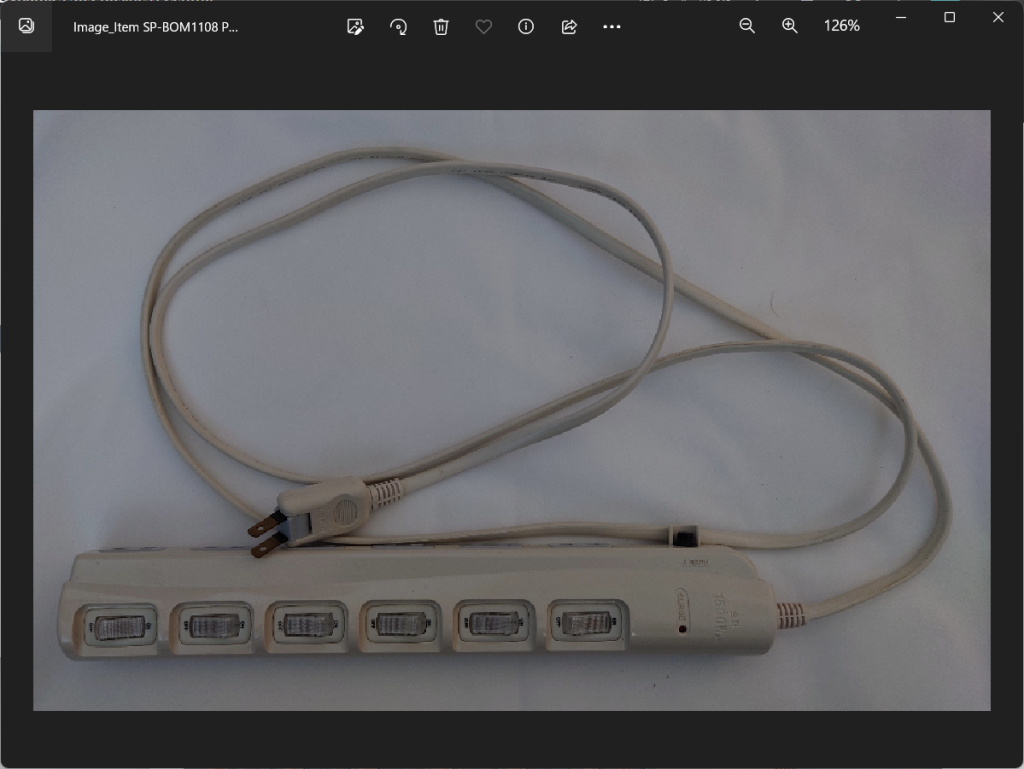
Next try is uploading an image. Open a record in Cronus that does not have an image attached to it. In this case, I will use “SP-BOM1108 Power Cord”.
The images for upload should be prepared and stored in local PC or in OneDrive etc.
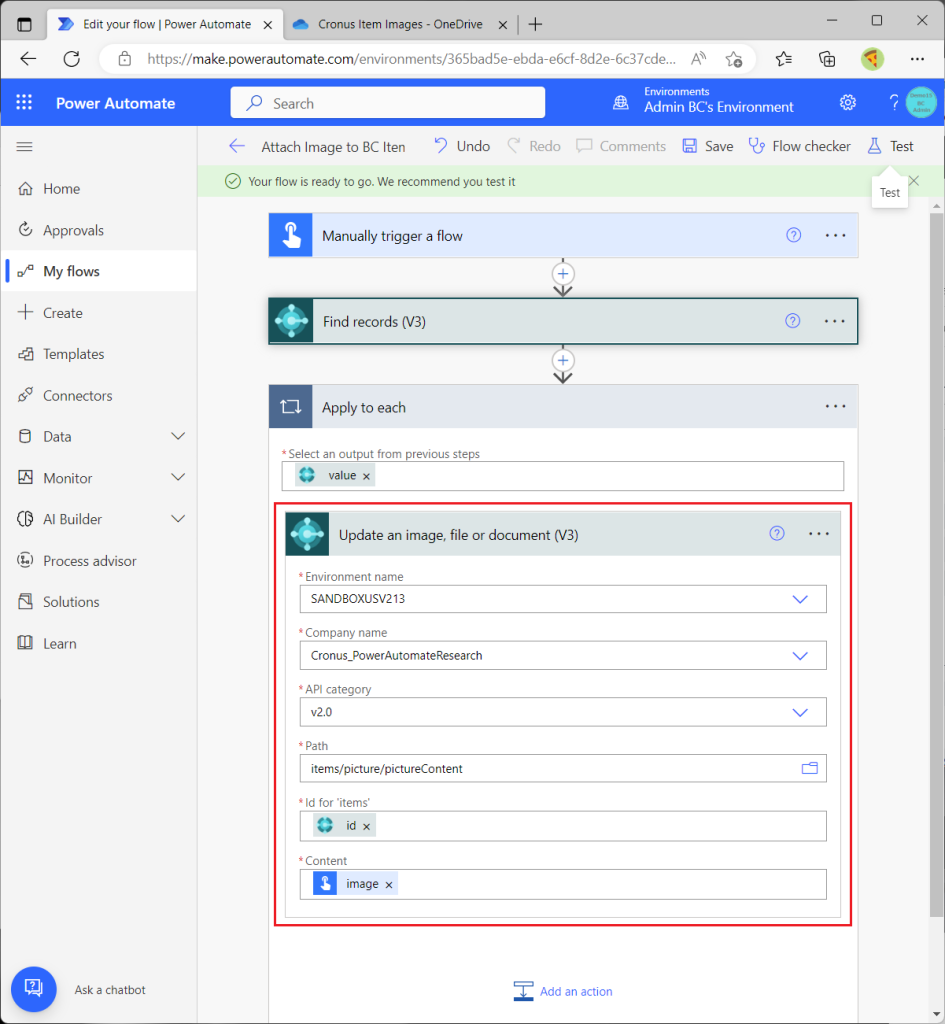
Create a new cloud flow. Allow the user to specify an item number and an image file in the button trigger. Retrieve the item master record with the “Find record” action using the given item number in “Manually trigger a flow”.
Attach the image file with the “Update an Image, file or doument (v3)” action of the BC connector using the ID of the item which is go t in “Find redord” action. (Note that it is not the file path you want to upload.)
Test run. Specify the item number and image file.
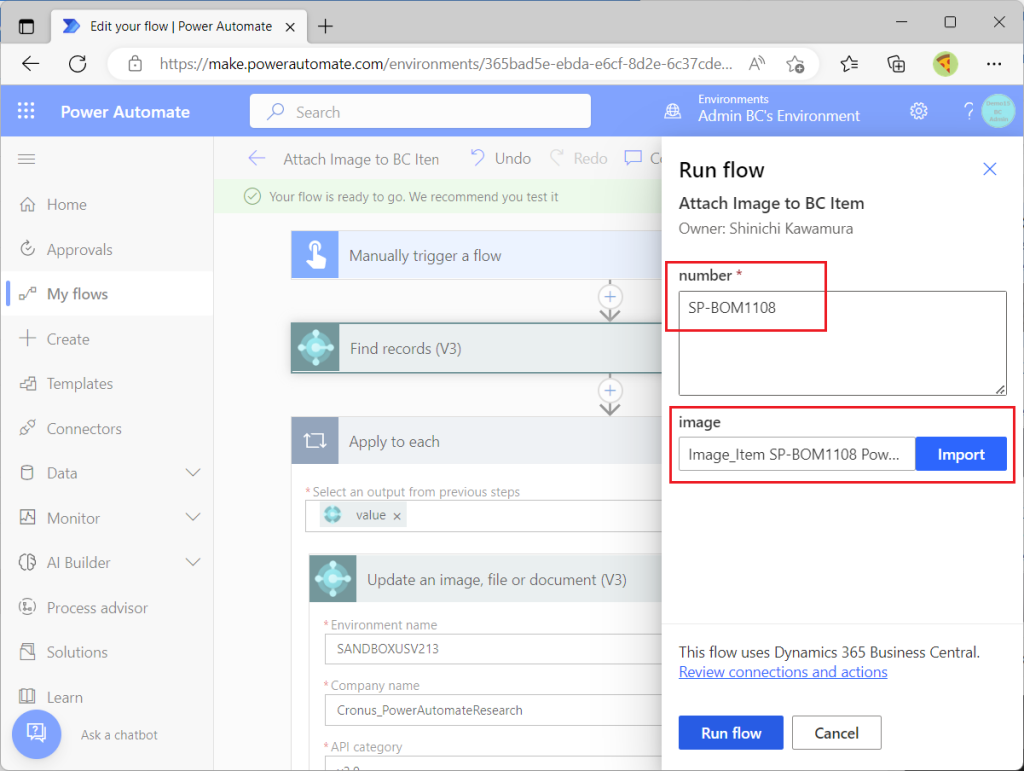
Execution completed. No errors. It looks good.
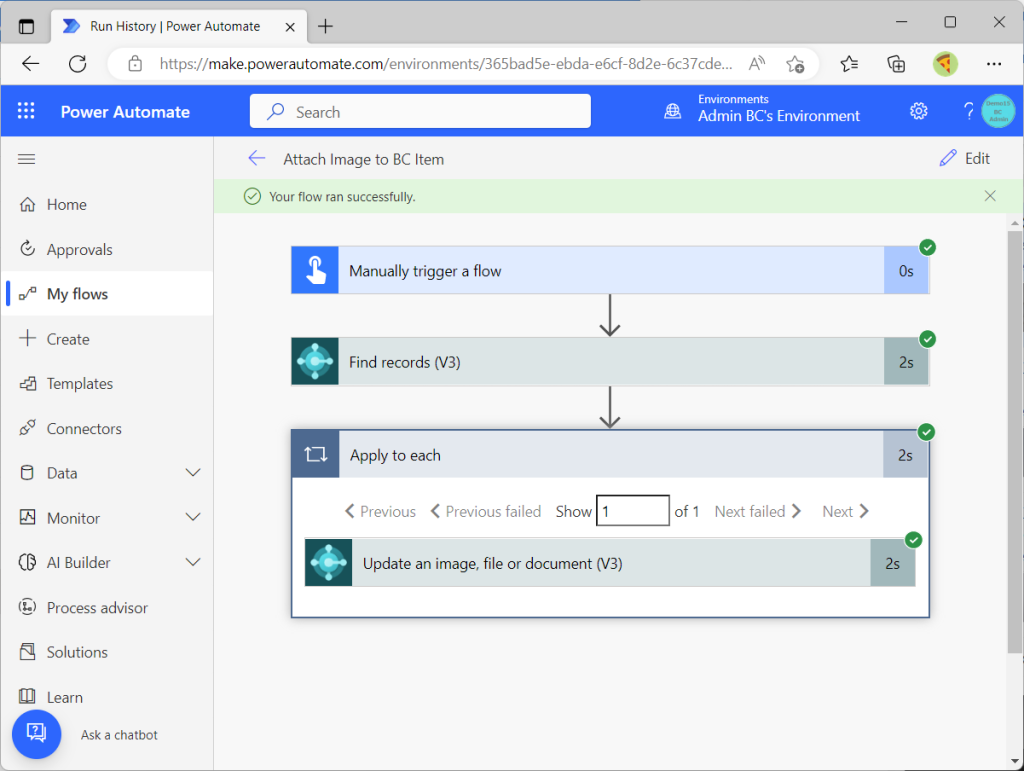
Open the corresponding item card of BC. The image has been uploaded. Success!

This is the basic procedure of this feature
I think there are many ways to use it. I think that attaching a document to a voucher is used more often than attaching an image to a master. For example, attaching a sales quote to a quote document, or attaching a invoice pdf to a payment request.
This is good news for those who have not used Power Automate’s BC connector in the past due to the inability to attach files, so try things out.
Thank you for reading this blog post.